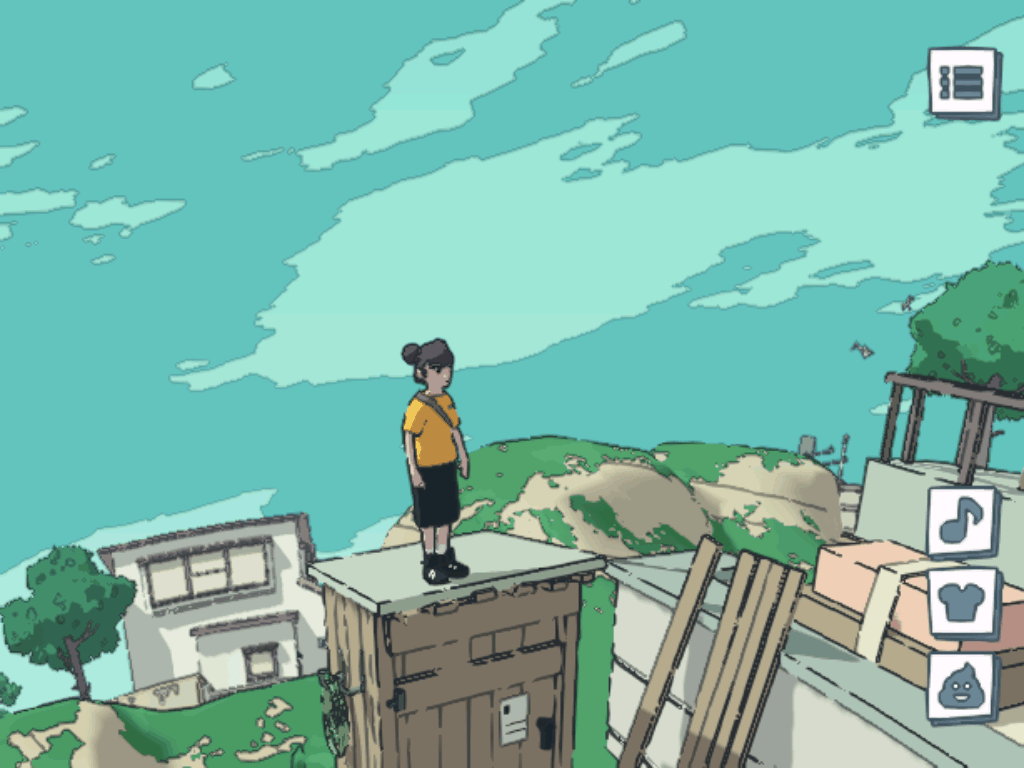
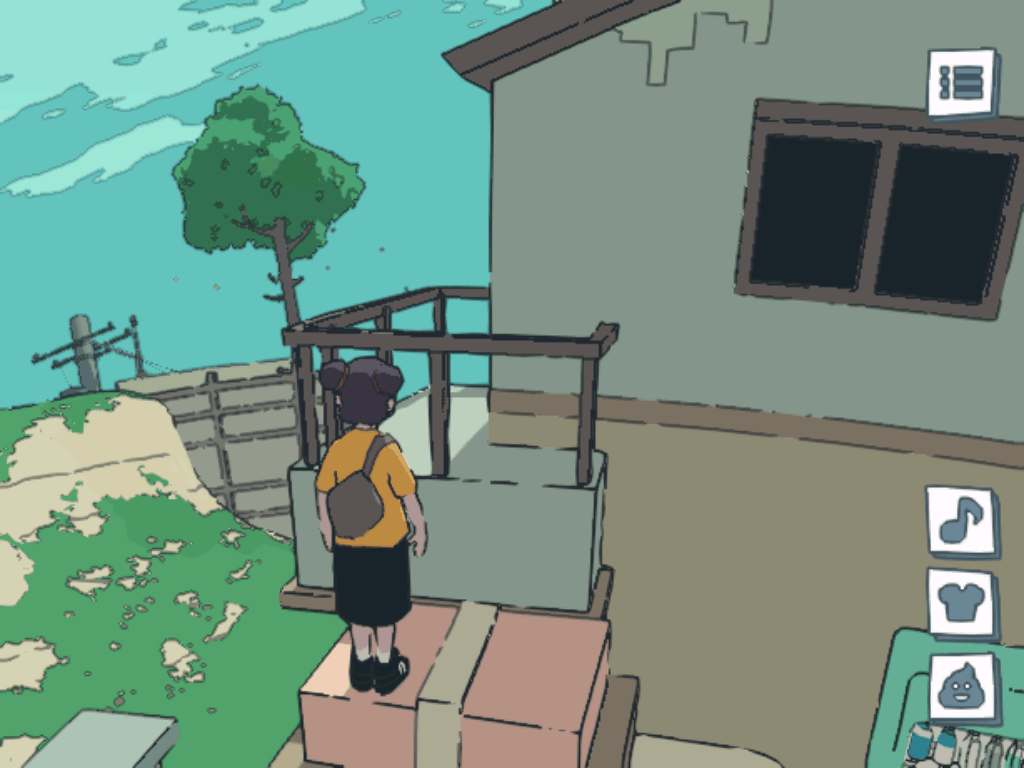
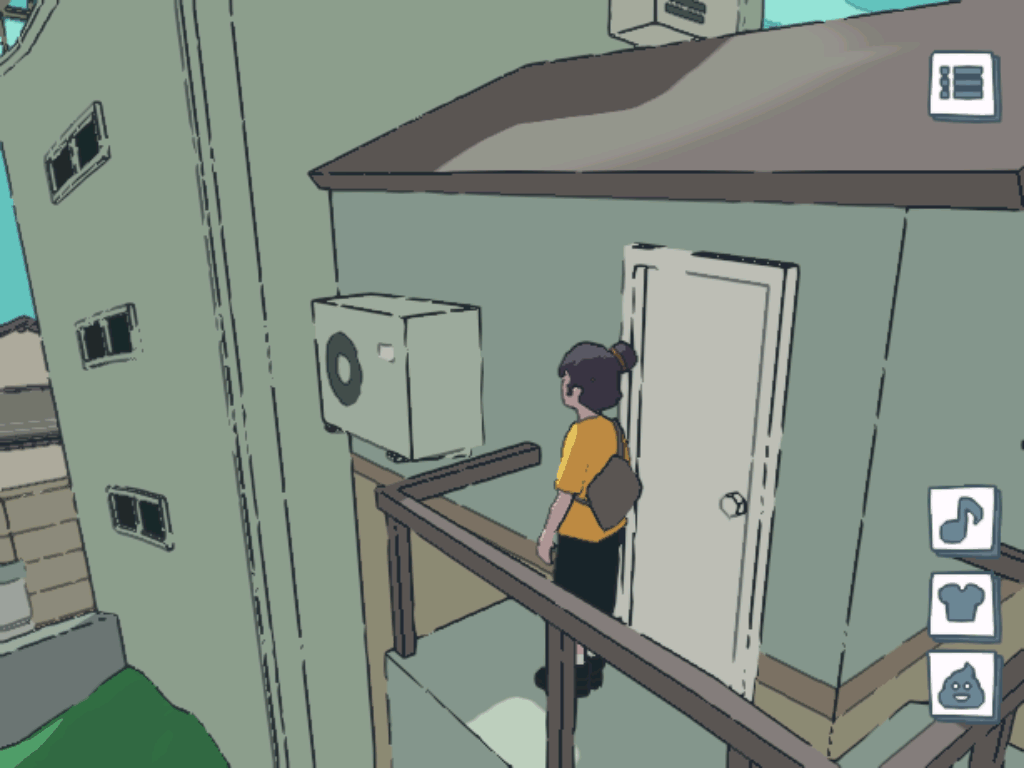
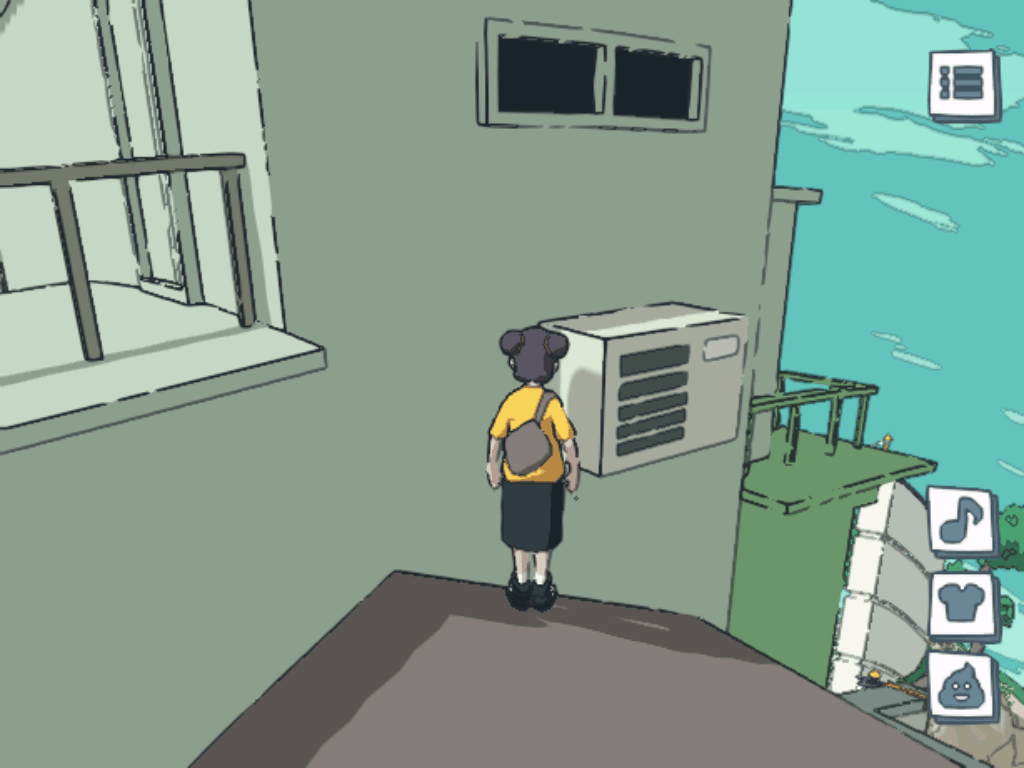
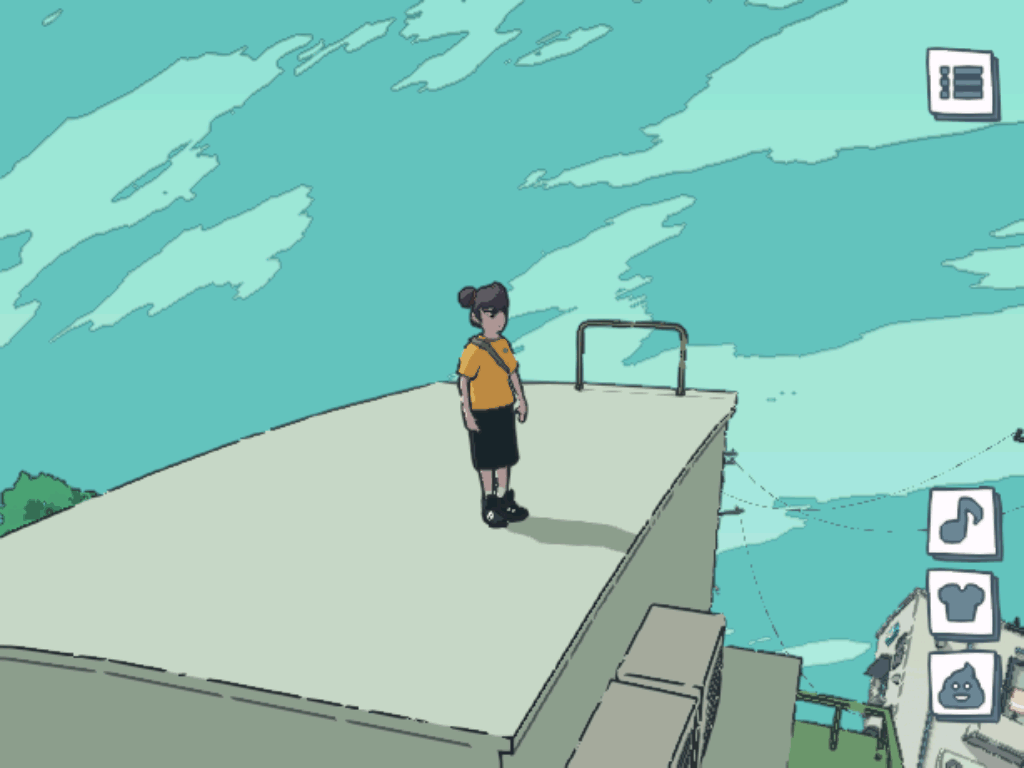
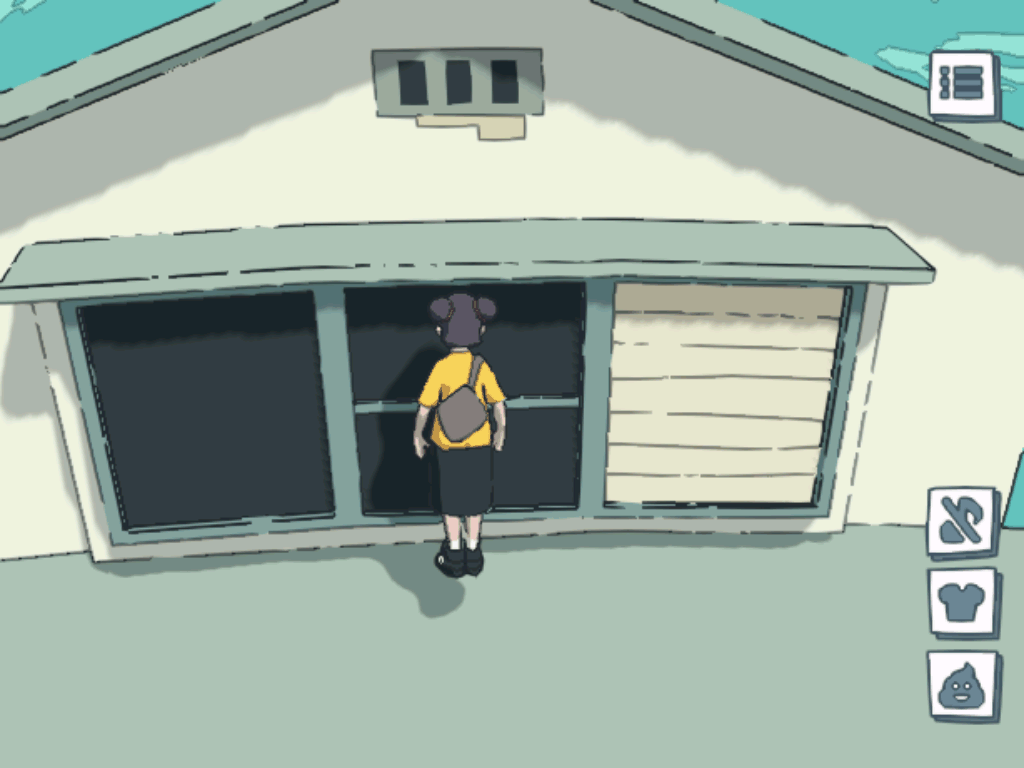
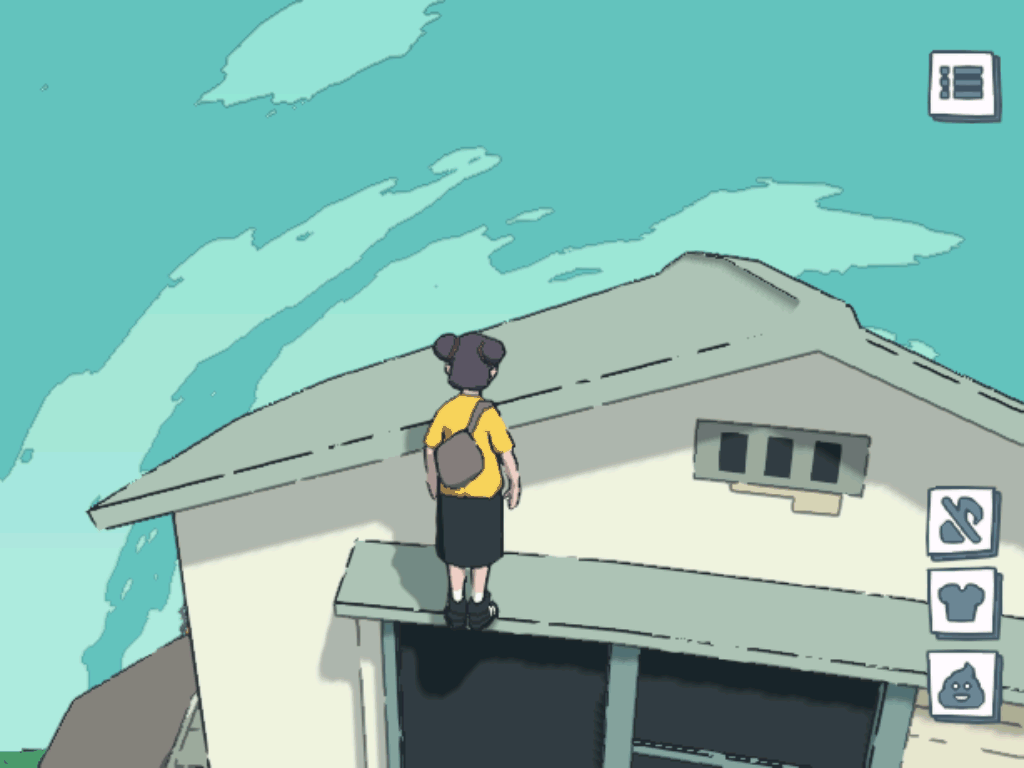
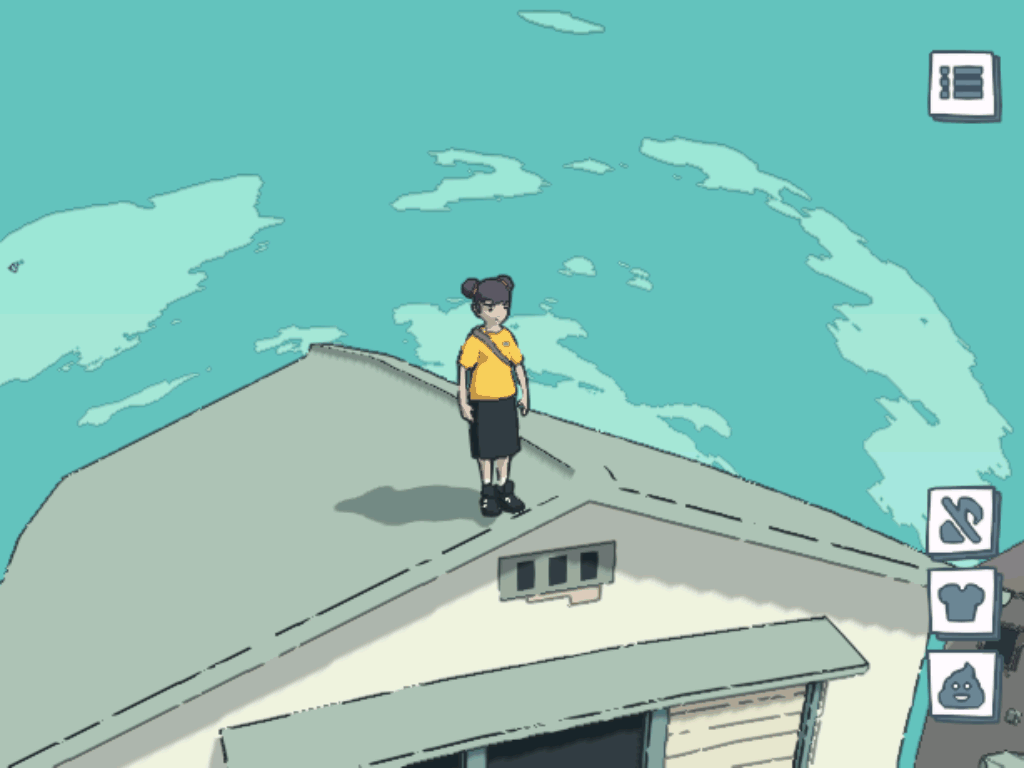
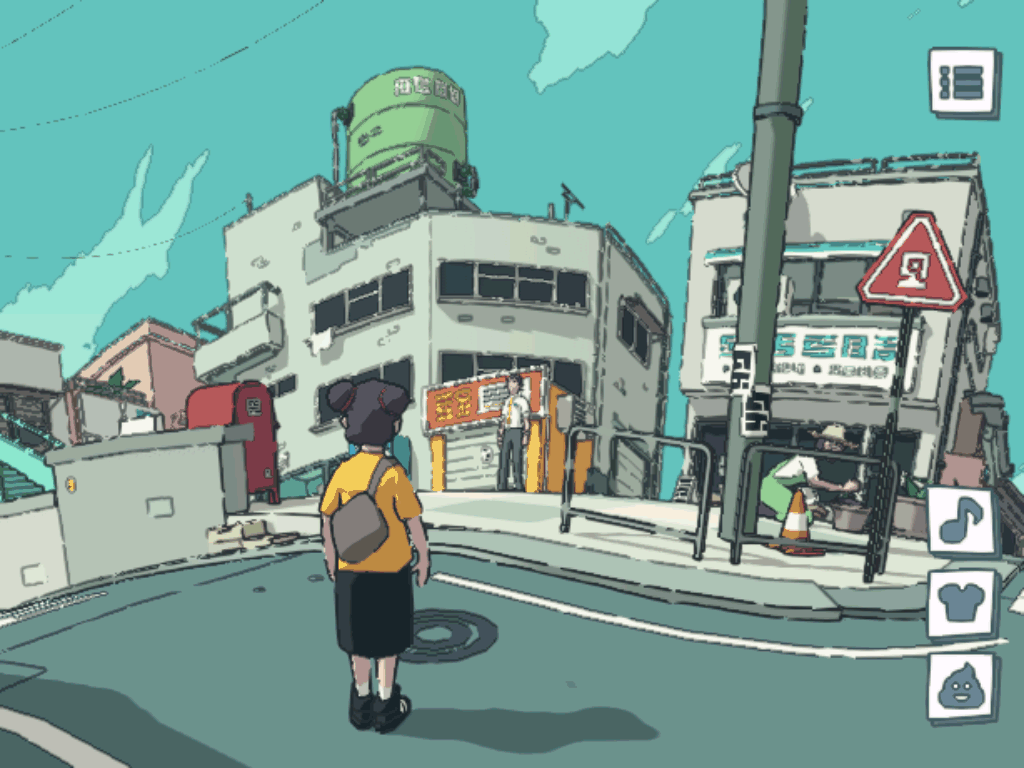
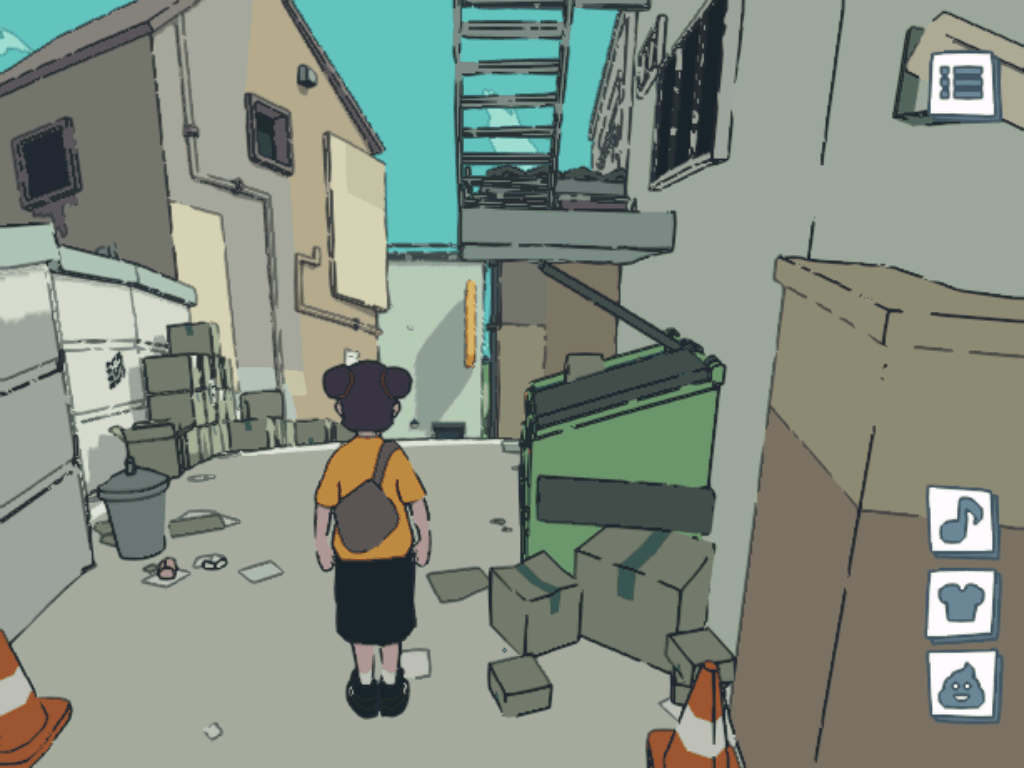
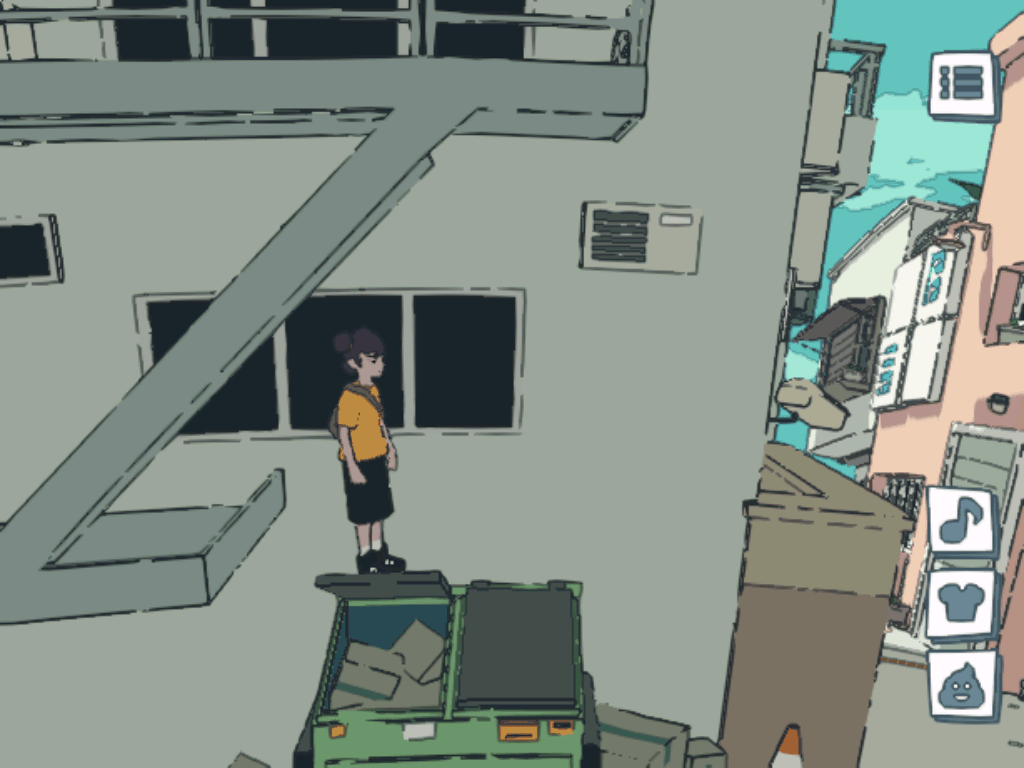
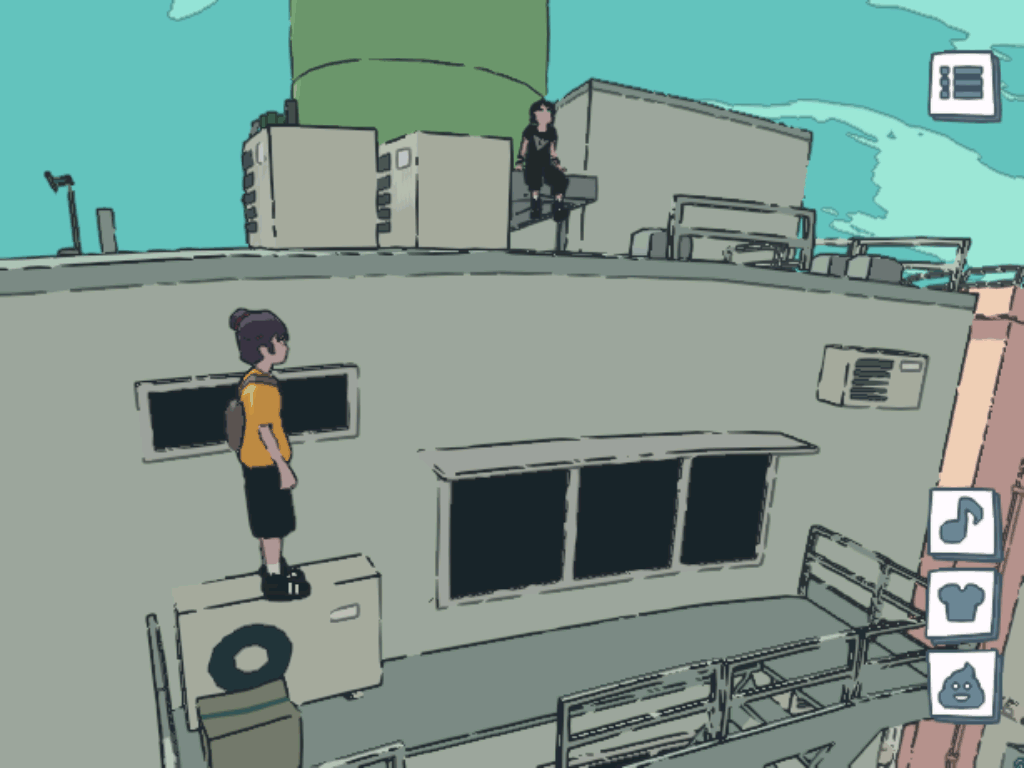
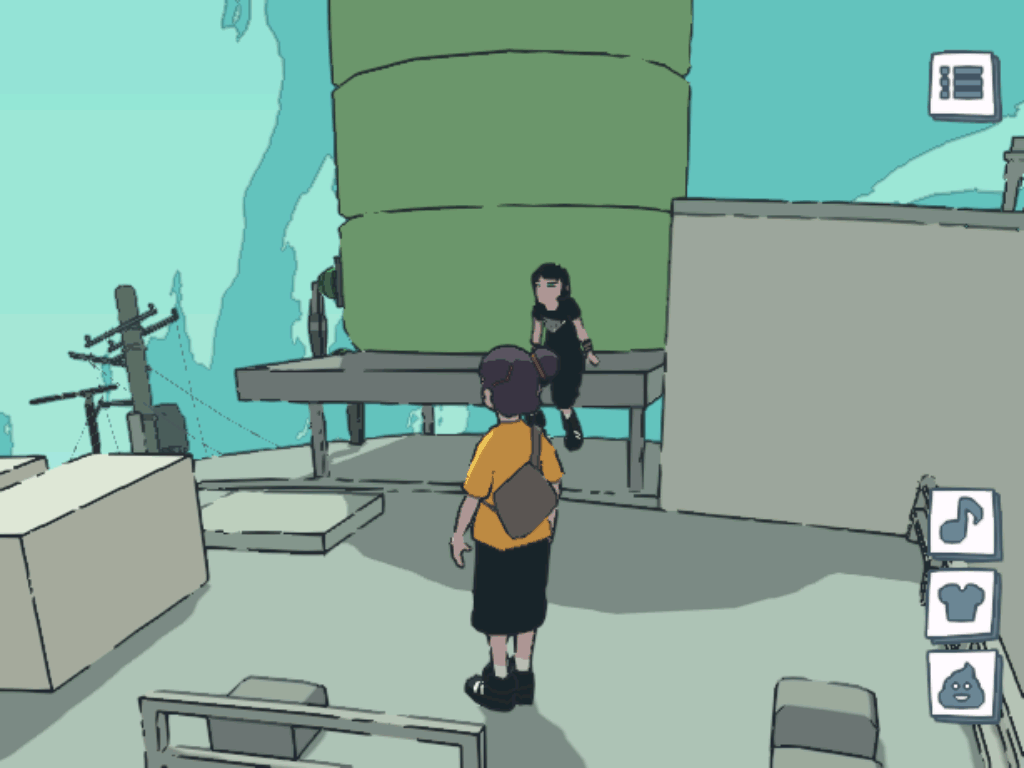
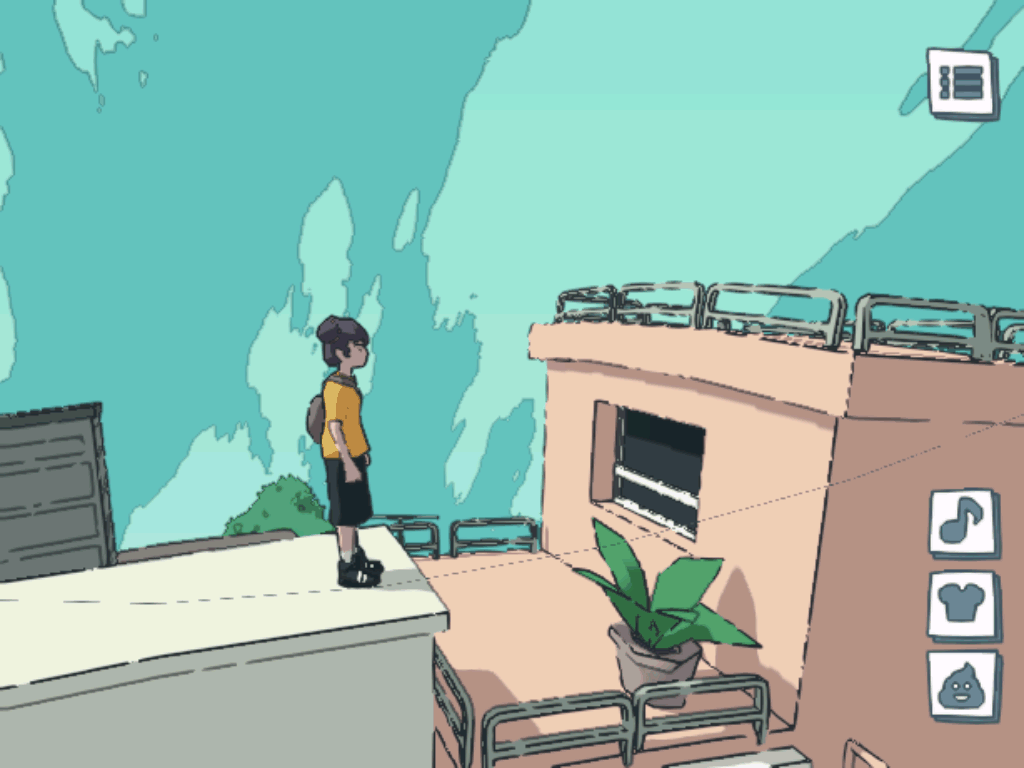
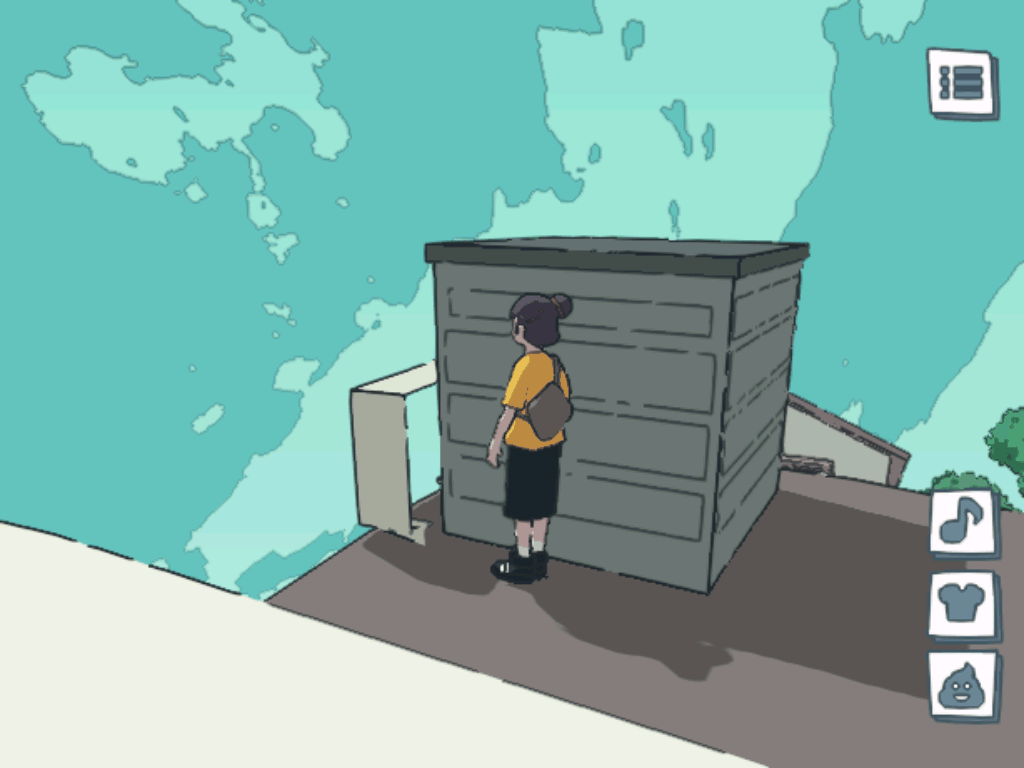
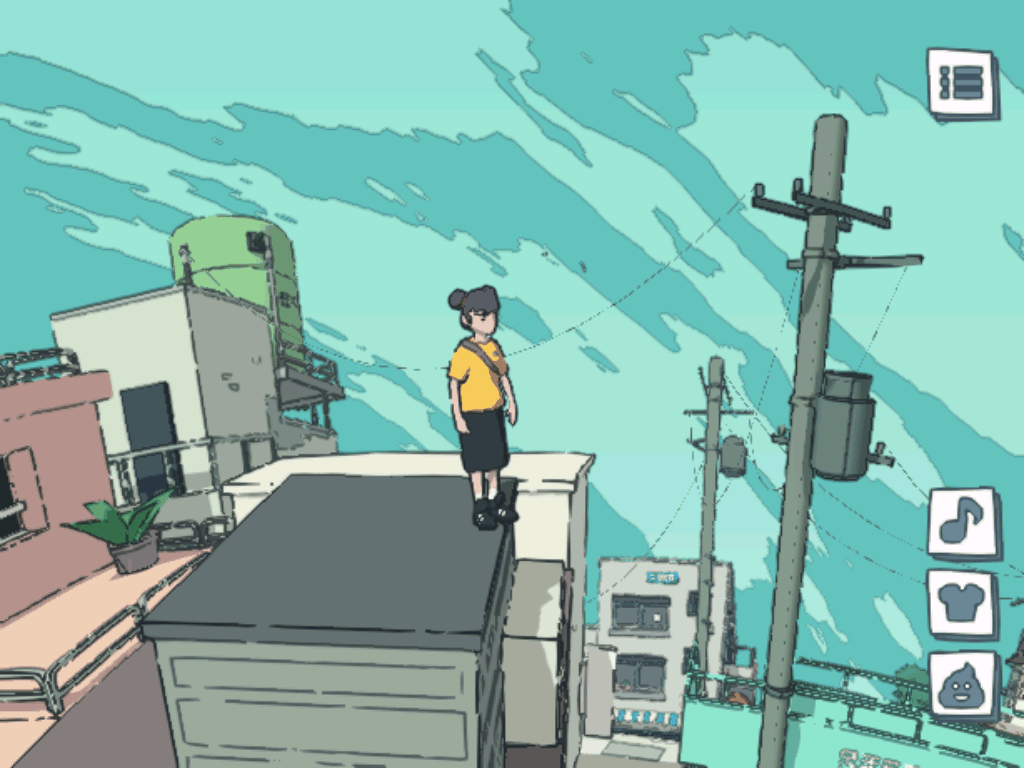
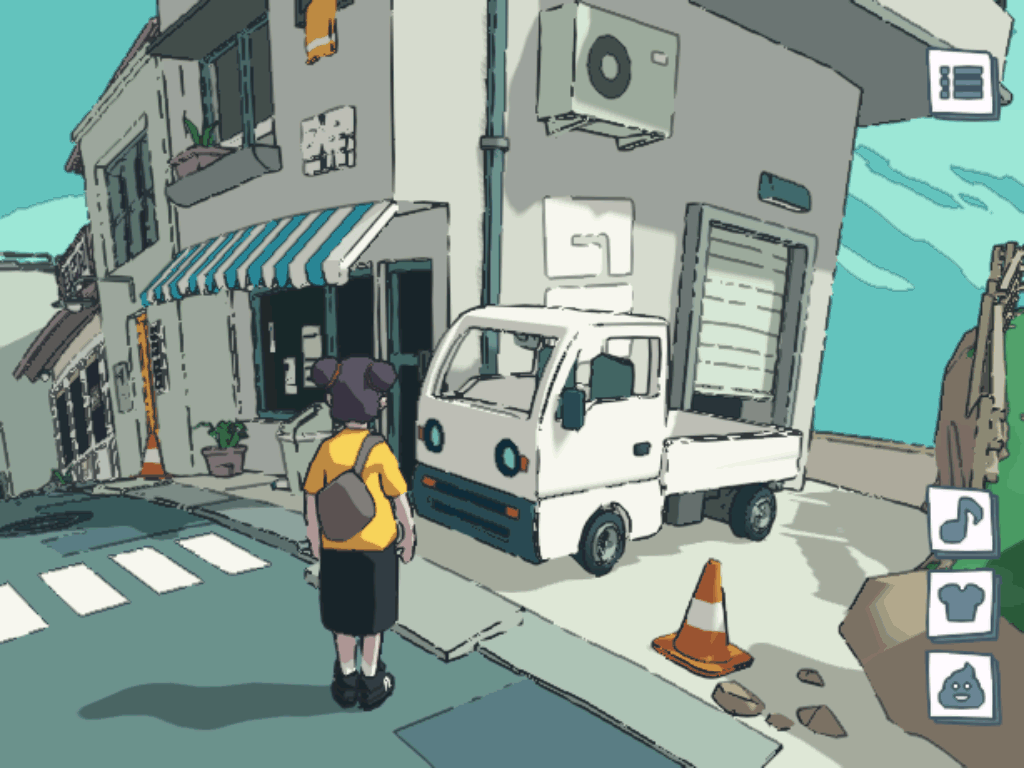
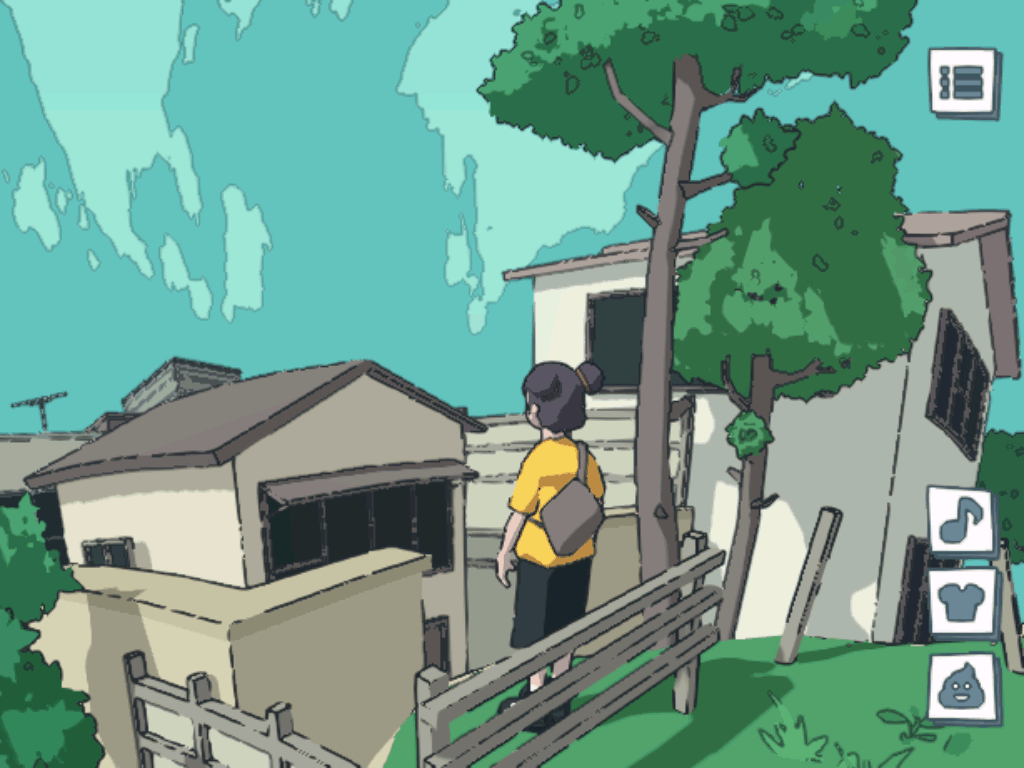
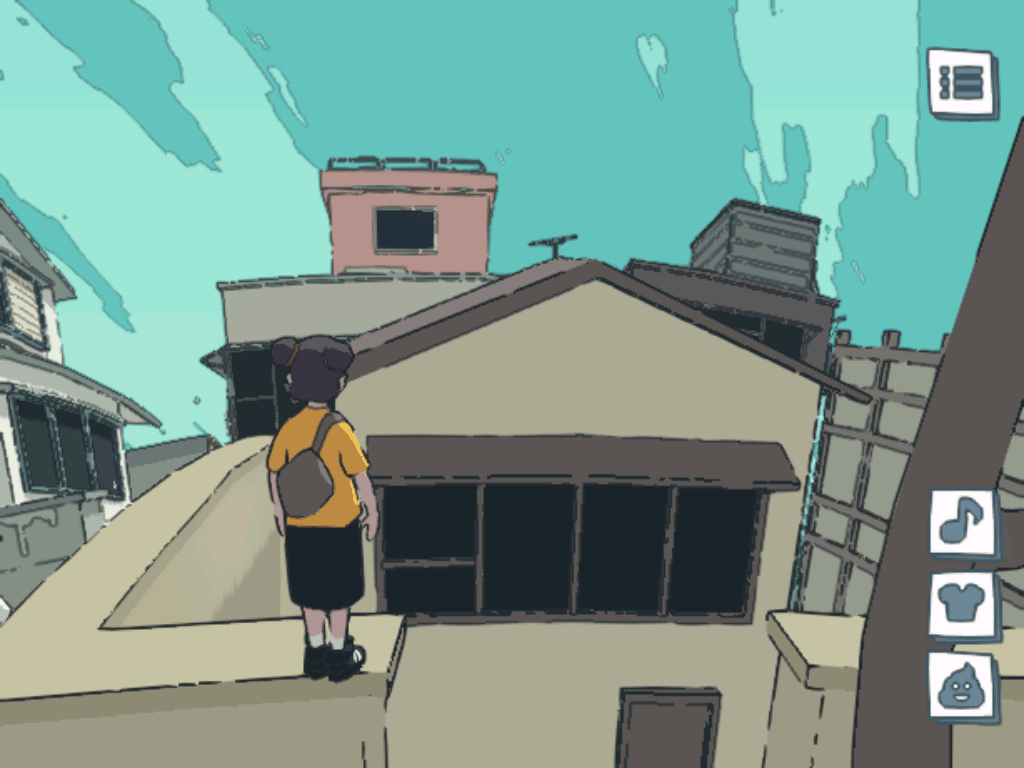
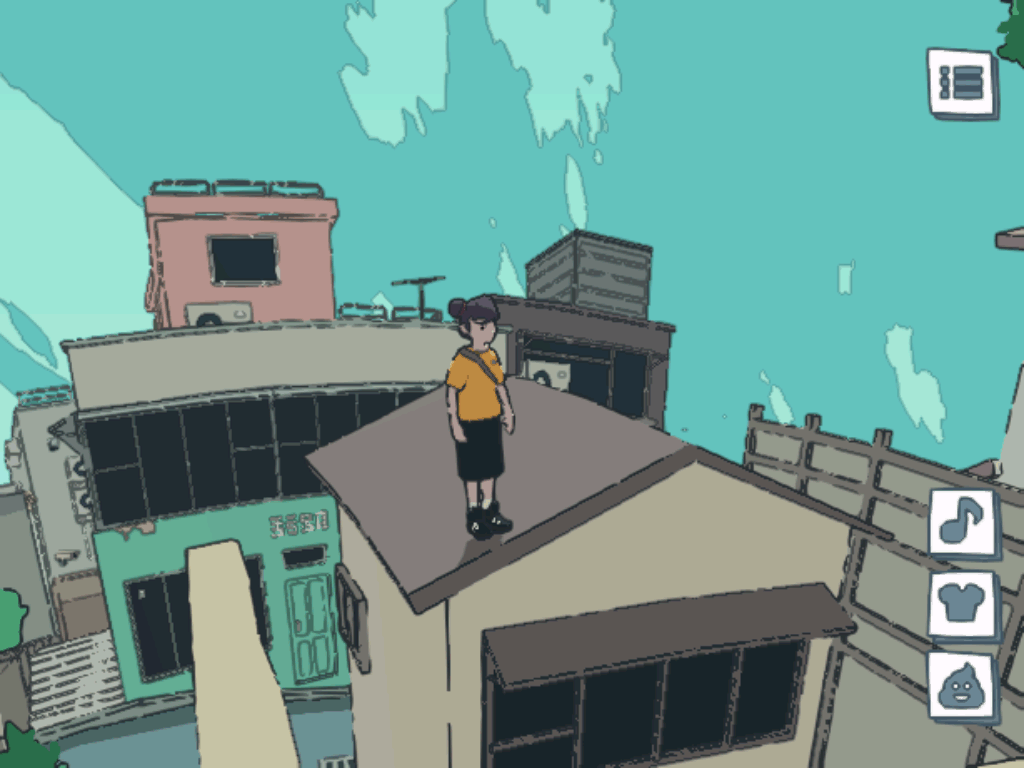
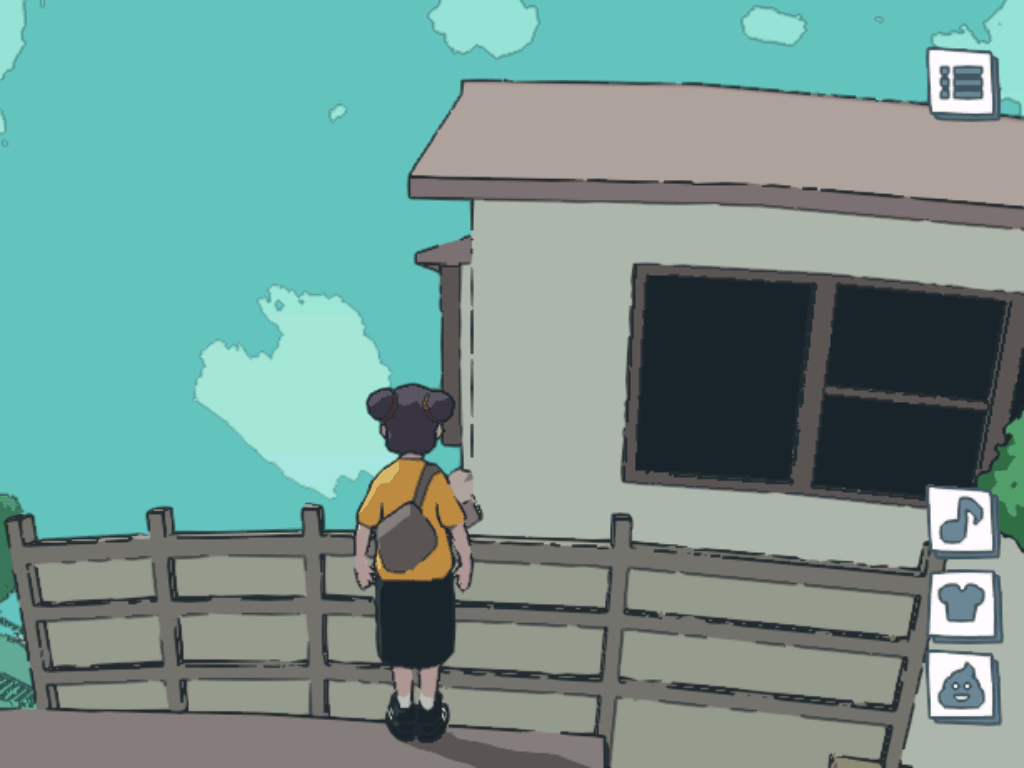
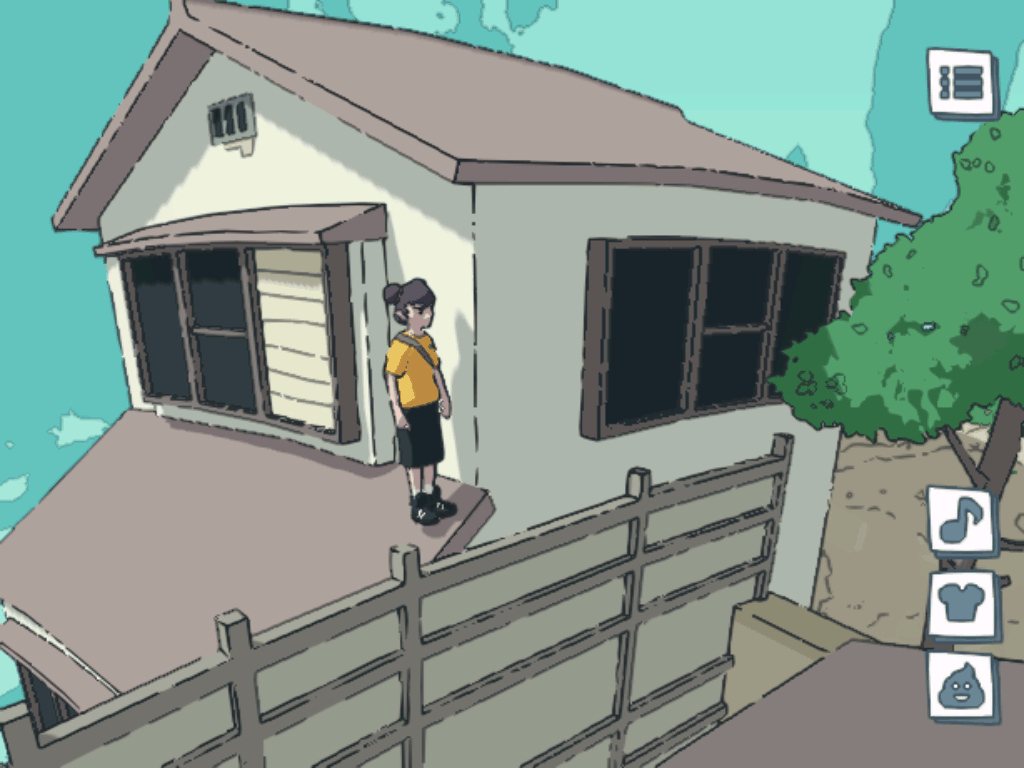
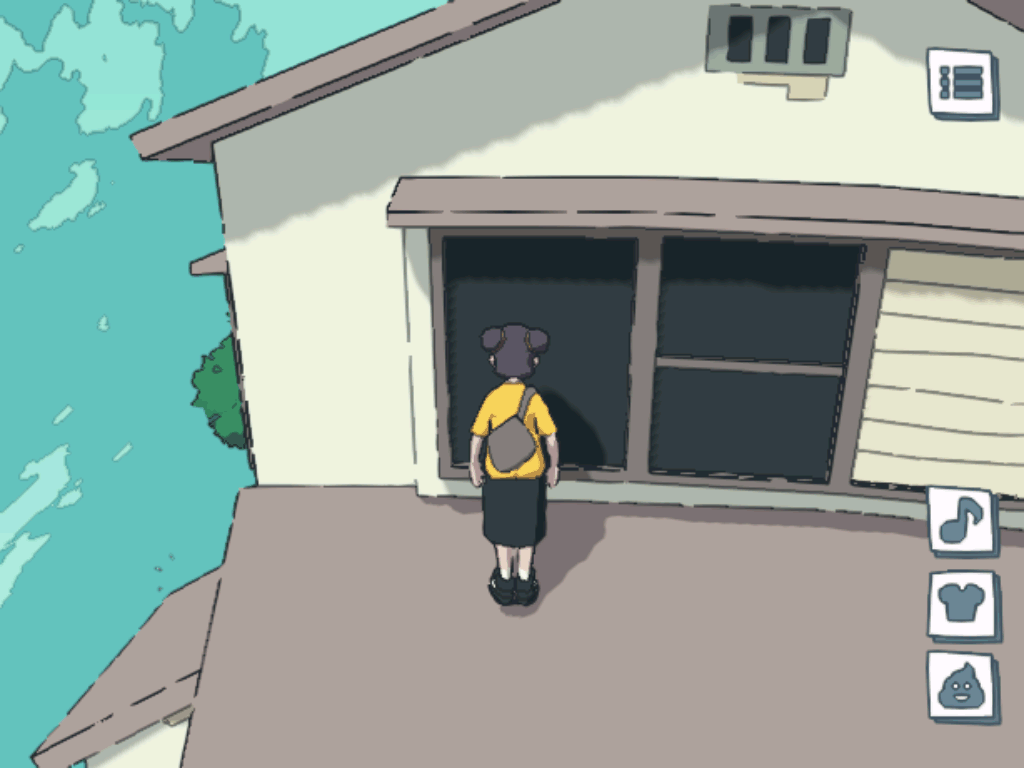
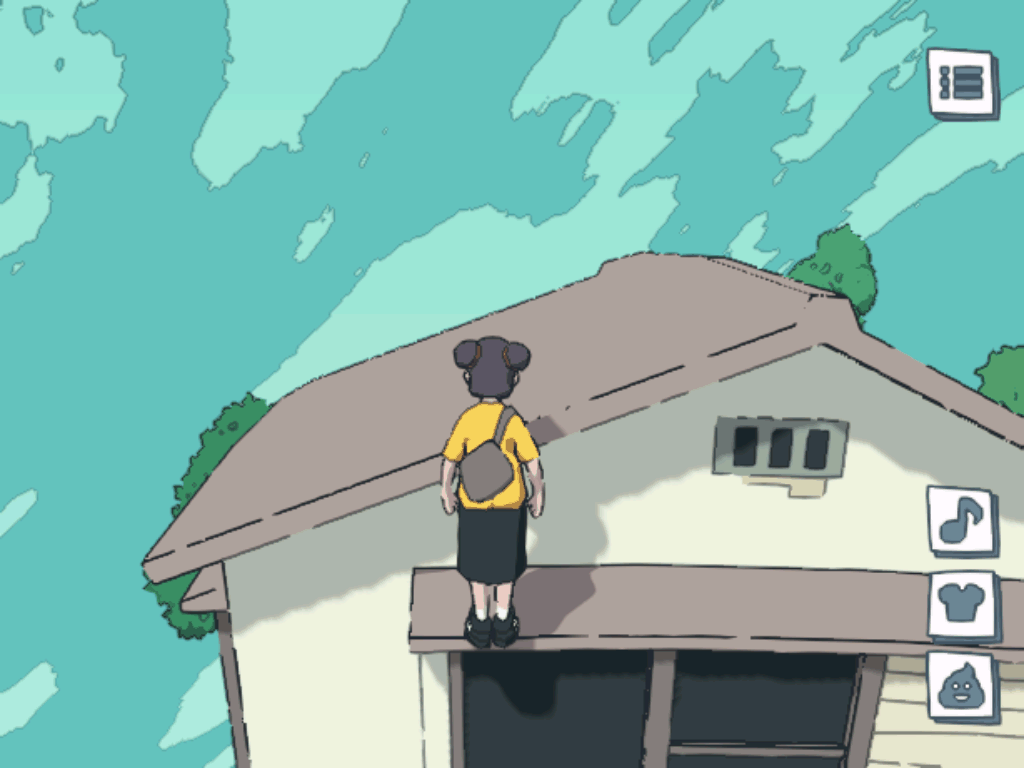
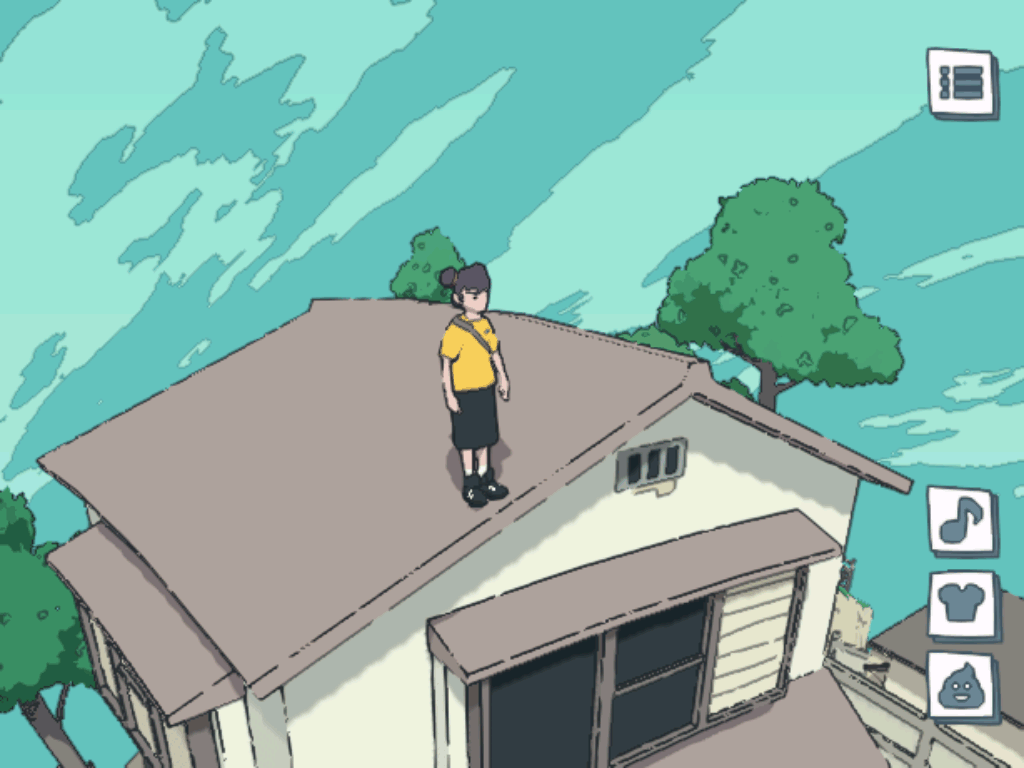
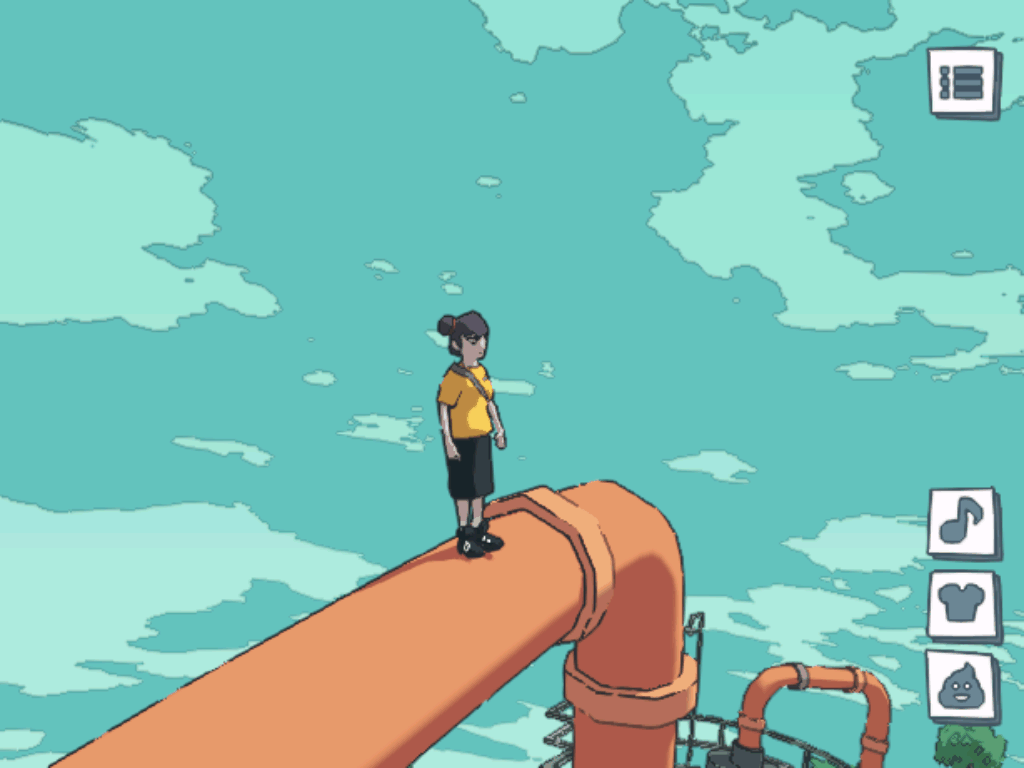
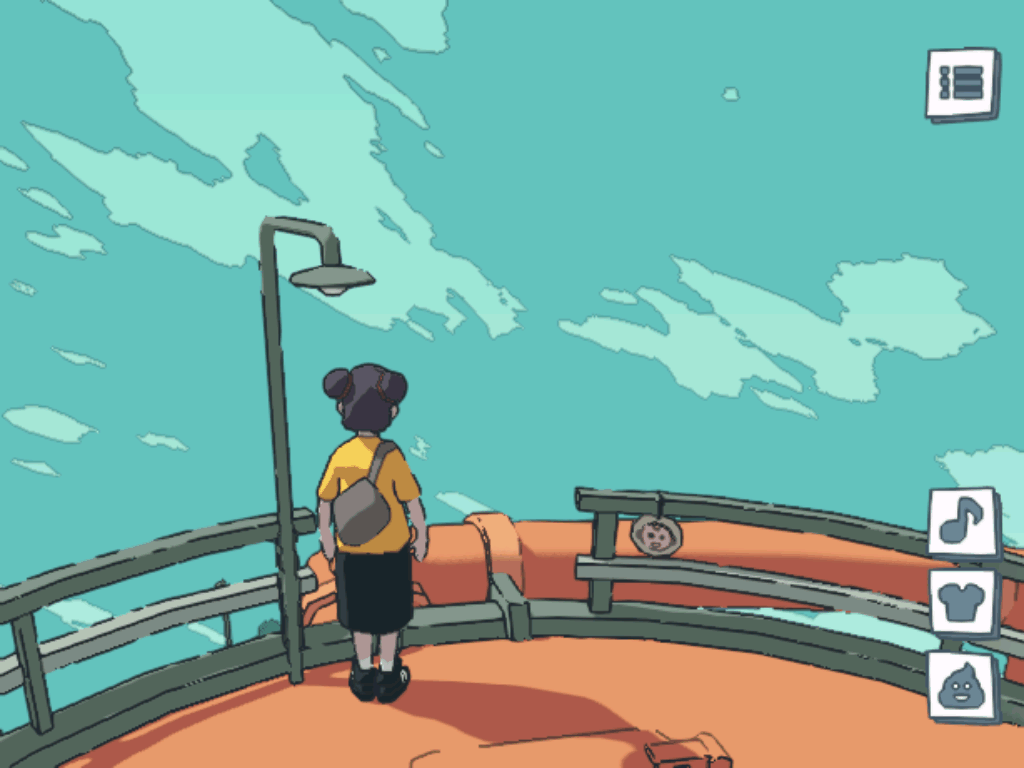
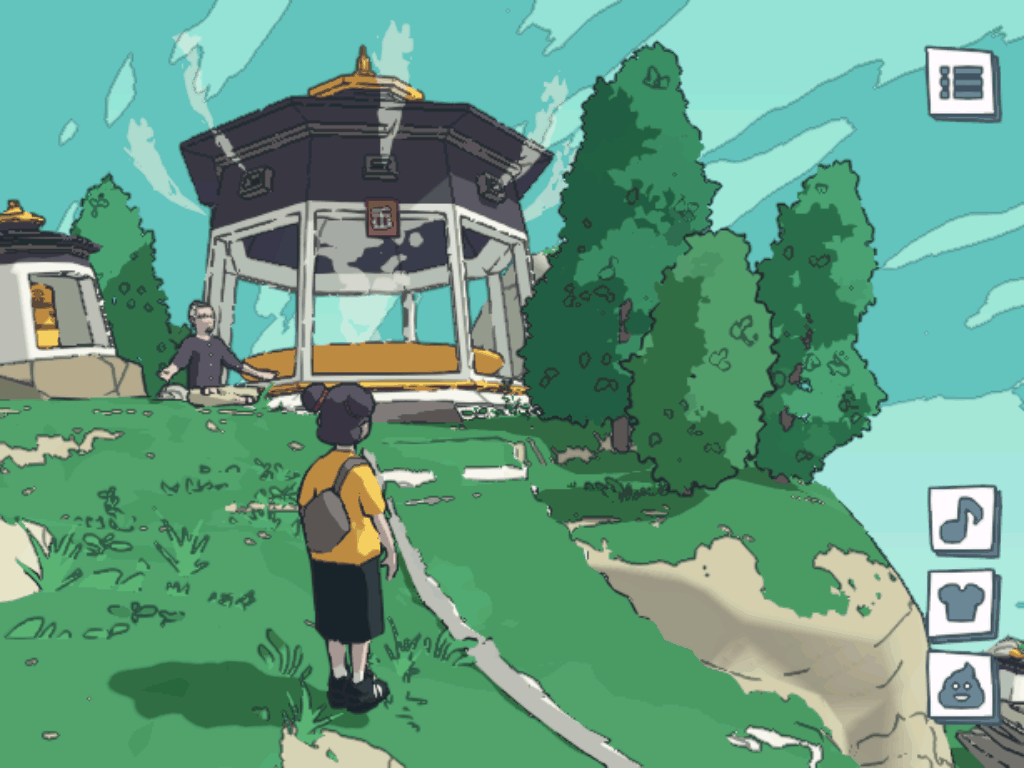
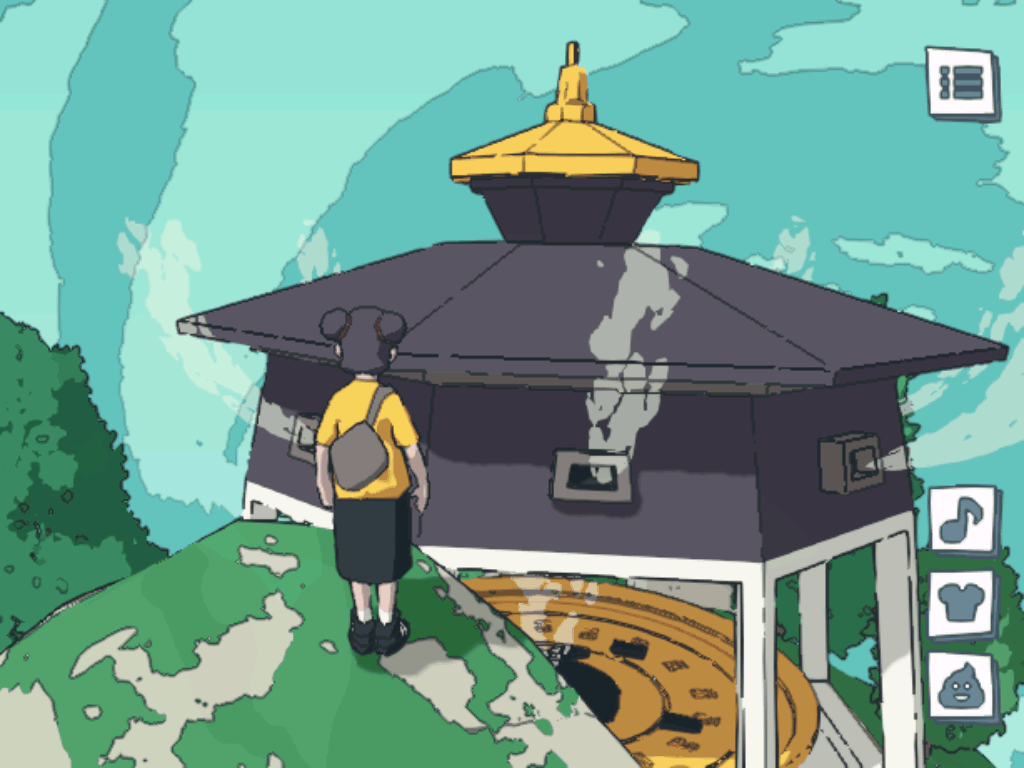
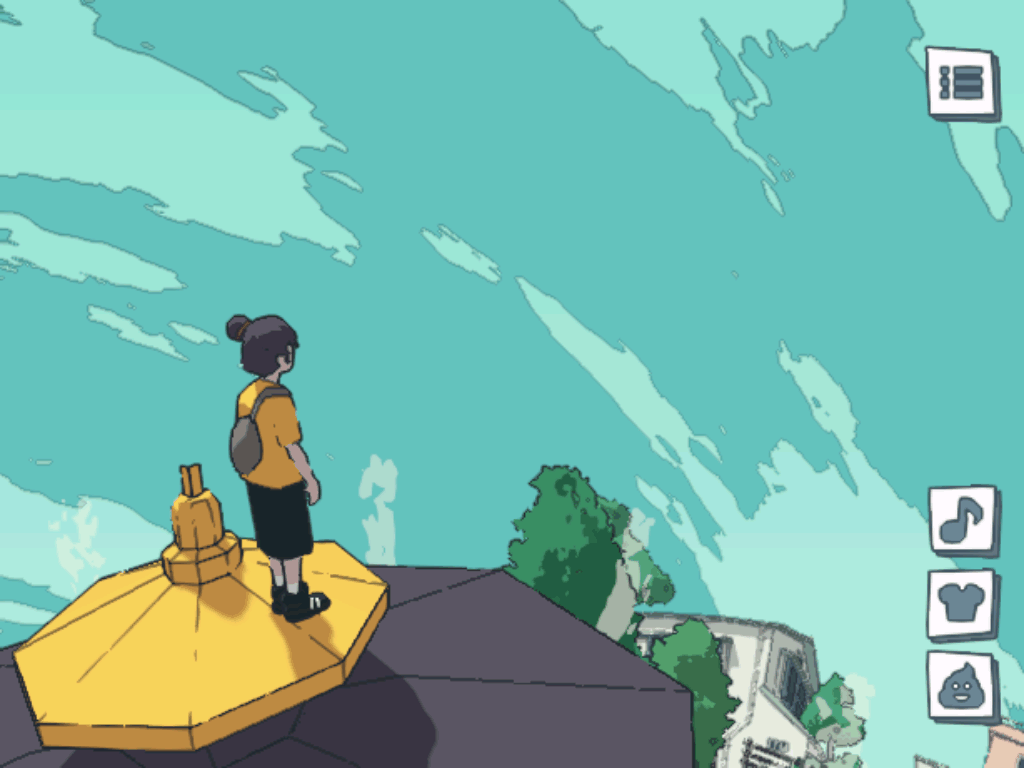
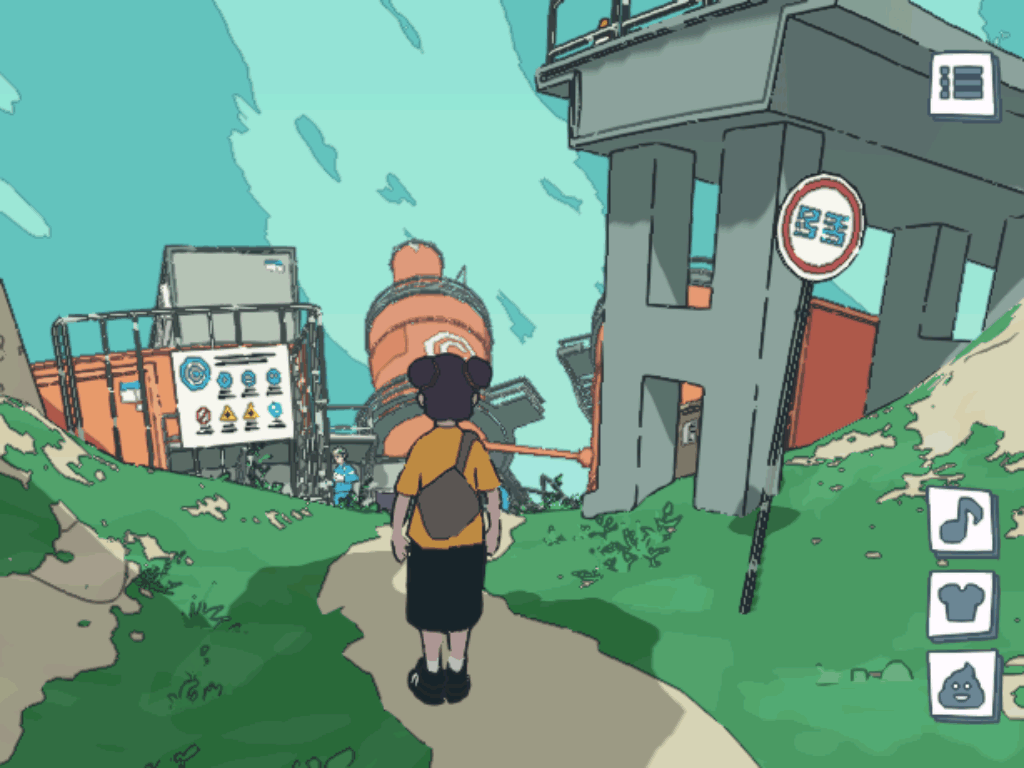
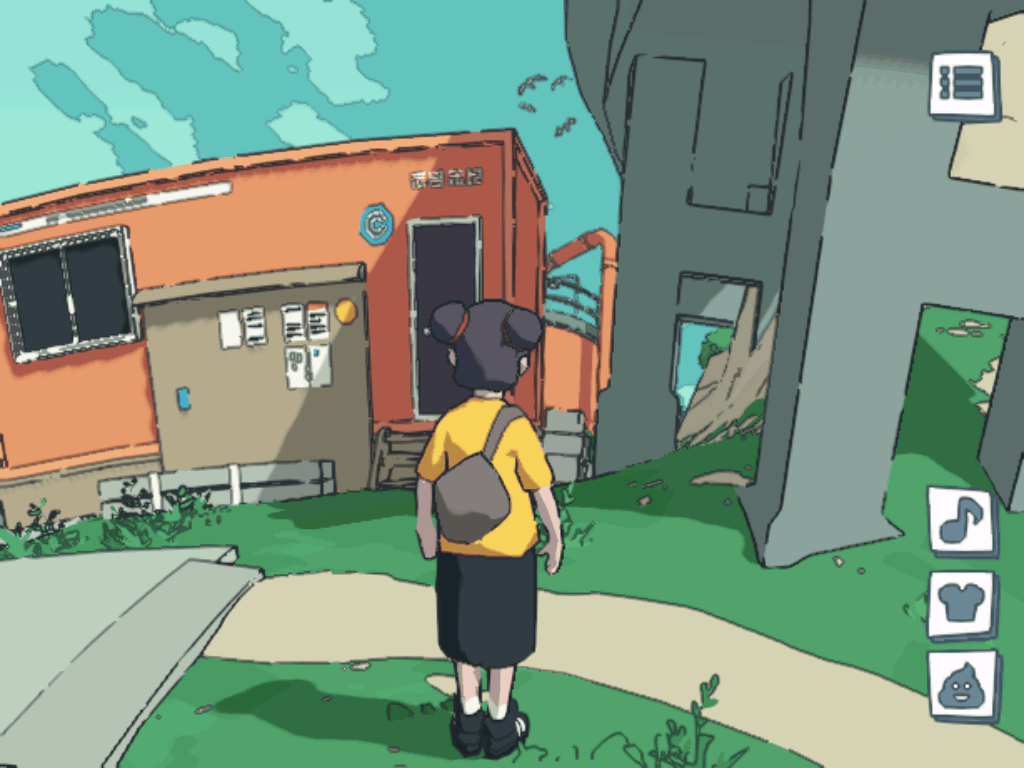
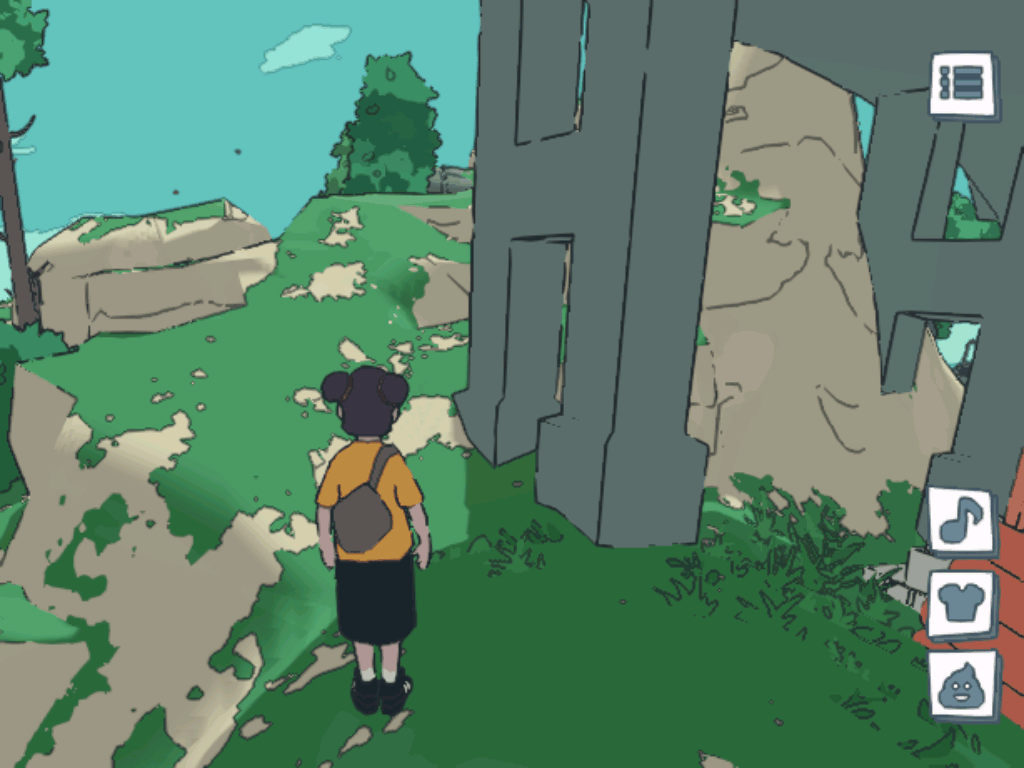
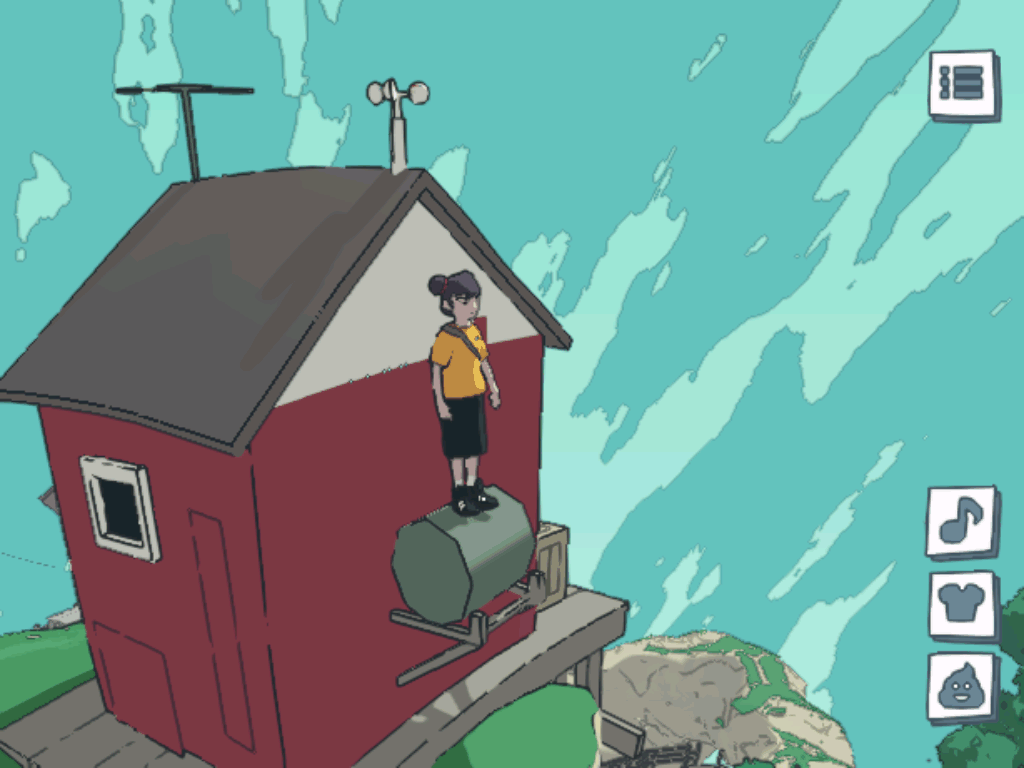
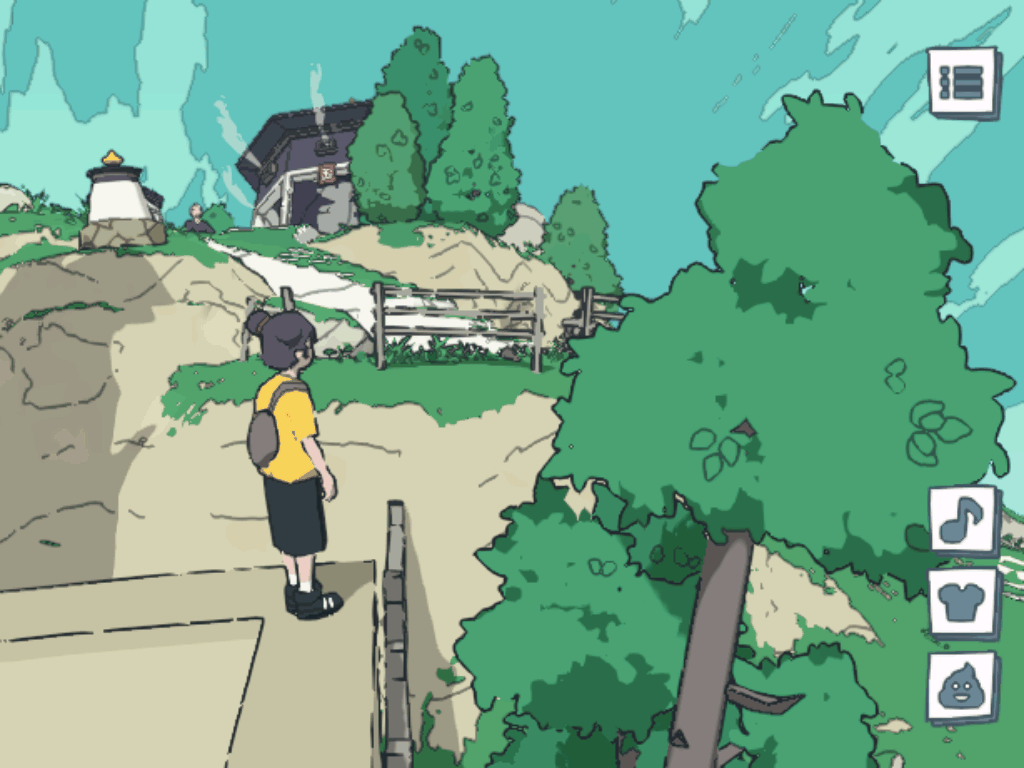
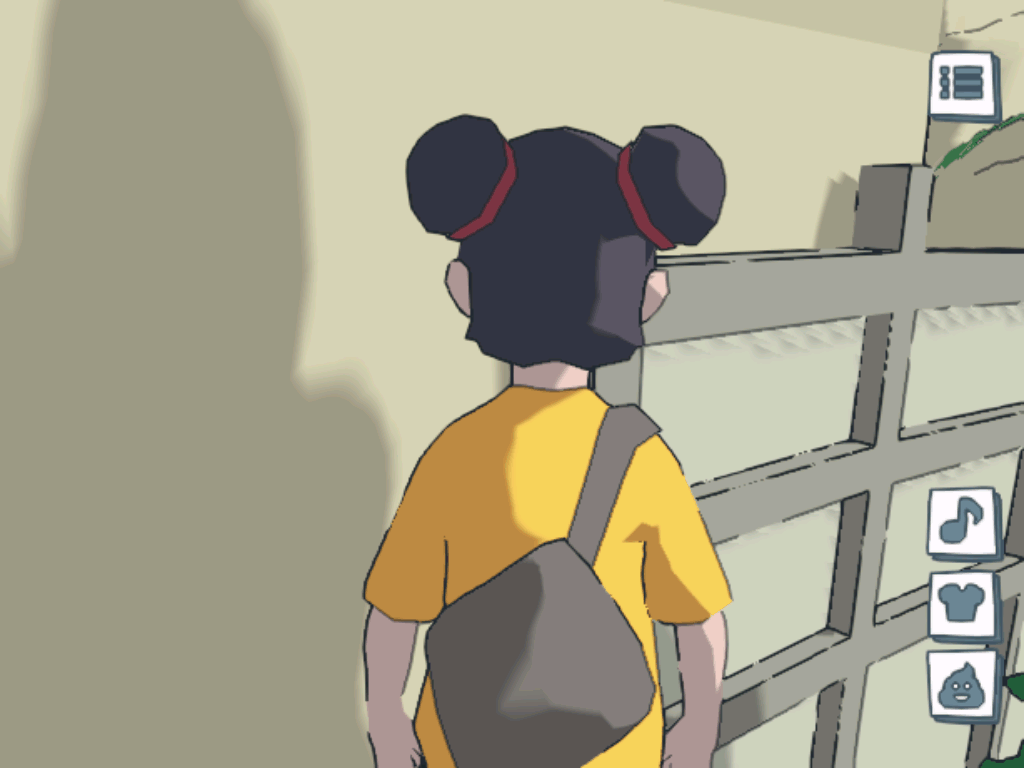
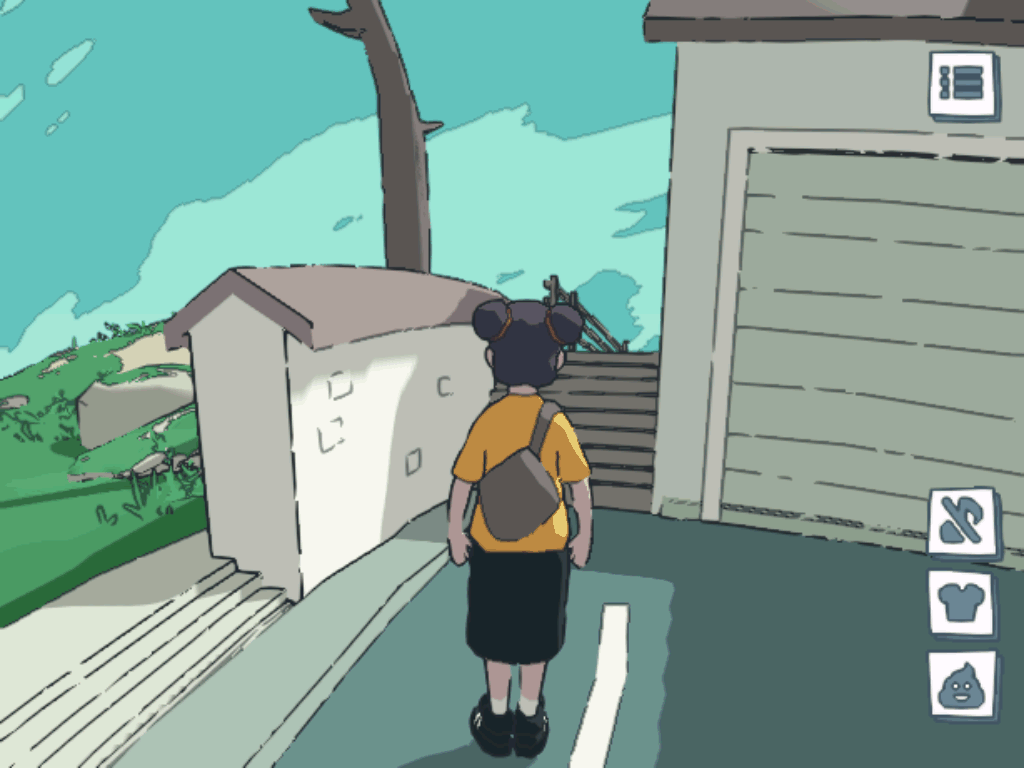
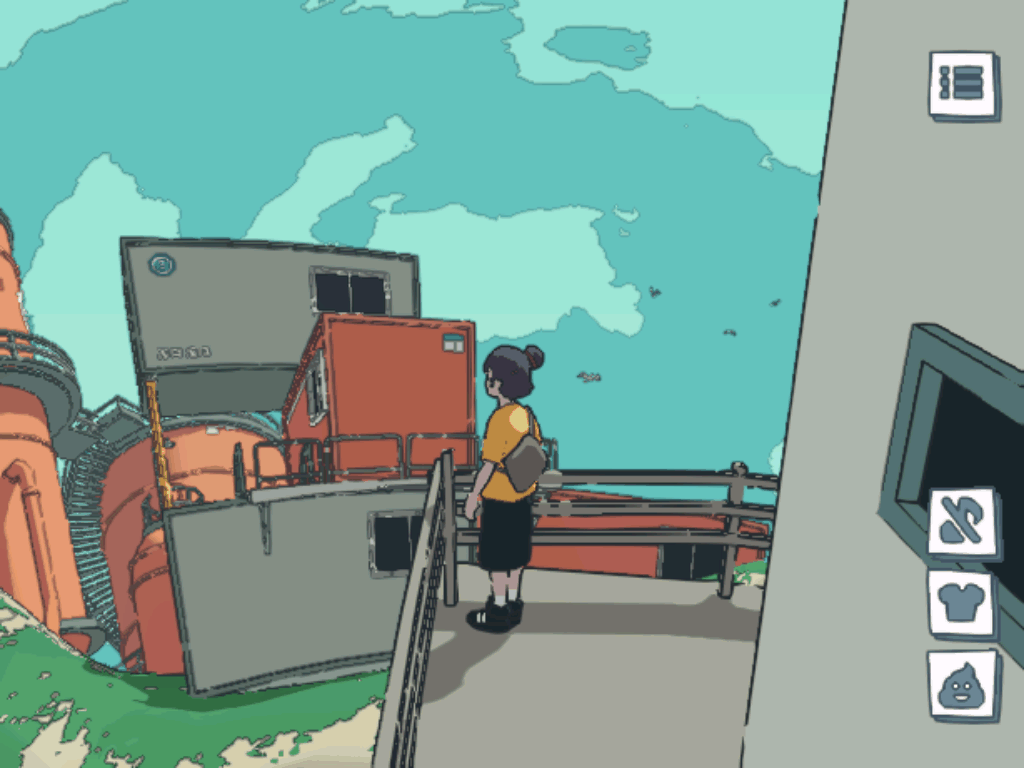
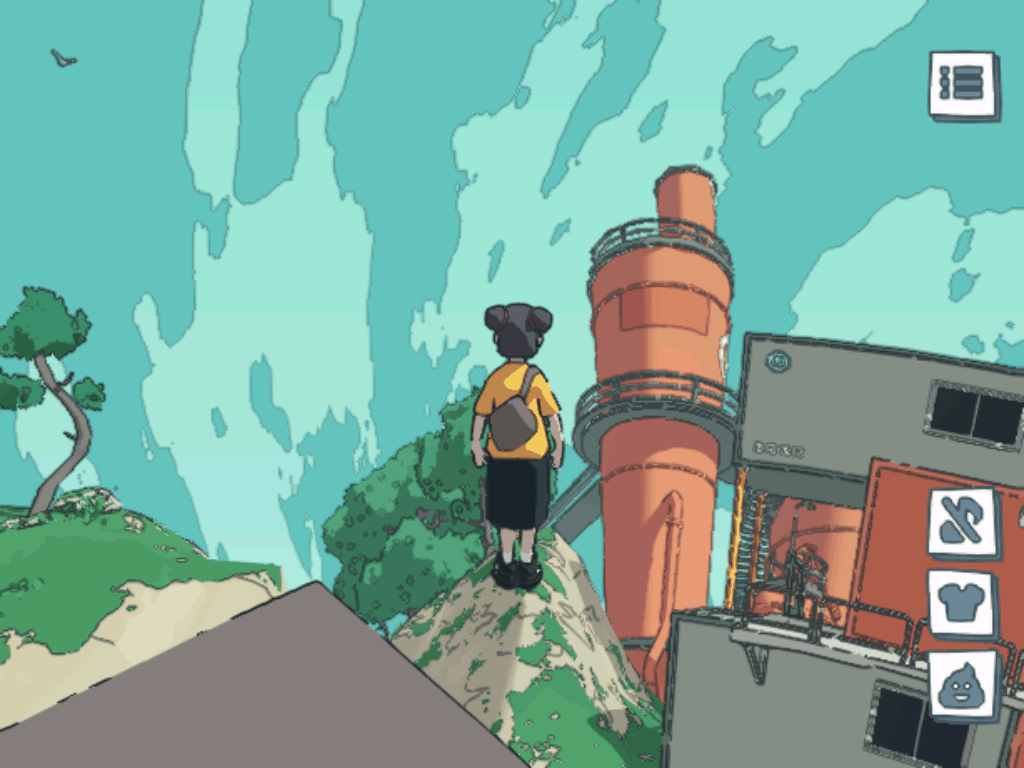
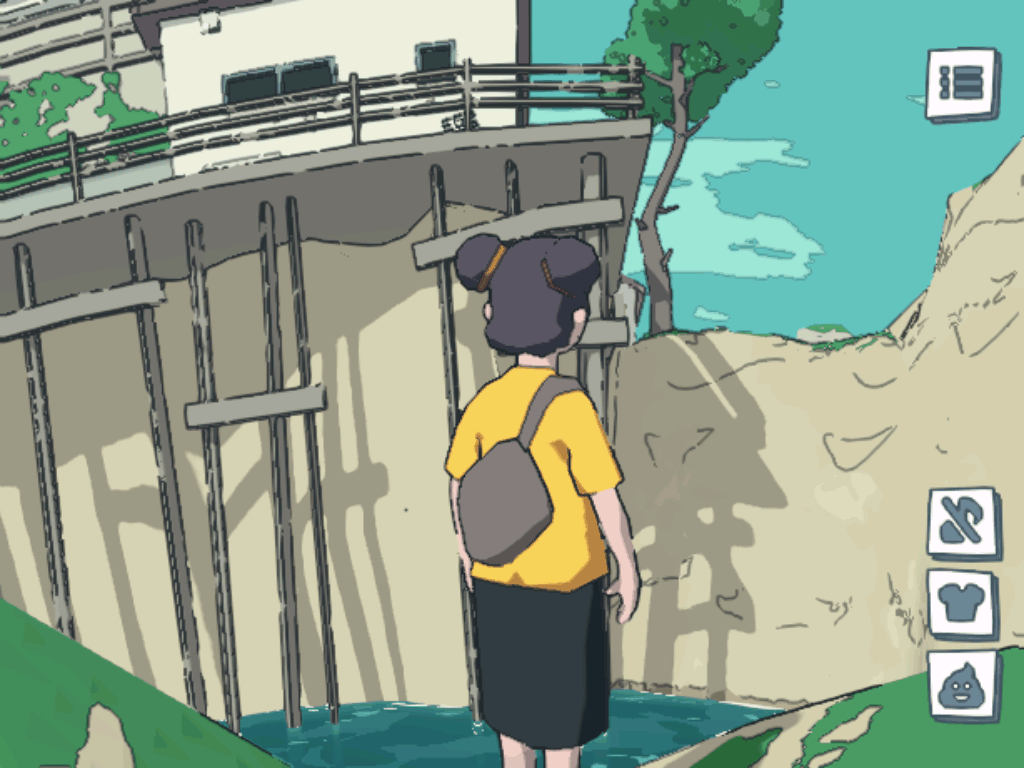
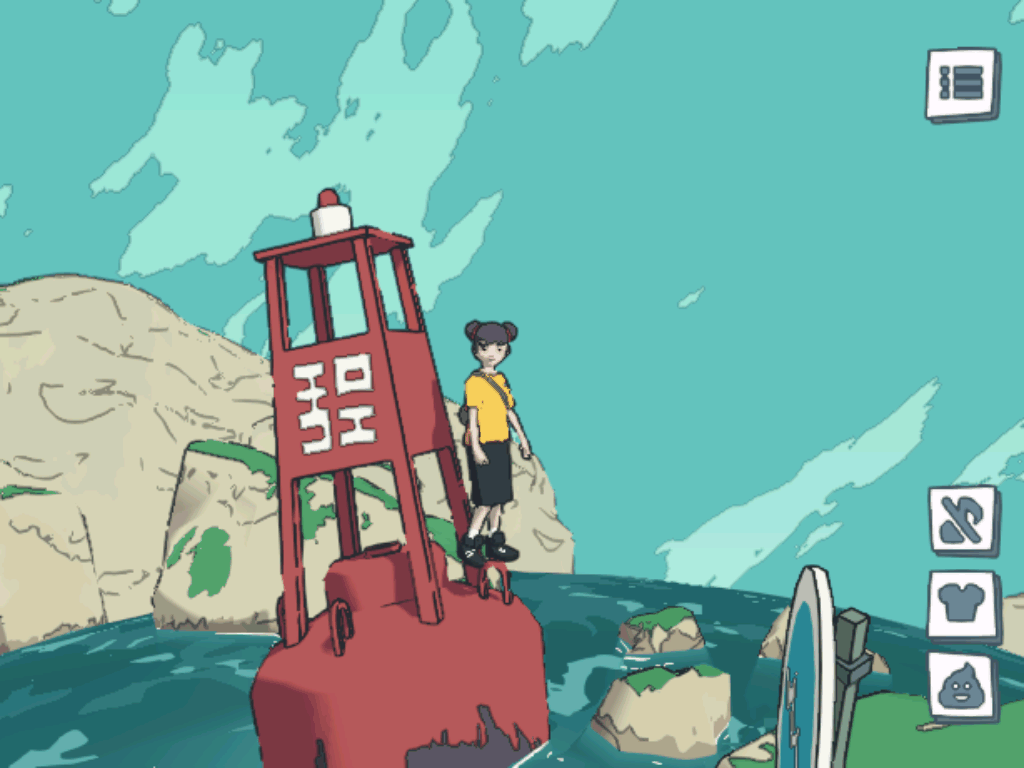
I accidentally stumbled upon a discussion of this game online by chance, then finished it in about
half an hour, and probably would have forgotten all about it if I hadn't climbed onto the roof of
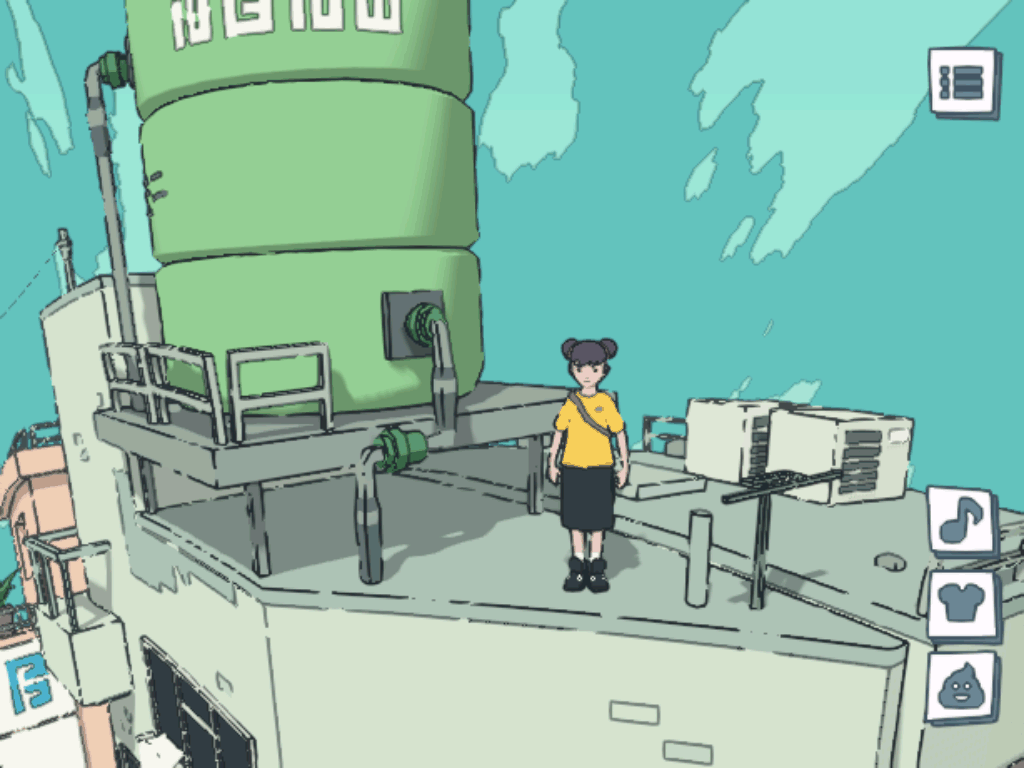
the building where the [Hacker Girl] is sitting. Recalling my attempts nearly twenty years ago in
another similar third-person game Urban Chaos I, in a fit of nostalgia, set out
to explore this game and see just how far I could get into its hard-to-reach places. I spent a week
searching for these locations and writing this article. I was amazed by just how much replay value
this game has thanks to parkour, but unfortunately, this potential weren't fully utilized because
probably all these jumps will be impossible for a mobile device players. And since there is no
official, comprehensive, and detailed user manual available either in the game or online, I decided
to fill in those gaps myself. In this article, you'll find descriptions of all my discoveries - most
of which you won't be able to find anywhere else (such as: a complete description of the keyboard
controls, instructions for remapping the controls, my notes on multiplayer, parkour, and much more).
I hope you find my work useful. Enjoy reading and playing!
Also here is a few supplementary files (JavaScript code with improved controls (see below), links
to all game file resources and batch file to download with wget, note on .DRC 3D model format and
where to view it online). It's more like technical information for advanced players and will be
useless for anyone else.
And if you want more then check Vicente Lucendo
personal site where among other things you can find
Summer Afternoon -
the Messenger prototype game. It has crucial thing that the Messenger lack of - explicitly marked
secret areas.
After I publish this article I send the link to Vicente Lucendo and got a reply:
That's a cool article, thank you for taking the time to write it!
Best,
Vicente
16 September 2026, Wednesday 14:40
It's a free game, so showing our gratitude and appreciation is the least we can do to support its
creators! And spread the word!
Complete controls
Keyboard controls for PC/Desktop browser.
Keys
Description
Movements
Up / Down / Left / Right
W / S / A / D
Left mouse button
Move.
Space
Right mouse button
Jump.
1 / 2 / 3 / 4 / 5 / 6 / 7 / 8 / 9 / 0
Emoji.
Left Shift Right Shift
Sprint mode when held (adds 30% to normal speed).
Move mouse cursor
A slight camera movement.
L
Open clothes panel.
L Escape
Close clothes panel (only when opened).
Talking with NPC in quests
Left mouse button
Start dialog when clicked on NPC with "..." above their head.
Space E
Next dialog line.
Escape
Stop and cancel dialog.
Misc useful keys
F11
Toggle fullscreen / windowed mode (it's browser key, not the game itself).
Interface buttons, require a mouse to interact.
Icon
Name
Description
📝
Memo
Toggle panel with current quests (can't find similar Unicode character, so using this one).
♪
Eighth Note
Toggle music and sound effects.
👕
T-Shirt
Toggle clothes panel which also rotates and fixes camera (see below).
💩
Pile of Poo
Toggle emoji icons panel to interact with other players (see below).
Changing control bindings
There is no option in game to change control keys but you can still do it by yourself.
This is especially useful since sometimes Space bar key on some keyboards a bit loose which is
preventing its pressing for being registered but its proper work is crucial for precise jumps
in the parkour described below.
How to change controls in example of adding "X" for jump (should be valid for Firefox and
Chrome based browsers):
Open game site, click on "Begin", go through all message boxes (make sure there is none on
the screen and you can move your character around).
Press F12 key (or Ctrl+Shift+I) to open "Web Developer Tools" window.
Click on the "Debugger" tab there.
In the left panel "Sources" select the following file:
Main Thread → messenger.abeto.co → assets → [JS] App3D-DwM1eiaC.js
(if there is no such file then look for anything started with "App3D" and ends with ".js")
After source code appear in the middle panel you'll need to find and press a small "{}" button
at the bottom there. This will make source code readable and easier to set a breakpoint.
Now click on the source code (blinking cursor caret should appear) and press Ctrl+F to open
"Find in file..." input. Enter there "ArrowUp" without quotes. You should see the code for game
default keyboard control scheme.
Around line 59881 there should be a "switch (e.code)" text. Click on the line number at the
left of it - this will set breakpoint on that line (don't worry if you got a different line number).
Click inside game area and press "X" key - breakpoint should stop code execution at the
selected line.
Now click on the "Console" tab of the "Web Developer Tools" window.
Click on the bottom line and paste there a new keyboard code (see below) and press Enter.
Return to "Debugger" tab, click on the source code again and press F8 to continue execution
(you may want to remove breakpoint by clicking on the line number again but leave it there for the
future usage).
Now test that you can properly jump with the "X" key. If you can't jump - this means that
something goes wrong. Refresh the page with F5 key and do everything again.
If everything alright then close "Web Developer Tools" window by pressing F12 or Ctrl+Shift+I again.
Last note: if you close browser or refresh the game page you will need to do this setup again
to change controls, since there is no way to save these changes. It will work only for your current
game session.
Here is the new keyboard code to copy and paste where "X" has been added in addition to the
"Space" for jump. General rule for keys from "A" to "Z" is to add "Key" prefix to them: "X" →
"KeyX". If you want a different key - see
Code values for keyboard events for keyboard key code values.
You can also customize the movement keys as you see fit.
Also note that aside from "X" the code below additionally adds new keys - see the table.
Important thing about players overlay - it will be displayed above players heads as a four-letter
ID (warning: this will change if the player refreshes their connection) converted into names using
two-letter syllables, along with the distance from you in parentheses. This will be a big help
in finding your partner in an area with lots of obstacles blocking your view if they've fallen
somewhere while attempting a difficult jump or distinguish your partner in the crowd of other players
with similar outfit. And above your head will be displayed the number of other players aside from you.
If it's zero, you should probably refresh your connection to the server (see "Multiplayer" below for
more details). One additional note: all IDs are specific to the device you're playing on, and your ID
is always "local". Therefore, it's completely pointless to exchange IDs with other people in order to
find each other in the game.
Keys
Description
Comments
Camera and overlay
X
Jump.
This is additional key to jump.
Z
Camera left.
Rotate camera to the left.
C
Camera right.
Rotate camera to the right.
V
Camera snap.
Instantly snaps camera behind character's back.
N
Toggle overlay.
Toggle players overlay.
Playing with keyboard only (without mouse)
E
Starts dialog with nearest NPC.
Since "E" is already used to advence the dialogs with the NPCs, this key becomes even more
useful (but you still need to be close enough to NPC). Also it closes final congratulations screen
when all quests finished and with this key you can display bubble text from other NPCs characters
without leaving their area of talk (if you want them to repeat their bubble text).
Side effect: be aware that if you're in intermediate quest state and just mashing this button
to skip dialog lines you may accidentally start the dialog with the NPC again.
Q
Toggle quests list panel.
Useful if you don't want to use mouse.
M
Toggle menu side button icons.
It's good for taking screenshots and for keeping the view unobstructed.
This state will be reset after dialog with quest NPC or opening the clothes panel.
B
Toggle background music.
Compared to the game menu side button icon, this keeps the sound effects enabled so you can play
different background music or just play with the sounds only.
G
Toggle global mouse usage.
This disables a bunch of things when turned on:
- Left and right mouse button clicks not registered anymore.
- Camera fixed and not affected by mouse cursor position.
- Hides mouse cursor so you won't need to move it out of the way.
This state will be partially reset after dialog with quest NPC or opening the clothes panel.
M / B / G key modes recommended if you're already setup your outfit as you wish and finished all
quests or just want to roam around and do a parkour.
If you're testing different keys and frequently restarting the game, start at least one quest so
that you don't have to skip the initial dialog explaining the backstory every time you reload the
page.
Code text below are in the editable element - you can modify it as you see fit before copy to
the clipboard.
Emoji icons
Available emoji icons in the game.
☠ Skull
🥡 Takeout Box
🧻 Roll of Paper
⌛ Hourglass
🔍 Magnifying Glass
🧭 Compass
👟 Athletic Shoe
💩 Pile of Poo
💙 Blue Heart
✋ Raised Hand
Since it's very limited assets of the icons it's hard to properly talk with it but you can still
make some sense and sentences. The major issue here is that your companion must understand on-the-fly
what you want to express. Meanings for all icons highly depending on the context where you use them
(see some examples below).
Key
Icon
Name
Possible meanings
0
☠
Skull
no / not / suggestion declined / be careful / danger ahead / impossible
9
🥡
Takeout Box
I'm leaving to eat / let's take a break here
8
🧻
Roll of Paper
roll out of here / go away / leave me alone
7
⌛
Hourglass
time / wait / waiting / thinking
6
🔍
Magnifying Glass
look / looking / searching
5
🧭
Compass
need directions / I'm lost / I can show directions
4
👟
Athletic Shoe
let's go / go here / jump here / let's start parkour
3
💩
Pile of Poo
I don't like you / bad idea / no can do / extremely frustrated
2
💙
Blue Heart
thank you / excellent / love you
1
✋
Raised Hand
hi / hello / goodbye / yes / agreed
Few examples of usage (again, meaning highly depended on context, time and place):
✋ (single Raised Hand) - hi / hello (usually expects same icon in response).
⌛ ✋ (Hourglass, Raised Hand) - time to goodbye
(usually used before part ways or leave game).
⌛ 🥡 ✋ ✋ ✋ (Hourglass, Takeout Box, multiple Raised Hand) -
time to eat, bye-bye (another way to say goodbye).
🔍 🧭 (Magnifying Glass, Compass) - looking for quests directions
(this can be used in both ways: as statement and as question).
🔍 👟 (Magnifying Glass, Athletic Shoe) - looking for parkour (same as one above).
👟 ☠ (Athletic Shoe, Skull) - dangerous area, watch your step / jump or walk carefully.
💩 🧻 (Pile of Poo, Roll of Paper) - I don't like you, leave me alone.
Note that "🧭" Compass icon are sometimes mistaken for wristwatch which is why people may
use it for meaning where an "⌛" Hourglass would be more appropriate (time / wait / etc).
General rule: do not spam multiple similar icons (except for applause / attention / thank you),
always take a pause before repeat the message you want to convey and patiently wait for the answer.
Emoji text encoding
Since there is no text chat in the game it can be emulated using emoji icons. Please note that the
sole purpose of the following text encoding method is the exchange of contact information
(e-mail, social media, etc.) between players, so they can finally communicate as human beings.
Also the person you'll be talking to needs to be familiar with this encoding method
(find, read, and understand this article) otherwise you won't be able to understand each other.
First things first: to use this encoding you need a mobile device or a second PC nearby because
when you change tabs in the browser or switch to another application window the game will force you
to temporary disconnect. Because of that you may lost the person you're talking to (see about invisible
players in multiplayer part below). In other words: you play on one device and use the following forms
to encode and decode messages on another device. The same applies to other party you're talking to.
As an initial step you need to establish connection with the other party using a
three-way handshake:
🔍🧻🔍🧻🔍🧻 (Do you understand text encoding?)
🔍🔍🔍🧻🧻🧻 (Yes, I understand.)
🧻🧻🧻🔍🔍🔍 (Excellent, I'll start displaying emoji.)
Emoji "🔍" and "🧻" chosen since it's very unlikely someone use them together in any
meaningful conversation.
Emoji text encoding method covers only
printable ASCII characters
in range [32..126] mapped to [00..94] for fixed-width two-digit code per character.
Since codes 95, 96, 97, 98 and 99 are not used in this encoding they have special meaning:
Code
Icons
Tags
Description
95
🥡🧭
<top>
Start of message (from sender).
96
🥡🔍
<end>
End of message (from sender).
97
🥡⌛
<bad>
Something wrong, please repeat last message (from recipient).
98
🥡🧻
<ack>
Message decoded, proceed to the next message (from recipient).
99
🥡🥡
<all>
That's all. Your turn to talk, waiting for response (from sender).
Here is the interactive forms you can use to encode and decode messages text. Keep your messages
as short as possible and include only the minimum necessary information. The shorter the message,
the less likely it is that a typo will occur when it is sent or received.
Text to emoji encoder
Emoji to text decoder
How to talk using this encoding method (note that you can use digits on keyboard for faster emoji
input in the game):
After contact established sender write the text they want in the first form input field and click
the "Encode" button. Text will be encoded to emoji separated by "|" for convenience and codes
95 and 96 in the start and the end of the message.
The sender must display pairs of characters to the recipient. For example, for the lowercase
letter "a" the sender needs to display emoji "🔍" and "🧭". The emoji must be
displayed one after another with a short pause before each repetition so that the sequence like
"🔍" and "🧭" can be clearly distinguished from "🧭" and "🔍".
Recipient should answer with the single "✋" which means "I have successfully recorded and
decoded this character, please move on to the next one" or, in rare cases, recipient may answer with
the code 97.
When the recipient sees a pair of emoji they click the corresponding buttons on the second form
to record them and decode by clicking on the "Decode" button.
If, for any reason, the recipient wishes to end the conversation, they must send the code 99 to
notify the sender of their intention.
After sender display code 96 recipient should display code 97 or code 98.
Now sender can answer with code 99 or start to display the next message.
Overall as it was said before this is very inconvenient way of talking so use it only when it's
absolute necessary.
Solution / Walkthrough
Note that quests are completely optional. You can roam around without completing them, it's not
affecting anything.
The whole game world divided to the following locations (all names taken from the game source code,
that's why it's called "Official").
Official location name (location-id)
Official NPCs name (npc-id) you can find there or nearby
Red Cliff House (redhouse)
Boss (boss)
The Forest (forest)
Young Kid (scout)
Owl (owl)
Fox (fox)
Man's Cave (cave)
Cave Man (caveman)
Capital Corp. (factory)
Factory Worker (factory-worker-a)
Tengo (factory-worker-b)
Doctor Frebi (female-scientist)
Getave (factory-worker-c)
Smelly Falls (falls)
Dave The Musician (musician)
Main Square (square)
Office Worker (office-worker-2)
Flower Lady (flower-lady)
Walking Man (office-worker)
Shop Keeper (chef)
Hacker Girl (threekid)
Lucero Graveyard (graveyard)
Old Woman (oldwoman)
Mountain Temple (temple)
Doctor Frieb (male-scientist)
Mountain Guy (mountainman)
Scully's Beach (beach)
Captain Steve (diver)
Pale Man (alien)
Checklist (note that for each quest you need to visit the mentioned people strictly
in the following order or the dialogs will not start):
1. Falling off the corporate ladder (0/3).
Talk to [Office Worker] at the [Main Square] (1/3).
Talk to [Boss] at the [Red Cliff House] (2/3).
Talk to [Office Worker] at the [Main Square] again (3/3).
2. A man who's hiding from something (0/3).
Talk to [Cave Man] at the [Man's Cave] which located in [The Forest] (1/3).
Talk to [Flower Lady] at the [Main Square] (2/3).
Talk to [Cave Man] in the [Man's Cave] which located in [The Forest] again (3/3).
3. Scientists and mixed-up deliveries (0/3).
Talk to [Factory Worker] at the [Capital Corp.] (1/3).
Talk to [Doctor Frieb] who fixing green bike near the entrance to the [Mountain Temple] (2/3).
Talk to [Doctor Frebi], she is at right downward path from the [Factory Worker] at the [Capital Corp.] (3/3).
4. An offering to the mountain temple (0/2).
Talk to [Old Woman] at the [Lucero Graveyard] which entrance is near [Main Square] (1/2).
Talk to [Mountain Guy] priest at the [Mountain Temple] (2/2).
5. A note lost at sea (0/2).
Talk to [Captain Steve] near the [Scully's Beach] (1/2).
Talk to [Dave The Musician] at the [Smelly Falls] (2/2).
Multiplayer
You can play this game with other people.
If you want to play with your friends, you might not be able to see each other. As I understand it
(note: what follows is speculation), there is a limit to the number of players (total of 10 including
yourself) you can see at the same time in the game world. This limitation was most likely implemented
to reduce the load on the server-side (by reducing the amount of network traffic sent to the client)
and/or to reduce the load on the client-side CPU/GPU (the fewer objects there are, the fewer 3D
models need to be rendered). I tried playing with my friend (hi NiceHolySpirit!), but we couldn't
see each other, so we had to share our game screens via video call to see where we were and what we
were doing. After a while, the number of players probably decreased, and we were finally able to see
each other in the game world. So if you want to play with your friends, keep this limitation in mind
so it doesn't come as an unpleasant surprise.
A few important observations and additions to the things above:
If you switch to another window or application on your system, another tab in your browser,
or minimize the game window, the game will disconnect you from the server. To other players,
it will look as if you've disappeared. If you're playing with someone else, try not to switch away,
or you risk losing track of each other as explained earlier.
After returning to the game, the connection to the server is reestablished in the background
and not immediately, so it's normal not to see other players in the game world for the first
25-30 seconds.
But you can also use this to fix connection issues. If you can't see any other players anywhere,
it's quite possible that your connection to the server has been lost. In that case, you can switch
to another tab and then return to the game, thereby manually triggering reconnect to the server.
If you want to play with other players, there are two things you can do: help people complete
quests by showing them where the NPCs are, or teach them how to do parkour.
If you've decided to help other players complete quests, don't be pushy since they might want to
complete all the quests on their own, and your help might not be welcome. The best thing to do is to
stand in a busy spot and, every now and then when someone runs by, display the "🔍" and
"🧭" emoji one after another ("Looking for directions?"). If someone stops nearby and greets
you, you can try to convey the meaning of your message to them. It's best to stand next to one of the
quest NPCs and display a few "🧭" emoji nearby so it's clear that the compass indicates the
direction to the quest NPCs. After that, simply visit all the locations with the quest NPCs.
Important note: be sure to stop every now and then to check that your companion hasn't gotten lost or
fallen behind, and visit the quest NPCs strictly in the order the quests are meant to be done;
otherwise, your companion won't be able to complete them. It's very easy to tell when your companion
has started a quest - when they interact with an NPC, they automatically move to the required
distance to start a dialogue (this is very noticeable and unmistakable, as the player's model moves
without moving their legs).
If you've decided to teach people parkour, the advice is the same as for the quests - don't be pushy.
Stand in a busy or hard to rech spot to gain attention of those who interested and, every now and
then when someone runs by, display the "🔍" and "👟" emoji one after another
("Looking for parkour?"). If someone stops nearby and greets you, you can try to convey the meaning
of your message to them. It's best to stand next to one of the places where you can jump to and
display a few "👟" emoji so it's clear that the athletic shoe indicates the direction to the
parkour places. After that, simply visit all the locations with the parkour. Important note: you
should show parkour spots starting with the easiest ones and moving on to the more difficult ones.
If someone can't complete a difficult jump by their second or third attempt and displays the
skull emoji, it's best to move on to another spot where it might be easier for them. I've had
instances where someone couldn't manage the handrail jump on "Roof-2", but after going through all
the other spots and returning to it, the jump came easily to them. There have also been situations
where a player couldn't pull off a certain jump, but with admirable persistence, they kept trying
again and again until finally succeeded.
Few things to note:
Be patient and keep close to the person you're teaching. If they fail to do the jump don't just
wait there - jump down and patiently show everything again. If you just wait on the spot above this
will not only be discouraged to your partner but may push them to rush to you and make even more
mistakes in the process.
In "Roof-4" after jumping from the dumpster onto the fire ladder, the camera usually faces the
opposite direction. Because of this, your partner (if they're a regular player who doesn't know how
to add camera control keys) is usually forced to climb the ladder blindly, which causes them to fall
back onto the street. To help, climb to the middle of the ladder and stop there; then your partner
will be able to see your player model as a reference point to understand in which direction to move.
The hardest thing to explain to regular players is how to perform [C3] (see below). On "Roof-4"
for some reason, players try to jump while standing in the corner between the green tank and the wall.
It's very hard to explain (especially without words or a proper chat) that you just need to move forward
without jumping. One of the hint that most of the players catch is to never jump when on the
parapet and take a 360 degree turn before walking into the corner.
If the person, you're showing parkour to, has figured out how to perform [C3], you can show them
how to climb over a huge invisible wall (see below). For this, it's best to use the corner behind the
ship where the fence is (jump on its top and start from there), since the camera angle is better
there, even though the climb takes longer. But many people can't handle the 5-minute climb and often
jump down before it's over. So it's a good idea to set a timer on your phone and display "⌛"
emoji every minute: first 5, then 4, then 3, and so on. Not always, but often, people realize that
this is a countdown timer showing how much longer they have to climb until the end. Use keyboard
shortcut to emoji since using emoji icons panel with mouse may accidentally drop you down.
It's highly recommended to add and toggle on players overlay. Especially if your partner for
whatever reason decides to change their outift: first of all they will be invisible while clothes
panel opened (you may think they're disconnected but overlay label will be there) then it will be
confusing with different outfit (you may not recognize them but overlay label will be the same).
If your partner switch the browser tab or do anything else to reset connection to the server then
this will be another issue: their outfit will be the same but the name on the overlay label will
be different.
Before you read the following locations description try to find the places you can reach by
yourself. Nothing excites more than discovering a new area. Especially if you thought that it was
unreachable before.
General tips:
It is probably impossible to do most of the jumps from mobile devices due to different control
scheme. Play using PC/Desktop browser instead.
Set proper and comfortable to you keyboard controls (see above). Many jumps will be harder
without precise movement control.
Your character always moving relative to the current camera view. For example "Down" or "S" keys
will always move your character towards the current camera position. This is troublesome especially
on a small ledges when your camera not behind your character. If you wait enough the camera will
eventually moved to the back but it's a waste of time. Mouse movement on the game area unfortunately
moves camera too little. If it's too difficult to change controls (see above) for you then there
is another way to instantly fix current camera view: turn your character so that their back is facing
the direction you want to go, now press "👕" (T-Shirt) interface button to open clothes panel
(use "L" shortcut from the keyboard) - this will immediately move the camera view to your character's
face. Now close panel with "X" button (or press "L" again) and press "Up" or "W" once to turn around
and your camera view should be exactly behind your character's back. Walking on narrow ledges or
making accurate jumps would be much simpler.
Do not rush. Especially on a tiny ledges high above the ground. Climbing all the way up here
again could be a waste of time if you make a mistake.
If you fail to land a jump and your character get stuck on a ledge or parapet of the destination
place, continue moving forward and jumping, as there's a chance you might succeed.
Warning: parkour is fun in a video games, but it can be very dangerous in real life, especially
outside of a gym!
Corner Clipping Climb ([C3] for short)
The Corner Clipping Climb ([C3] for short) is a side effect of the game collision mechanic where
walking forward while pushing an obstacle will move player character up.
[C3] can be performed on a flat walls too but in case of corners your climbing speed will be
higher.
It doesn't matter how tiny the corner is (see few screenshot examples below).
It works with wide range of angles, you can even use tiny gap between two boxes standing
parallel to each other.
In most cases [C3] are extremely slow, so consider other options if they're easier and faster
at the same time.
While climbing, you can turn slightly left and right to find the optimal position that maximizes
your character's upward speed. But be careful, if you turn too much, you will lose grip and fall.
You can climb a structure or building only and only if there is no obstacles along the way.
I.e. it must be straight plane(s) from bottom all the way to the top. For example almost all roofs
has ledges at the top which prevents them from climbing.
If there are some kind of obstacle just before the top which prevents you from climbing higher or
drops you down, then you can perform a jump if you're already pushed yourself waist-high above the
ground. This can also be used to shorten climbing time.
Various executions of the [C3] below.
Building of Roof-1 (1).
The ledge on building near the fence of the factory (2). To get there climb vertical ledge corner
at the back, not the fence.
The highest factory barrel and the only one you can't reach the top of (3).
Jump button mashing ([JM] for short) is a side effect of the game jumping mechanic where hitting
jump button as fast as possible while walking forward towards an obstacle will throw player character
up. As far as I understand, this is building up upward momentum.
Note that [JM] and [C3] will not work together - jumping will cancel [C3] while [JM] will not
allow for [C3] to work.
[JM] allows you to reach places where [C3] won't work for various reasons (no straight geometry
planes) but you need at least something under player character's foots to stand on and something
that may be used as standing point in the higher position (window or window's ledge for example).
Unfortunately there is no consistent way to perform [JM] - just mash the jump button and hope it
works.
However, you can try different angles and positions before performing [JM], since in some cases
this yields results more quickly.
[P] Wall
Difficult: easy.
First easy exercise at the starting point[*] that you can perform (1). Walk on the box, then jump
to the storehouse and finally to the wall. Try to walk on the wall at least to the next lower section
without falling (2). If you can run from the start to the end of the wall without delays or falls and
even jumping in the process - you're grasping the flow of the character basic movement.
[*] Edit: I know that starting point selected randomly between this and near the ship, but that's
the place where my character spawned first and the most.
[P] Hut
Difficult: hard.
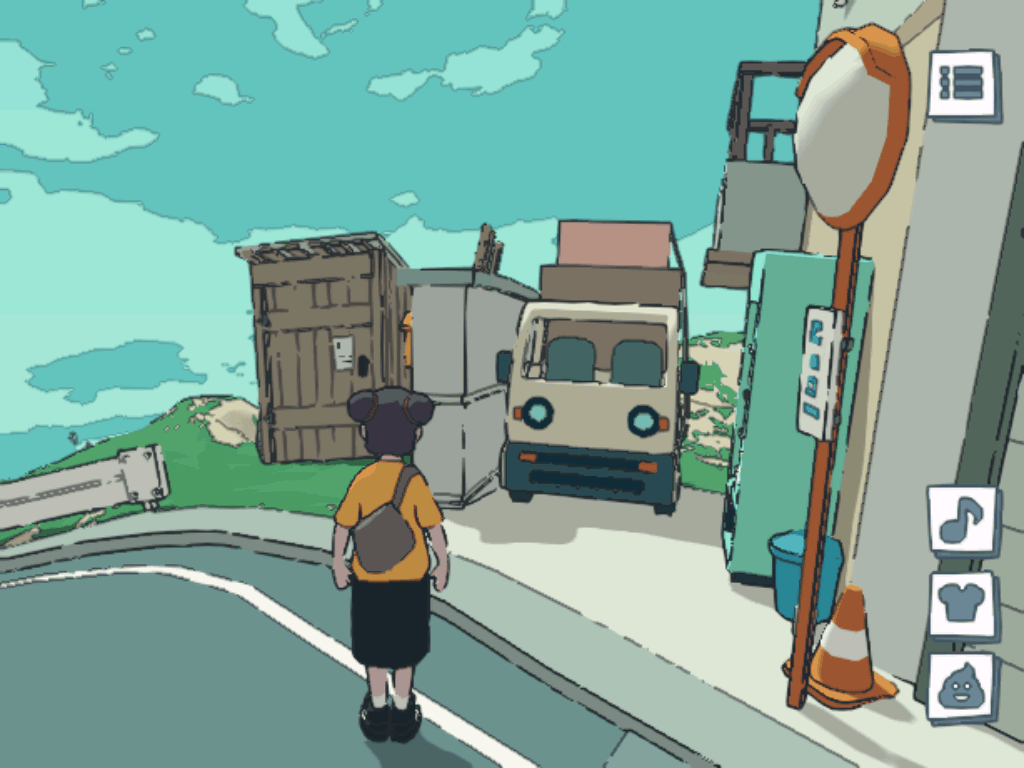
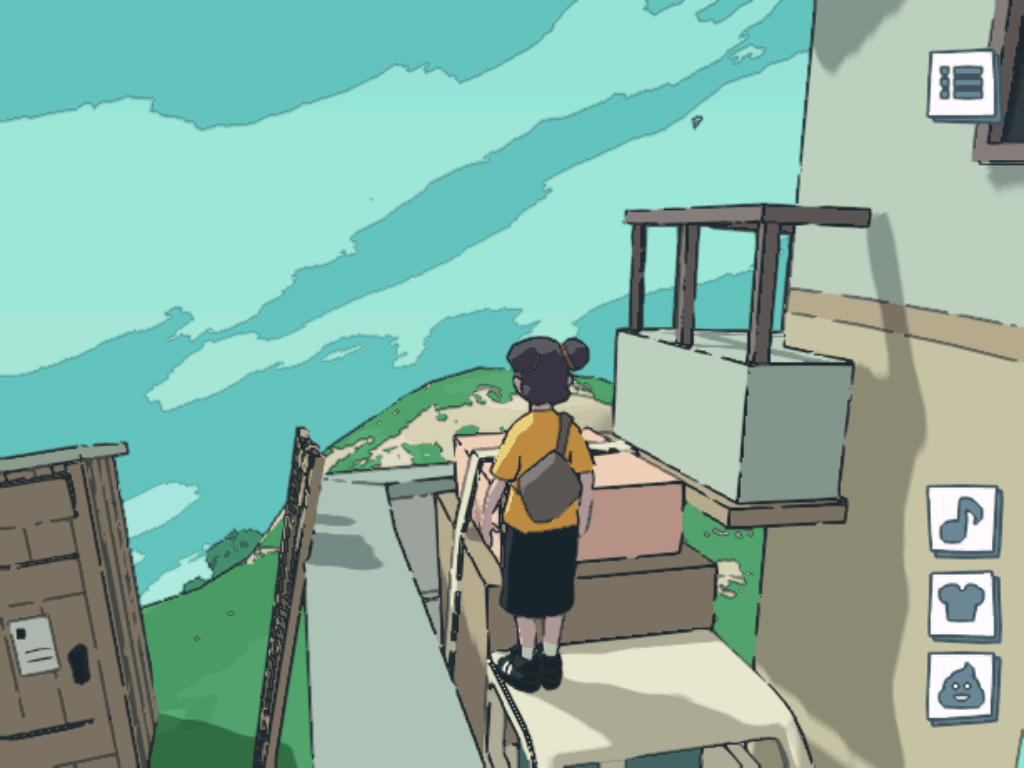
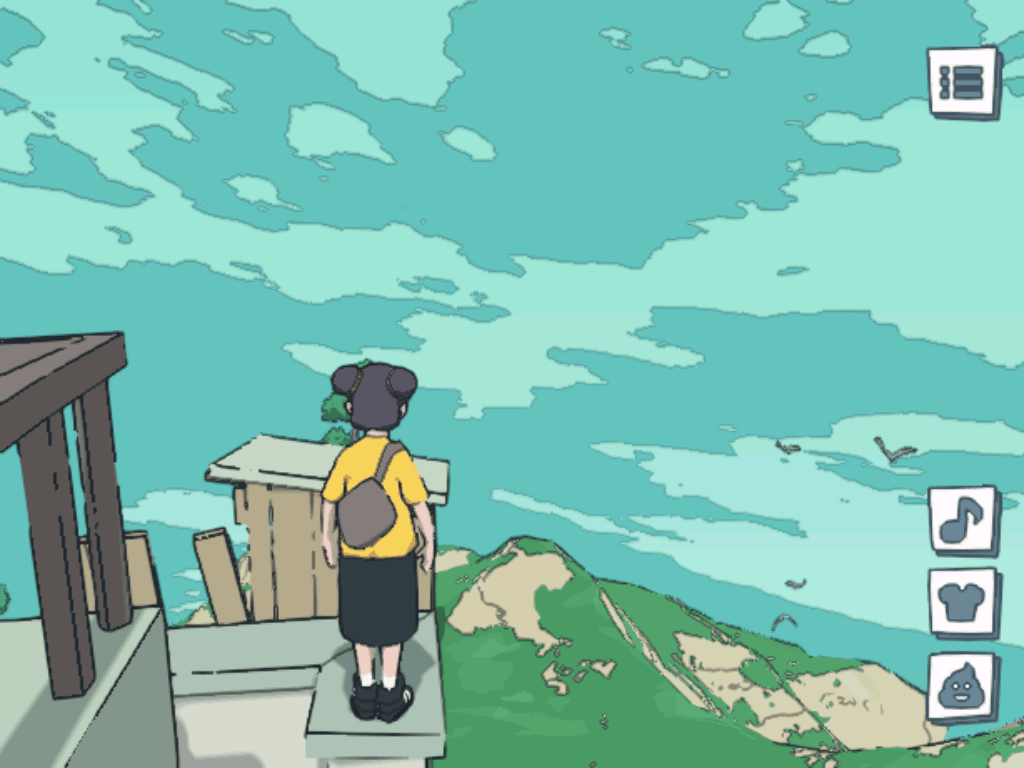
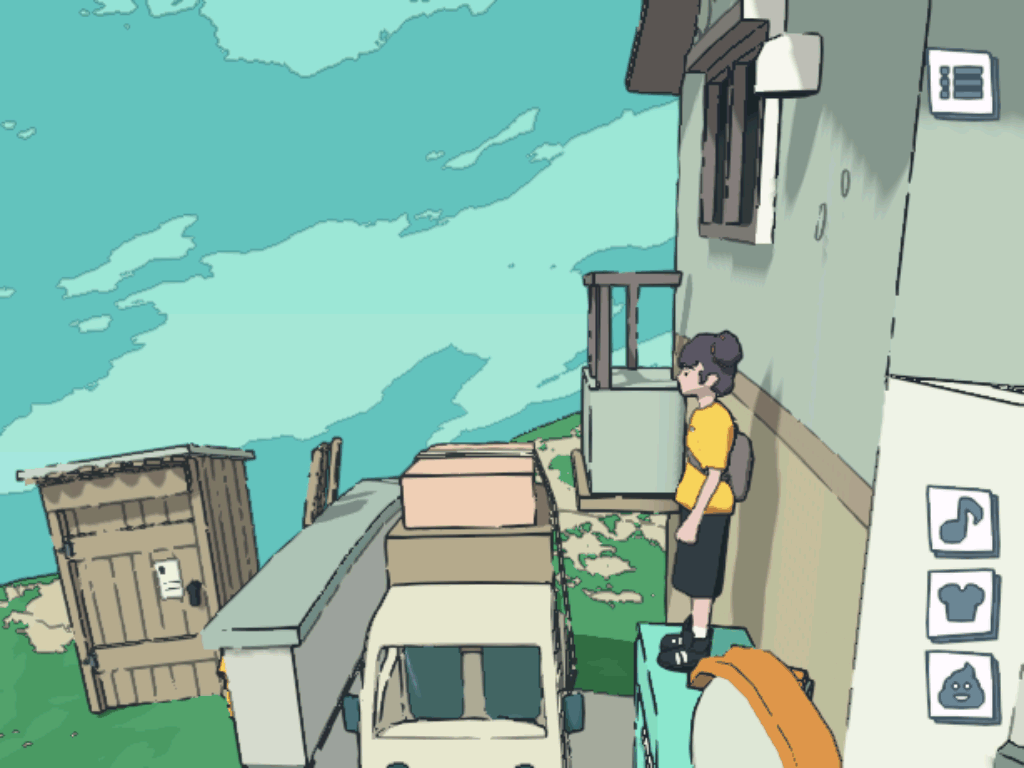
Find the truck at the same location (1). Jump on the truck face (cabin). If you stuck in jumping
animation keep moving forward and jumping until you reach the top (2). Now jump to the wall and go
to the far corner (3). Take a running jump to the roof hut (4). It's difficult since there is almost
no space to perform a proper running jump. Hint: aim to the lowest corner part of the hut roof.
[P] Roof-1
Difficult: impossible.
Start the same position on the wall as for the hut (1). Then jump to the balcony and keep jumping
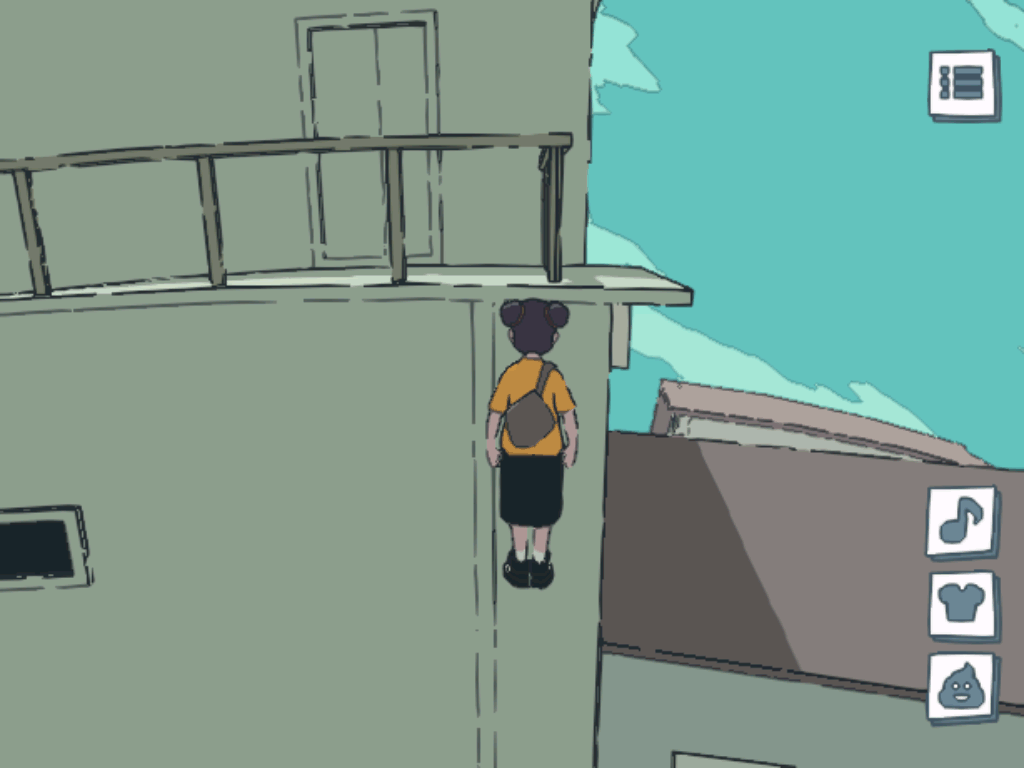
and moving forward to jump over the handrails (2). Now for the hardest jump in the game: from balcony
handrails to corner of the air-conditioner block and finally to the roof (3).
I was able to perform this jump only 3 times in all of my many-many-many attempts.
So if you know a consistent and solid way to do it - please contact me and I will credit you for
providing such useful information. Thanks!
Also I want to express my gratitude to the unknown player who at 2026.08.29 was spamming emoji
icons as crazy standing at the top of the house of Roof-2 (you can't reach it by other methods which
instantly gets my attention). I don't know who you are - but thank you for bringing my attention and
showing me the route below to the top of the Roof-1! If you want - please contact me and I will
credit you here properly.
Now push yourself to the second air-conditioner block and use [C3] to climb
it (4). From there perform a jump to the green roof and go to the smallest block here (5). Perform
another [C3] to climb it an go further (6). Yet again [C3] to climb up and position your character
just between two air-conditioner blocks (7). Now is the tricky part: you need to push yourself
between these two blocks and jump at the same time. If you fail you'll just climb both of these
blocks and can't reach the roof (it's too high to jump from there). You need the game to throw you
higher to the roof (8). From there you can descend to the balcony at left or probably jump to the top
of the house of Roof-2 below (I'm not sure it's possible since I wasn't able to do that in my few
attempts).
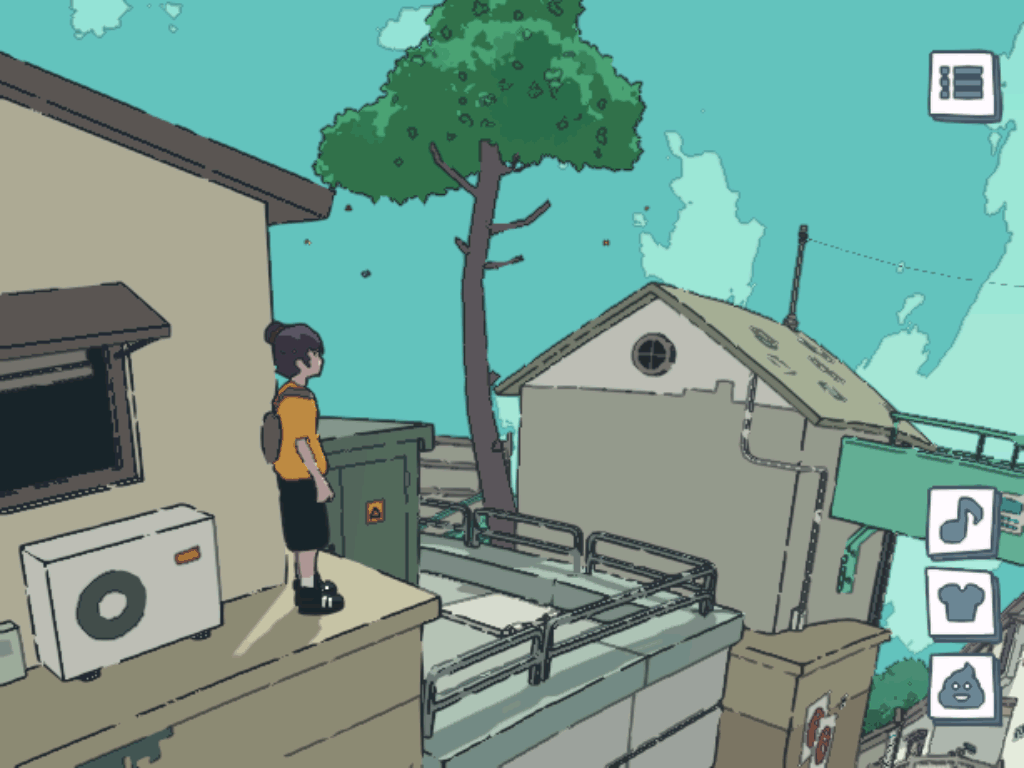
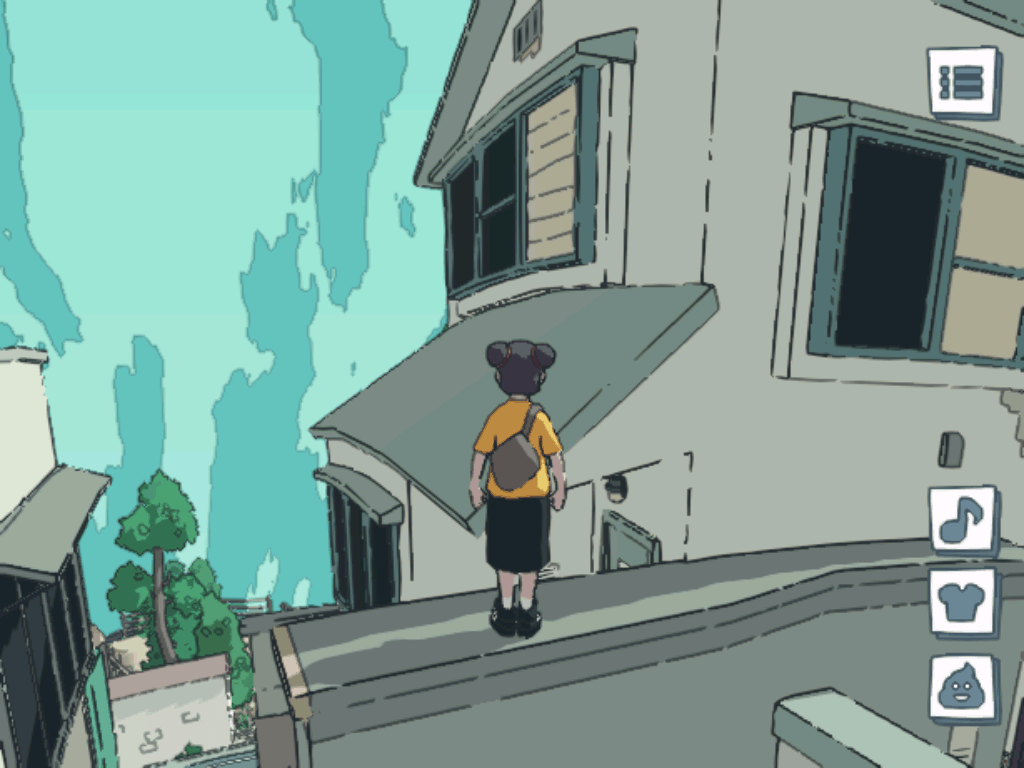
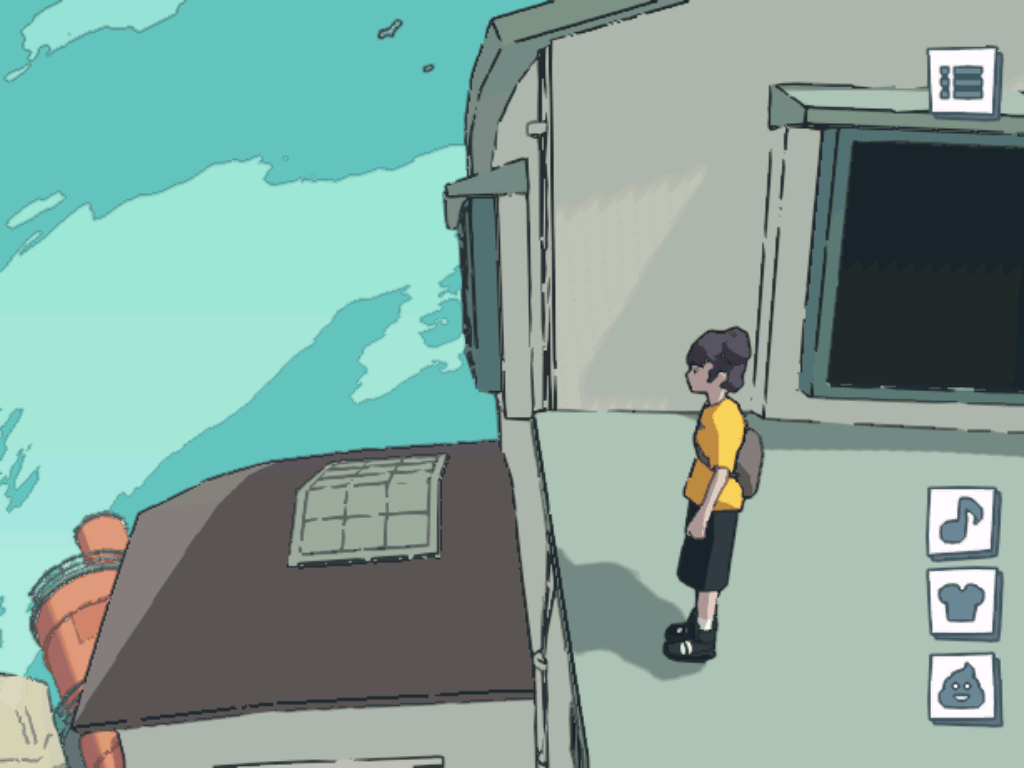
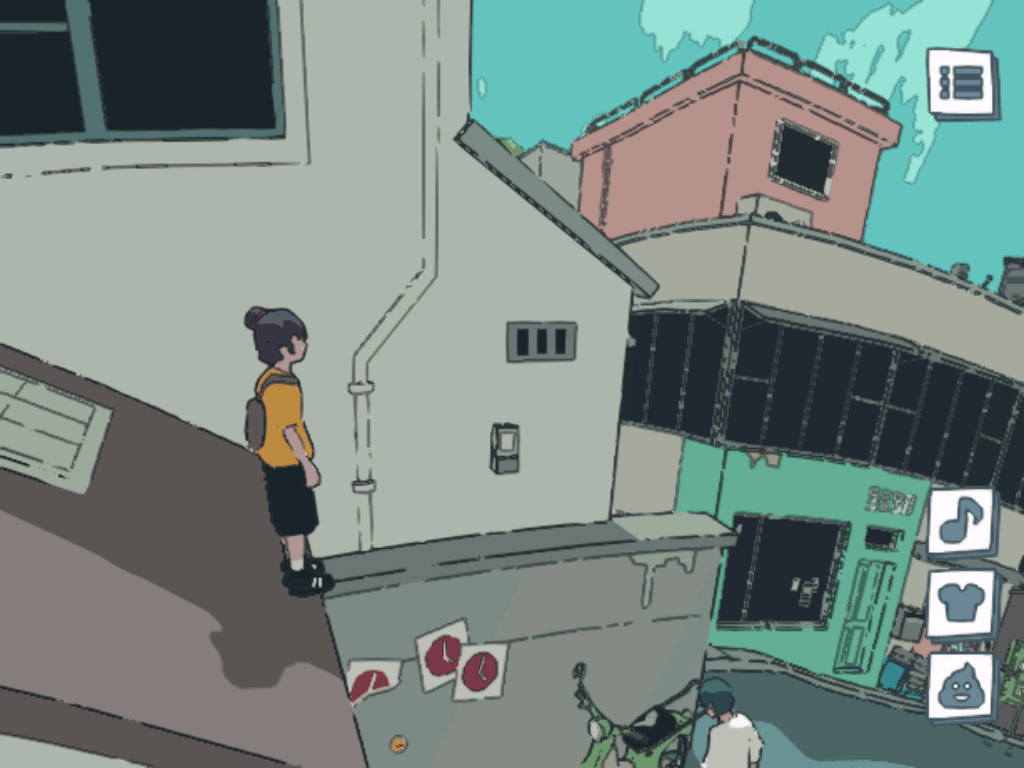
[P] Roof-2
Difficult: medium.
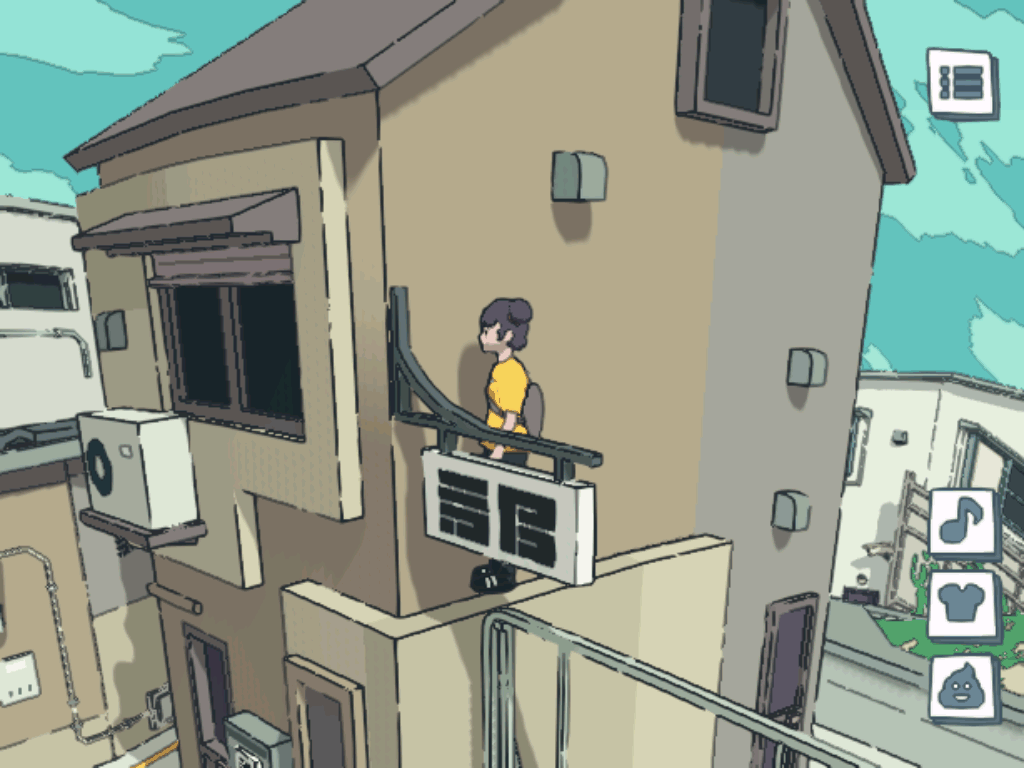
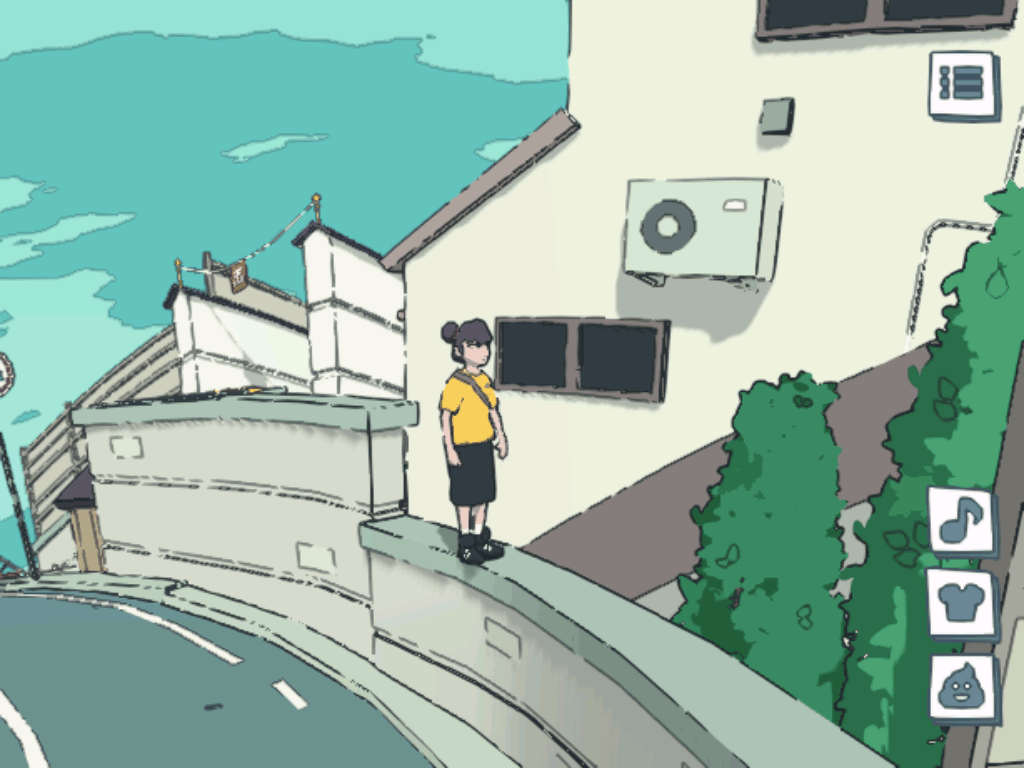
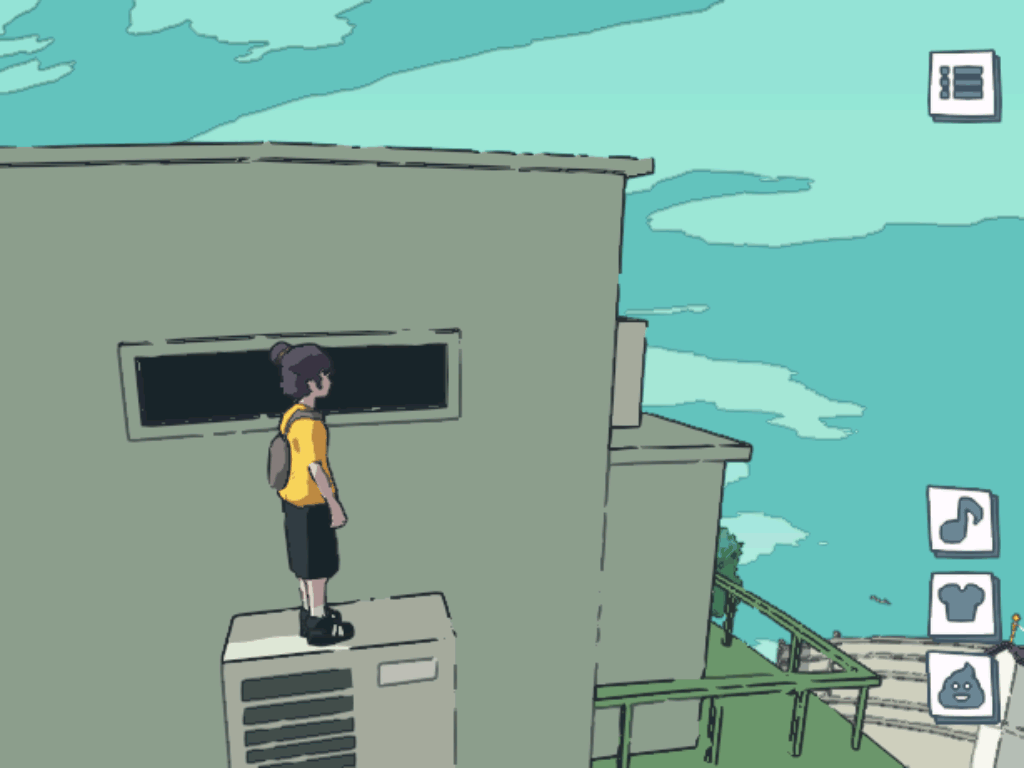
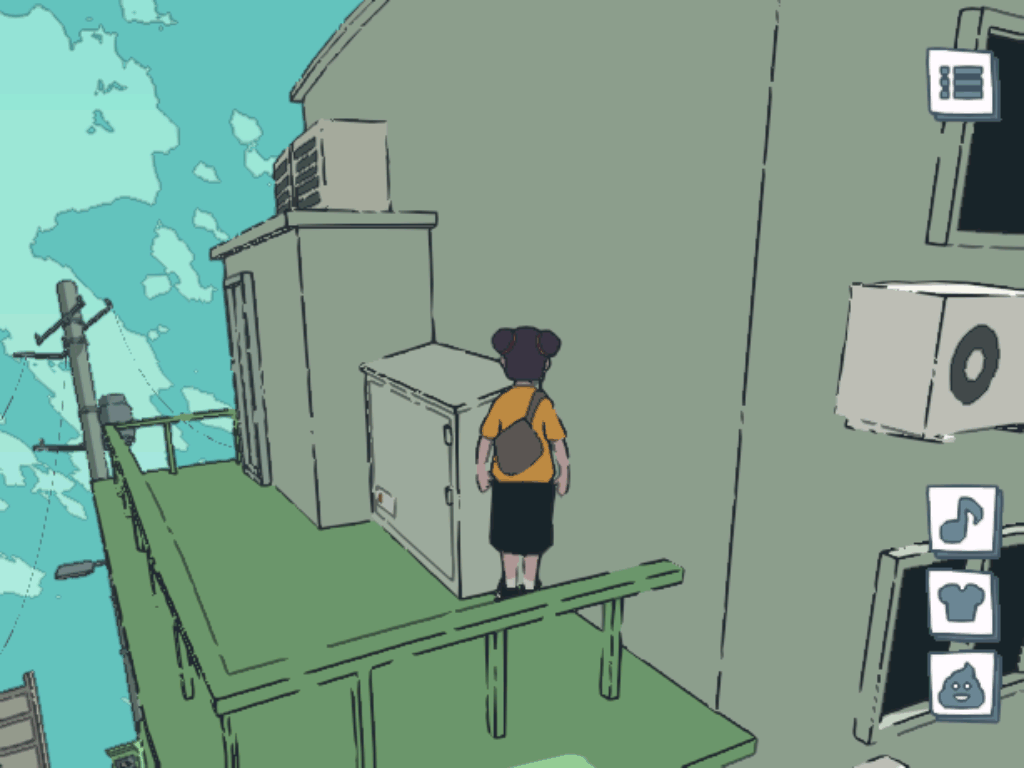
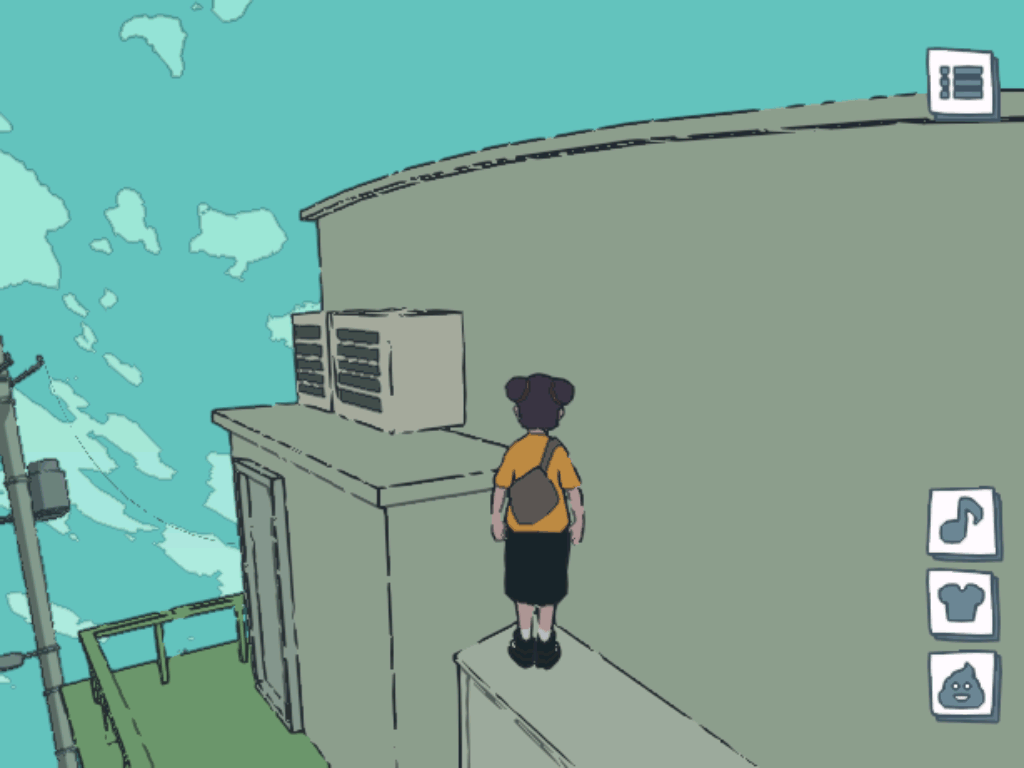
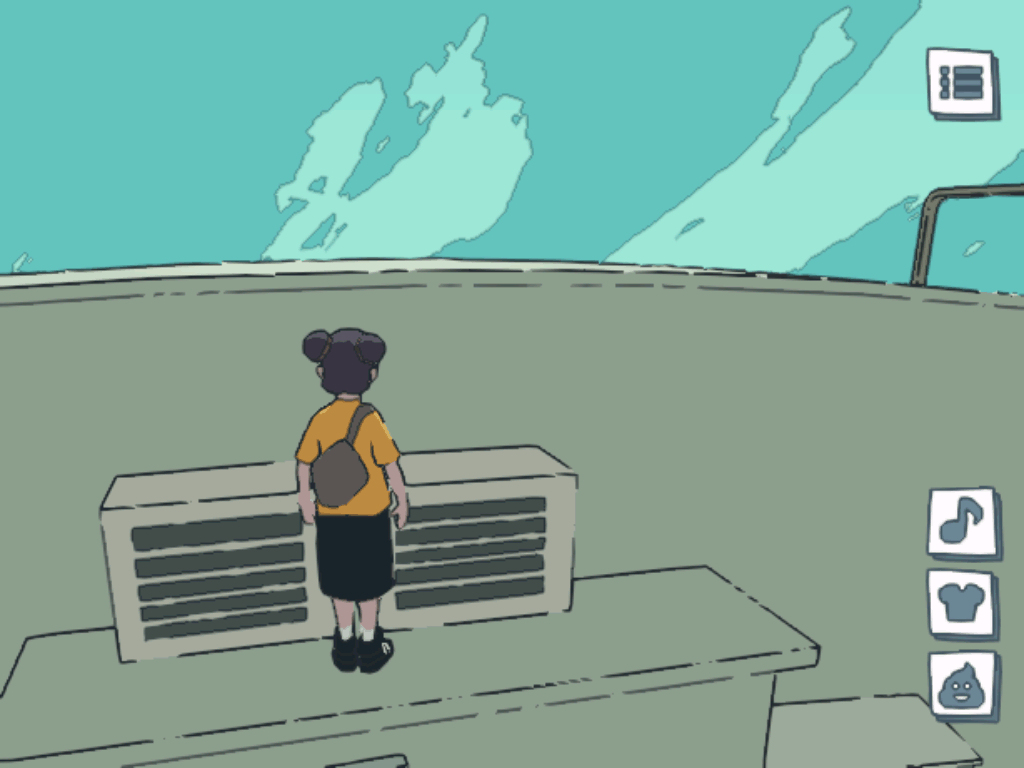
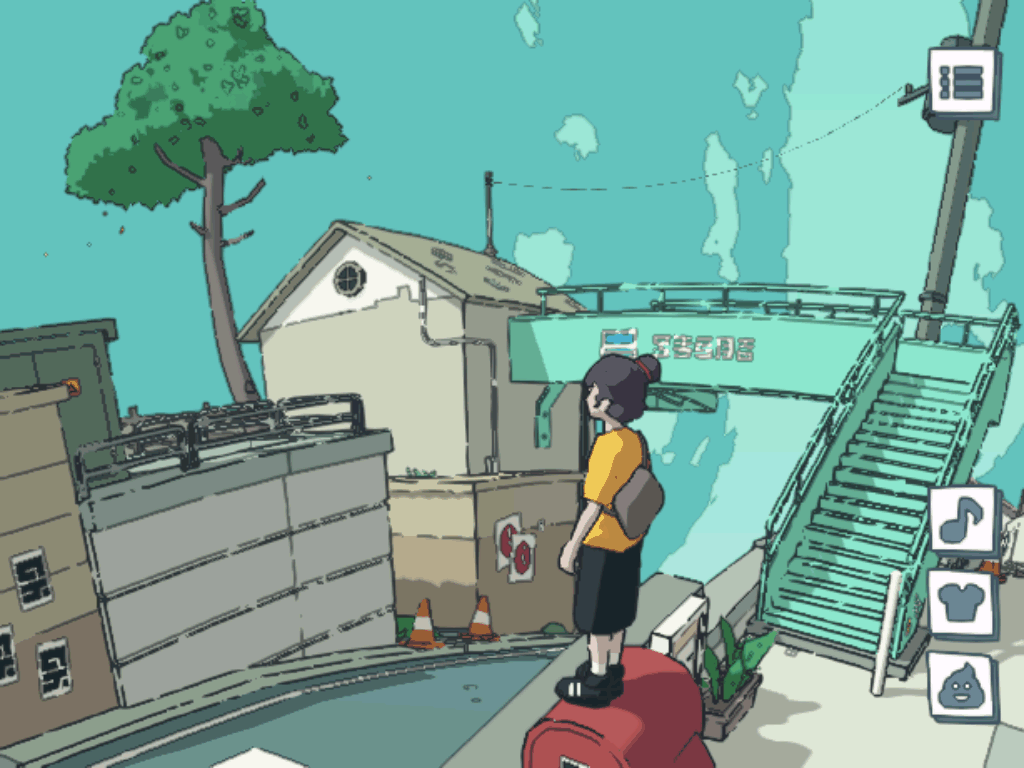
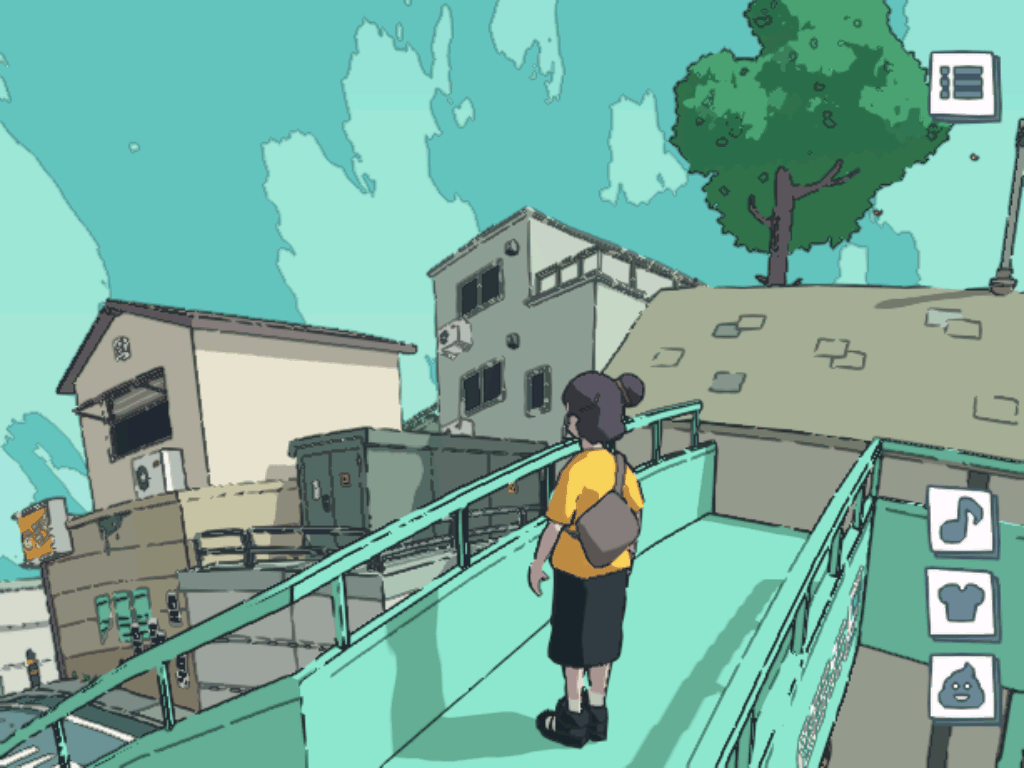
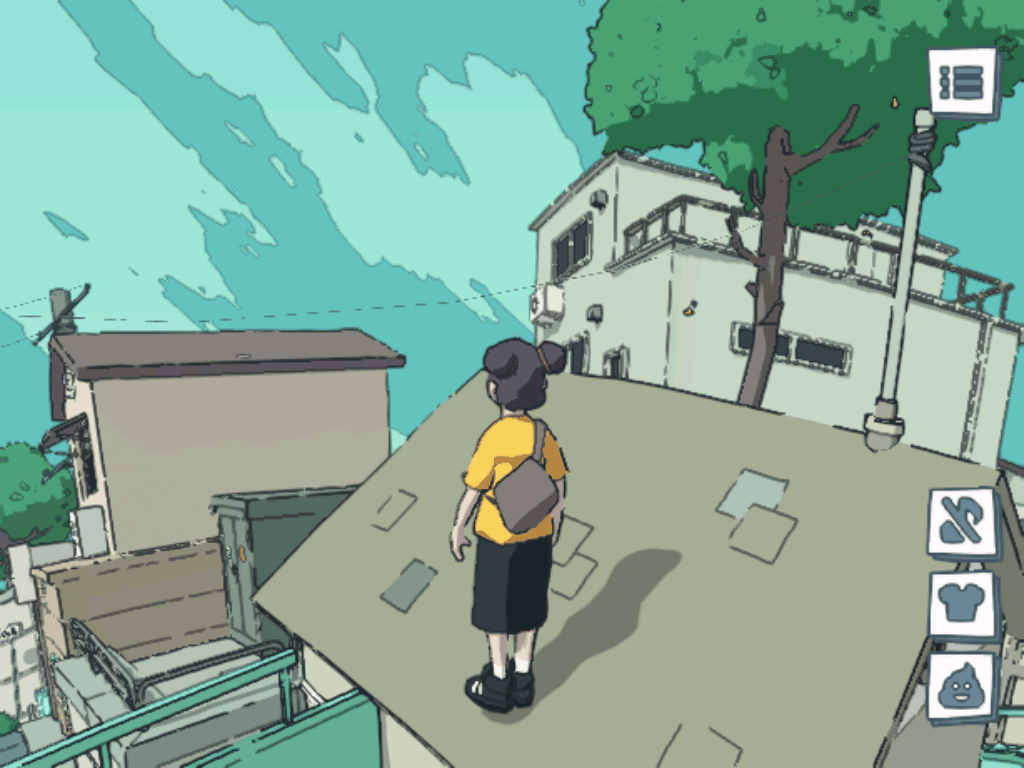
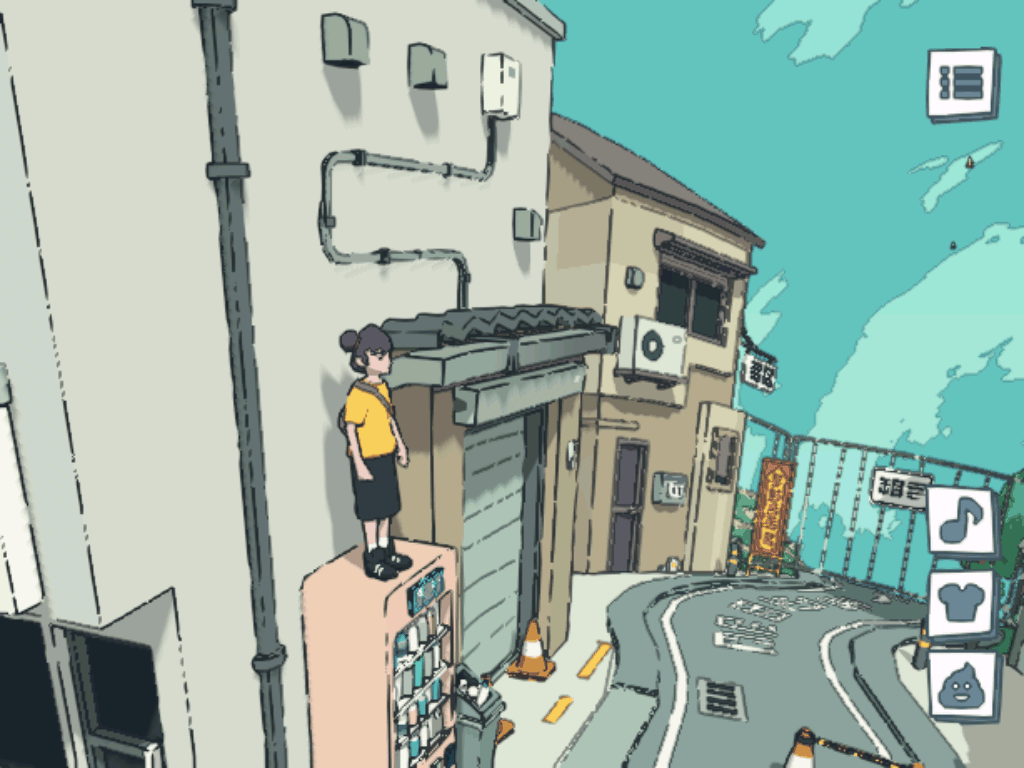
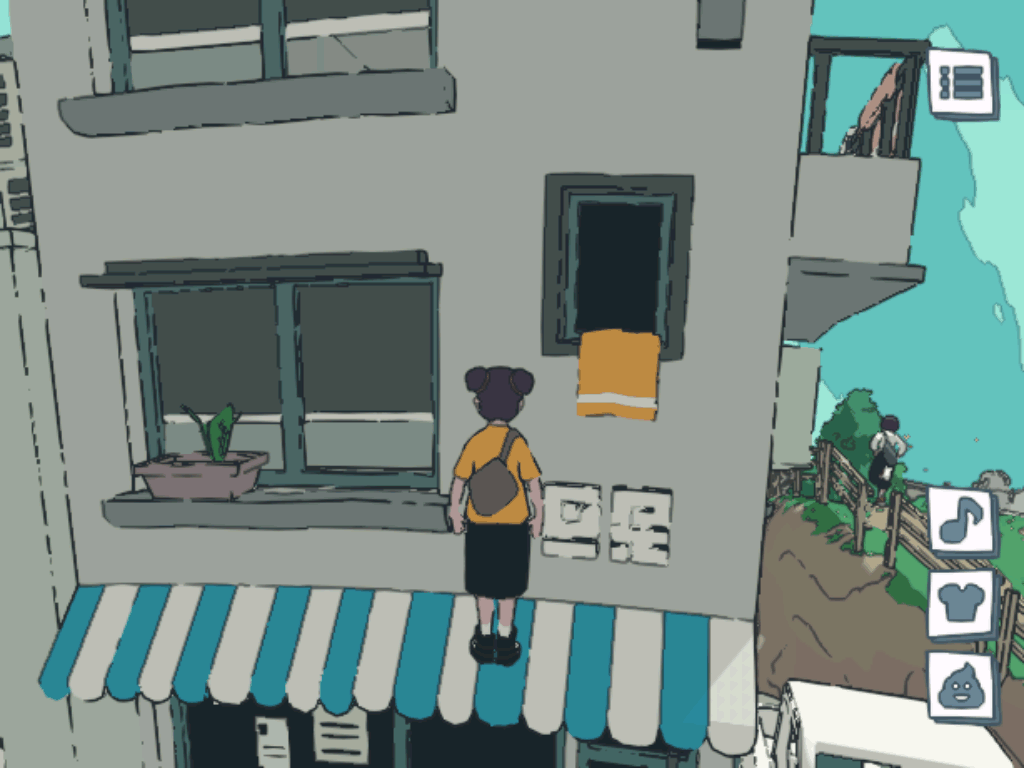
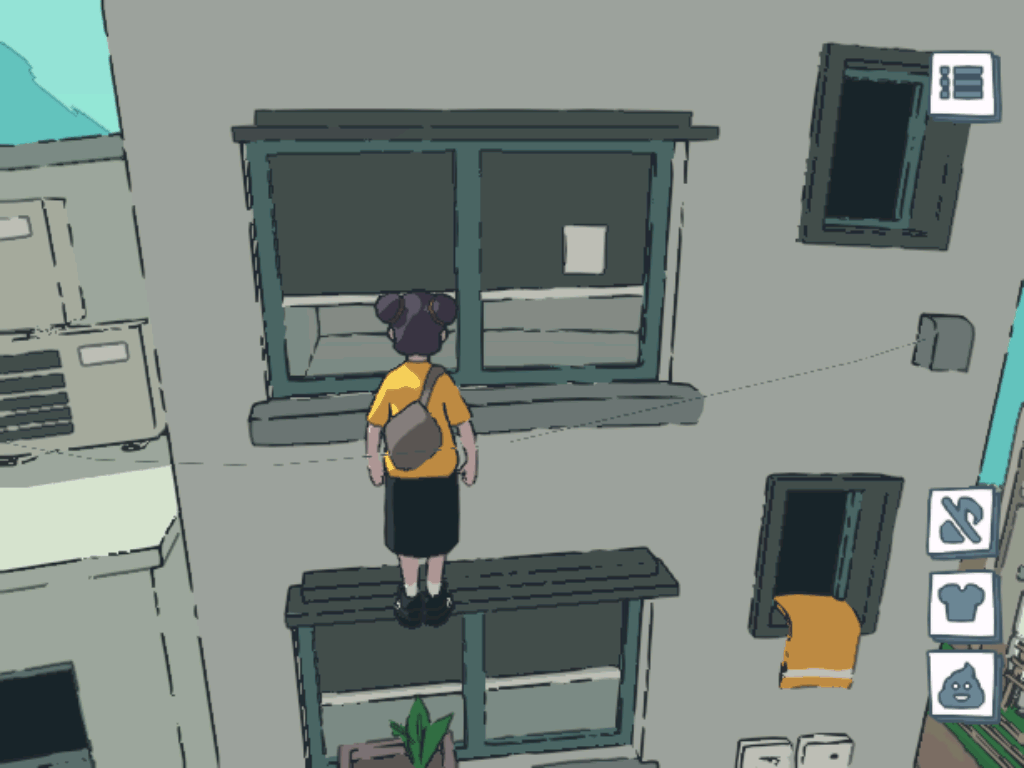
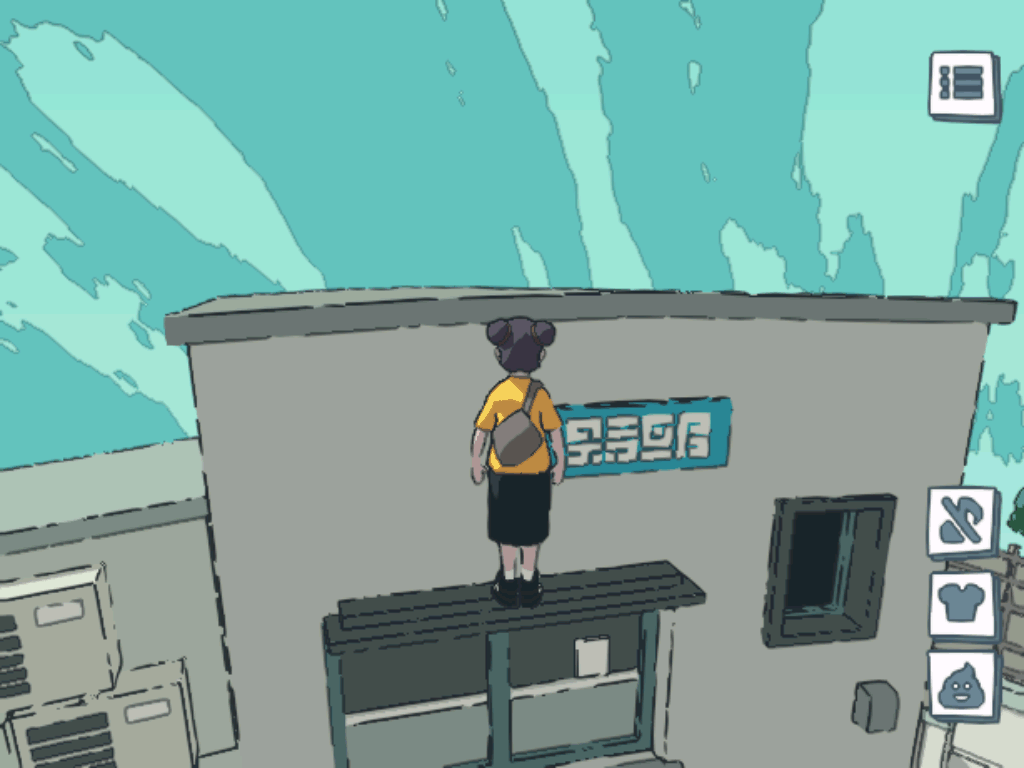
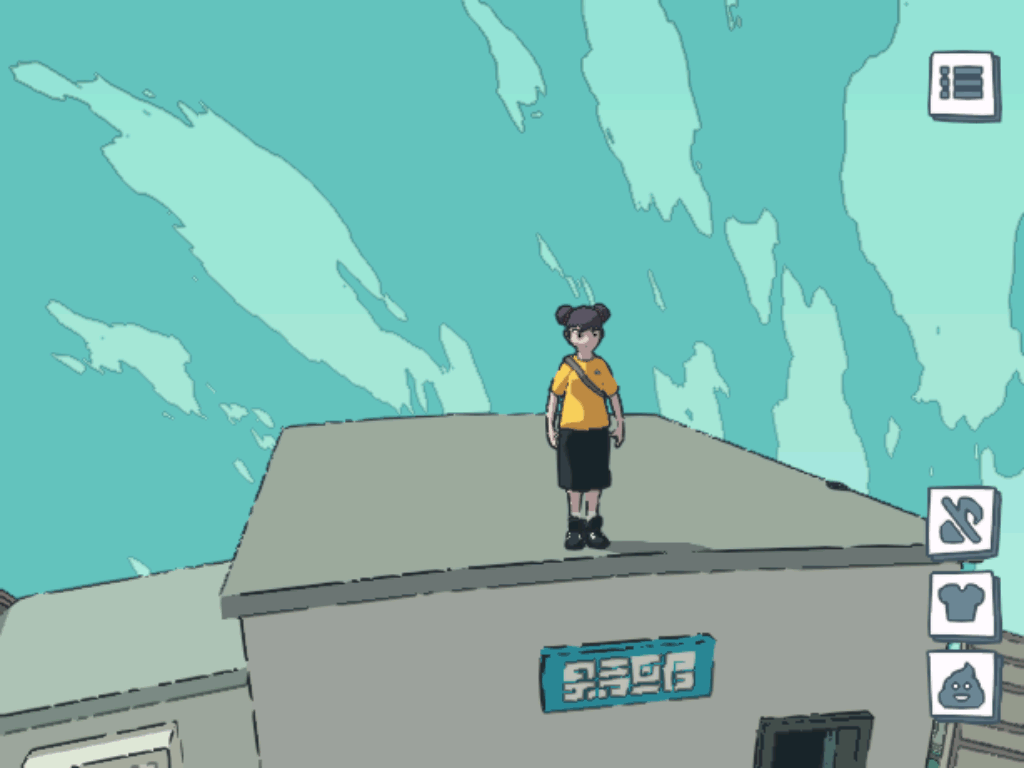
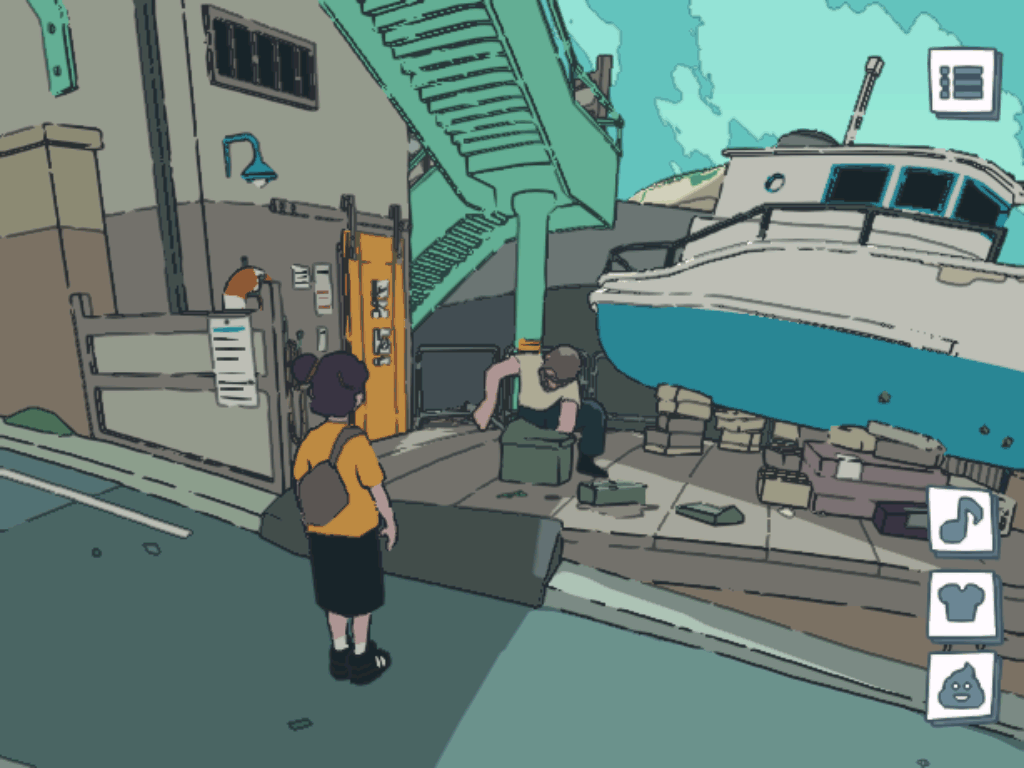
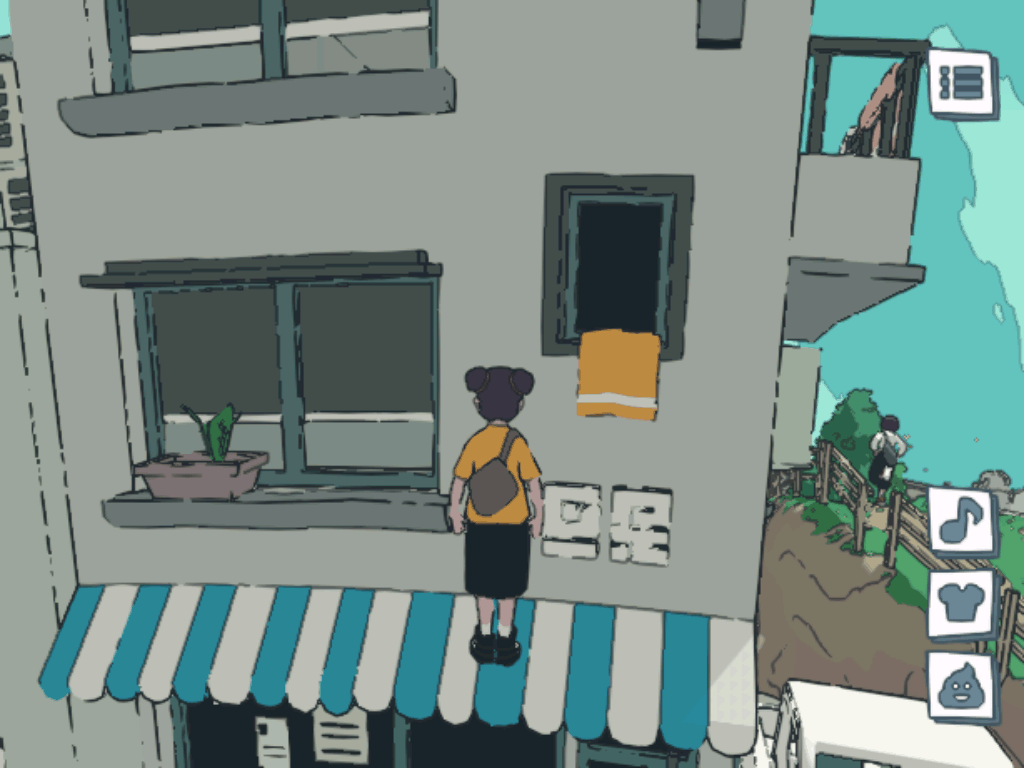
I'm standing on the mail box on the first screen only for better view (1). Go to the overpass (2).
Then jump to the roof at the end of it (3). From that roof perform a running jump (keep jumping and
moving forward to jump over the handrails) to the roof below (4). Now you need to jump on the handrails
and then on the parapet (5). Carefully (you may fall down if you rush) walk around air-conditioner block
(6). Now go around and jump to the transformer unit at the back (7). If you're already confident with
your skills you can directly jump to it from the spot where you reach the parapet.
[P] Roof-3
Difficult: medium.
Go to the backyard from the square, you can check Roof-4 below to find where it is (1).
Jump on the boxes at right, then on the dumpster, from there to the wall at right and to the wall that
higher and walk to the side of the roof (2). Note that the next jump from the roof side will be a lot
easier that the jump from the roof front. Now jump to the sloping roof but be careful since you may
slip and fall, go to the other end (3). Now you can jump to the roof with window directly or jump to
the parapet below and from there to the roof with window (4). If you descend to the parapet keep
jumping and moving forward to jump on the roof (you may need a few attempts for that).
[P] Roof-3-1
Difficult: medium.
Same as Roof-3 but different path this time.
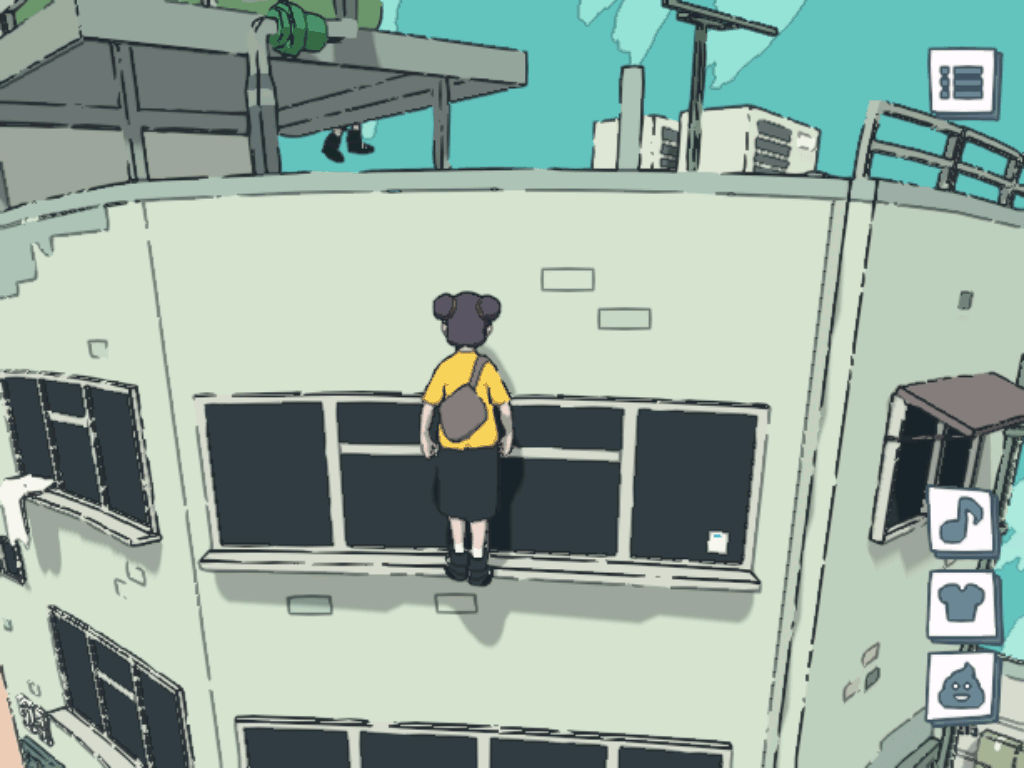
After jump from the wall to the roof go to the windows (1). Now perform [JM] to climb the windows
ledge (2). Keep jumping until you're reach the top (3). If you're lucky enough the game may push you
from the roof to the top instantly.
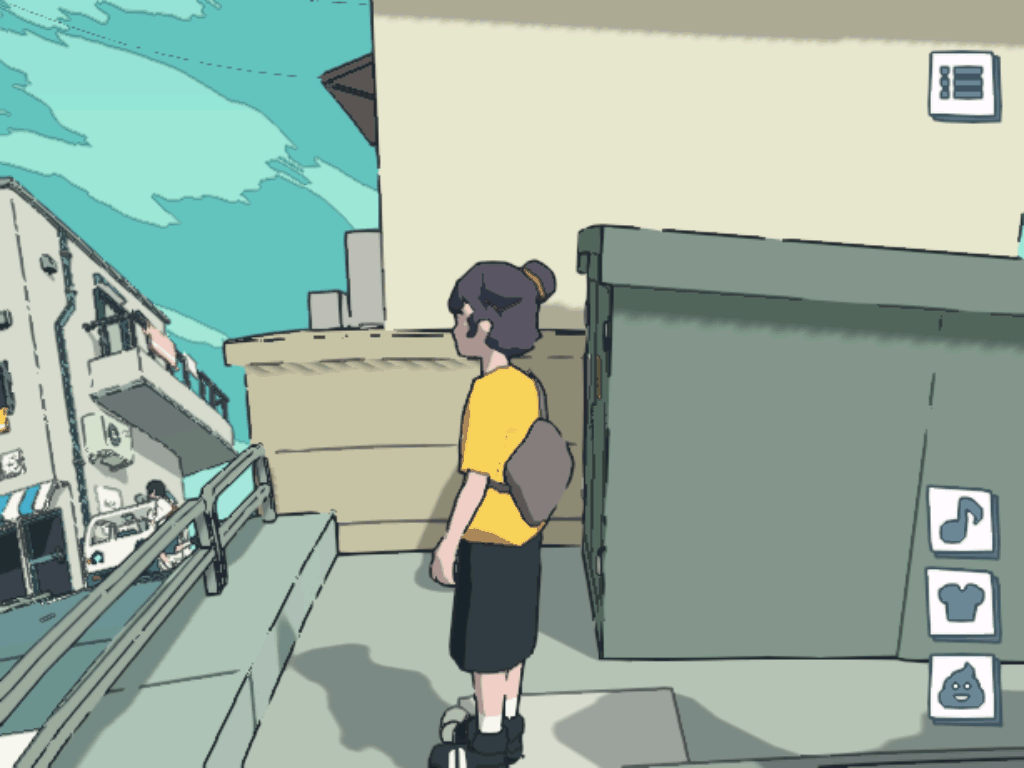
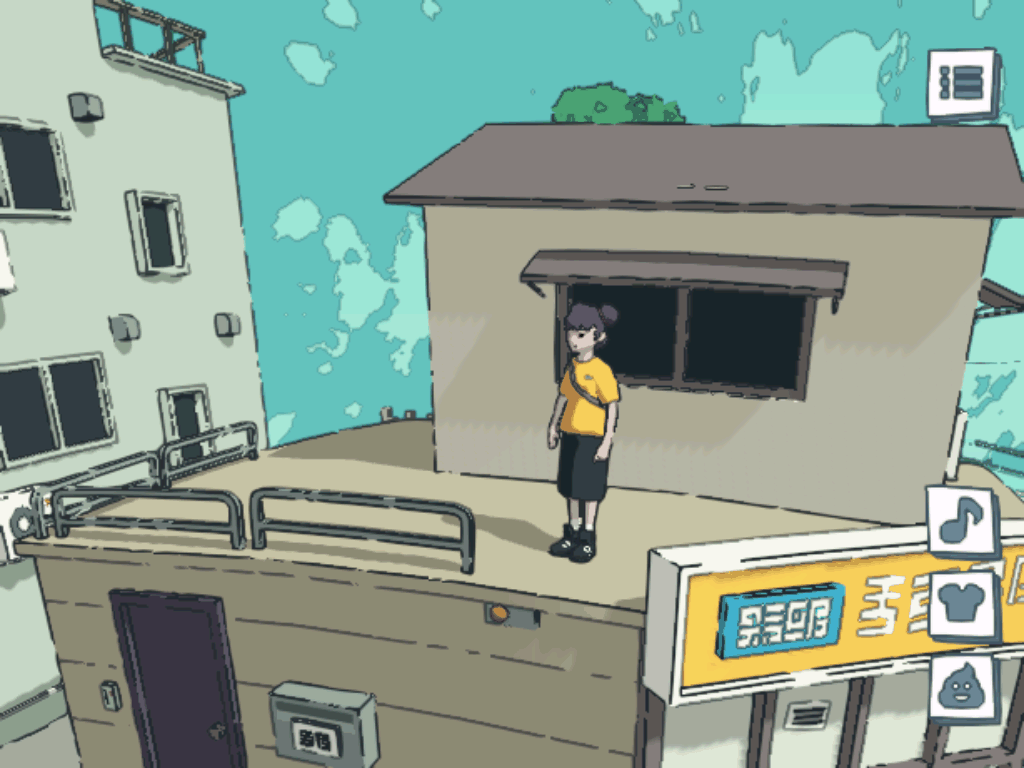
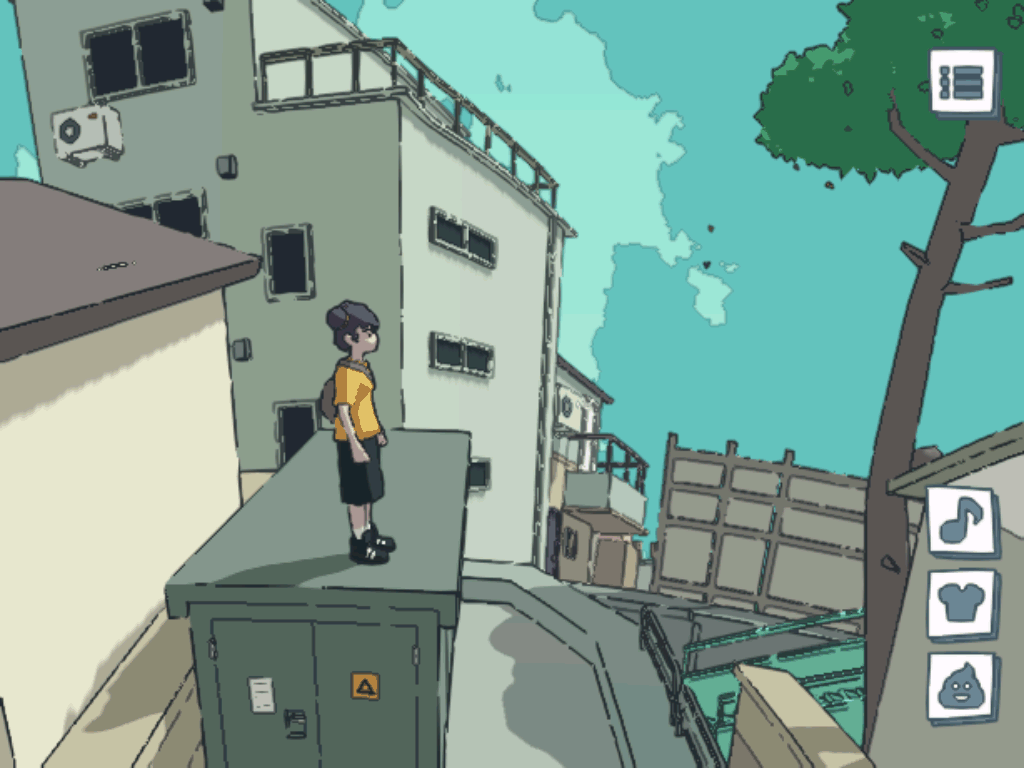
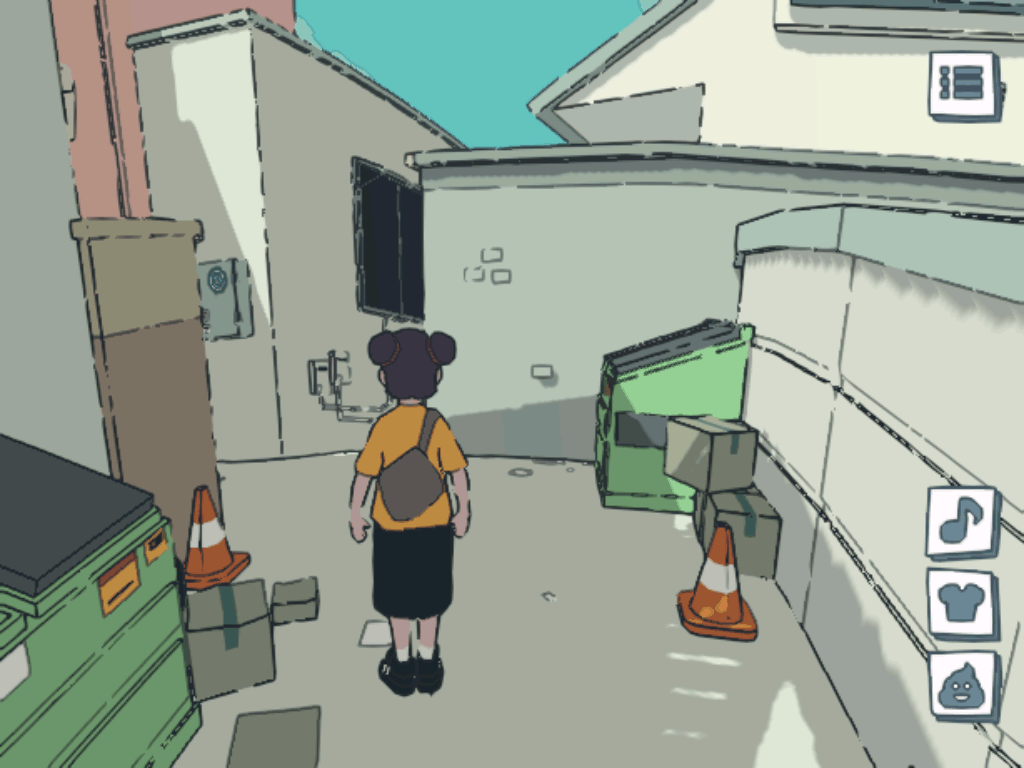
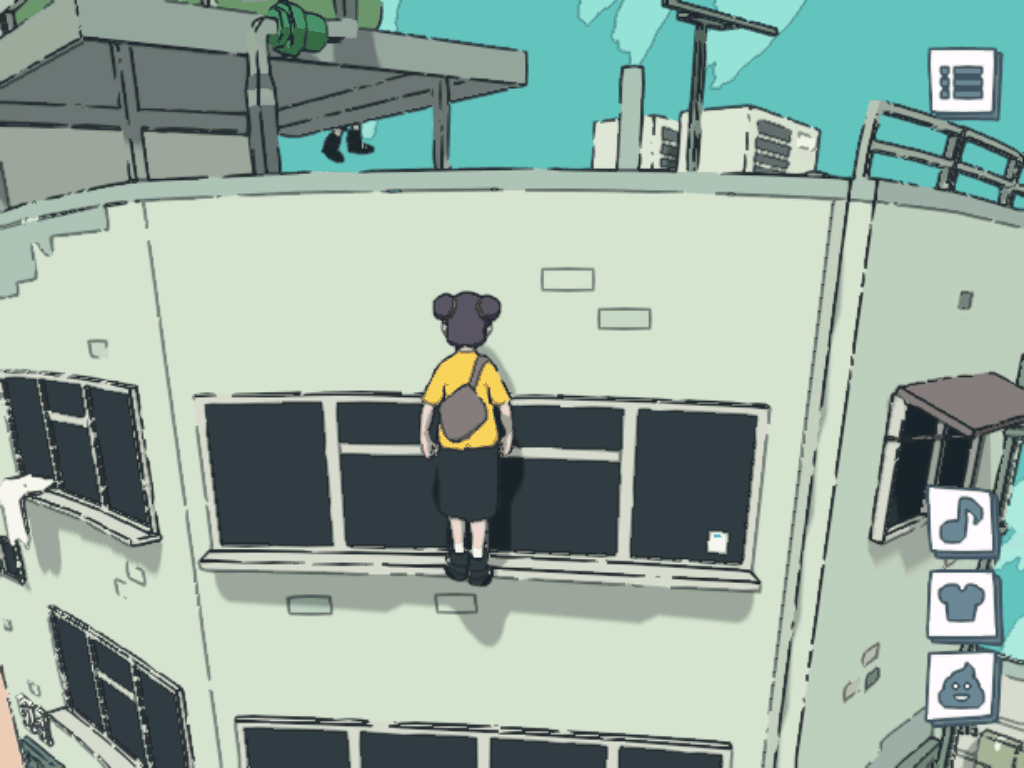
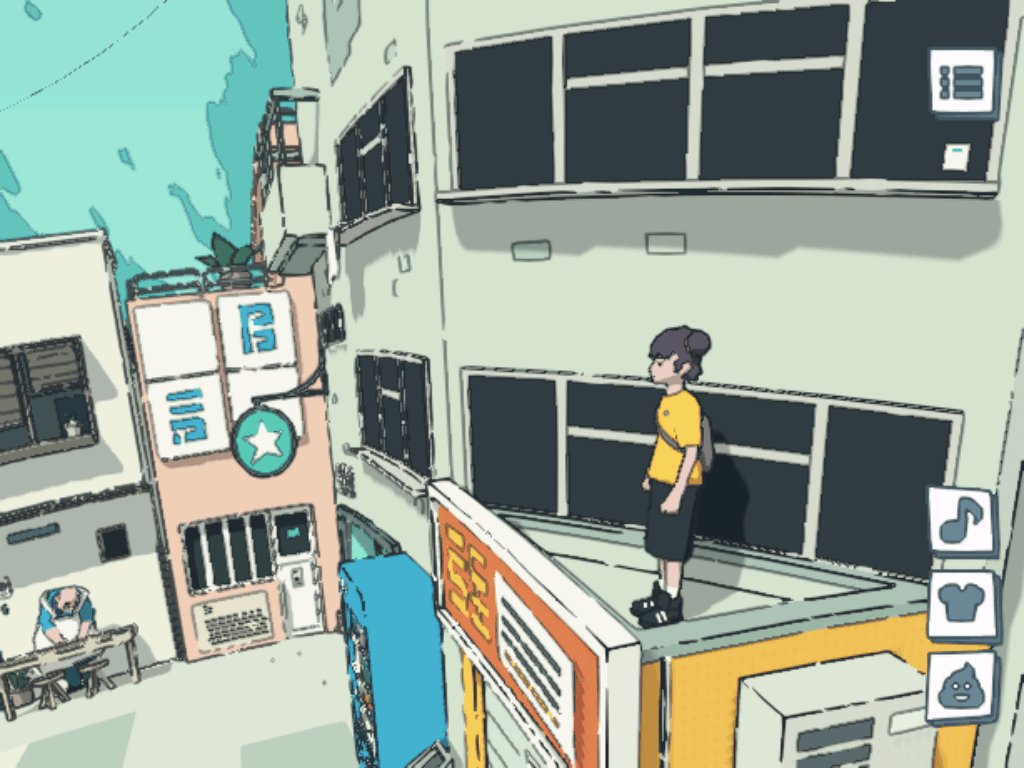
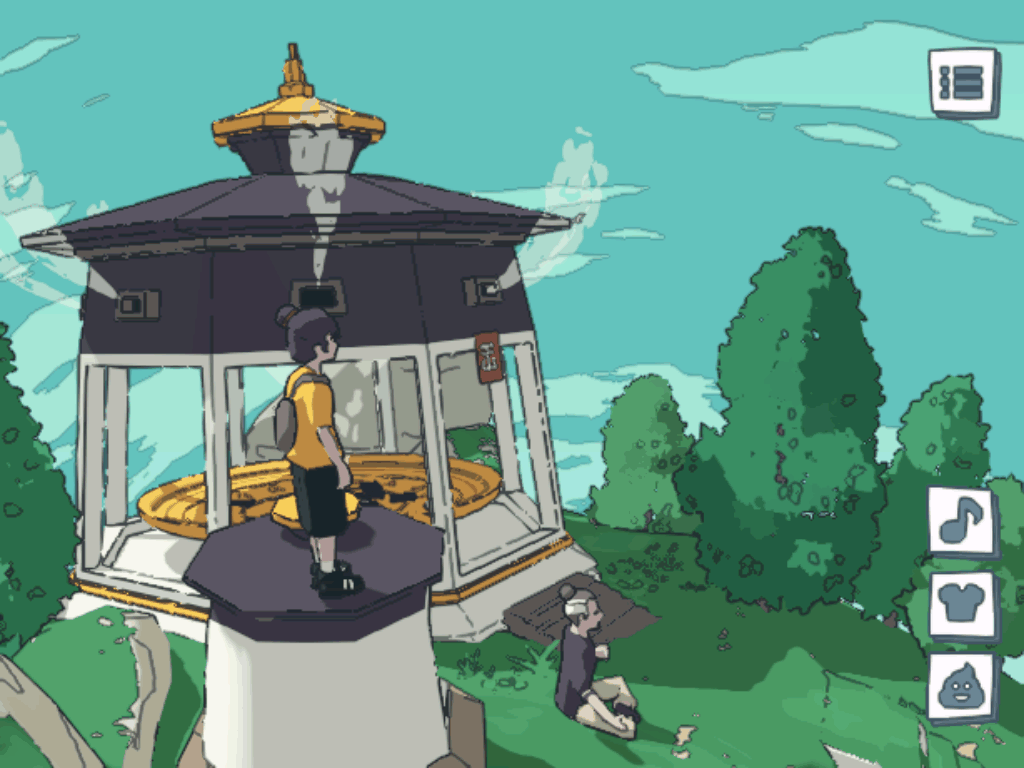
[P] Roof-4 (secret Easter egg)
Difficult: easy.
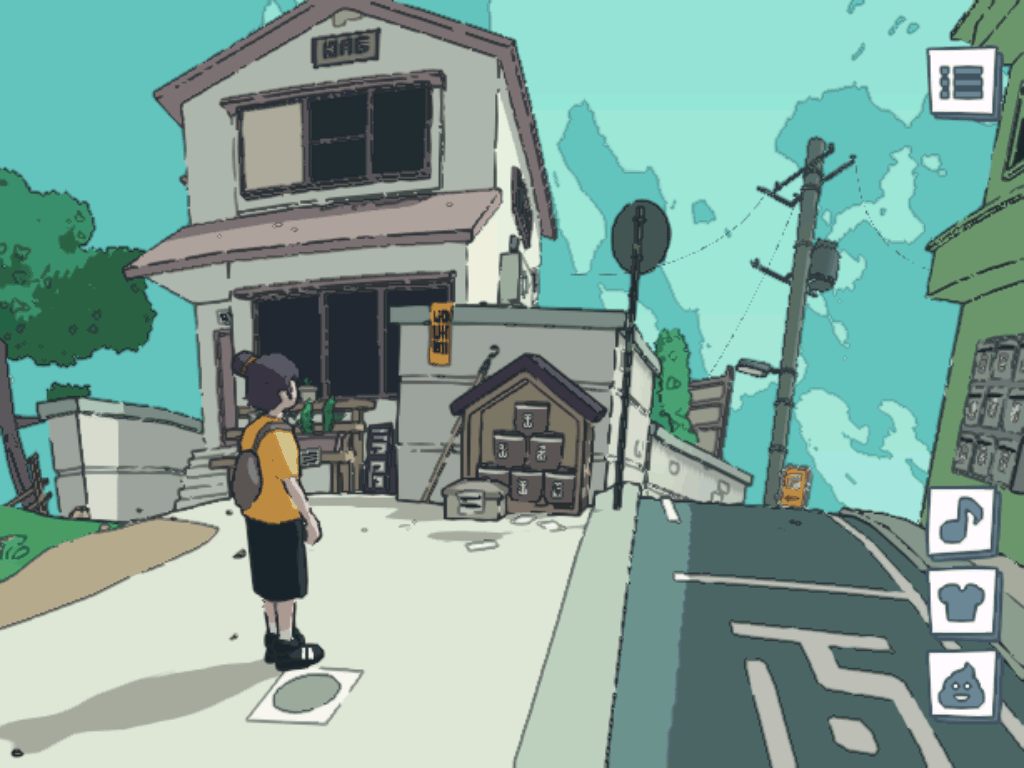
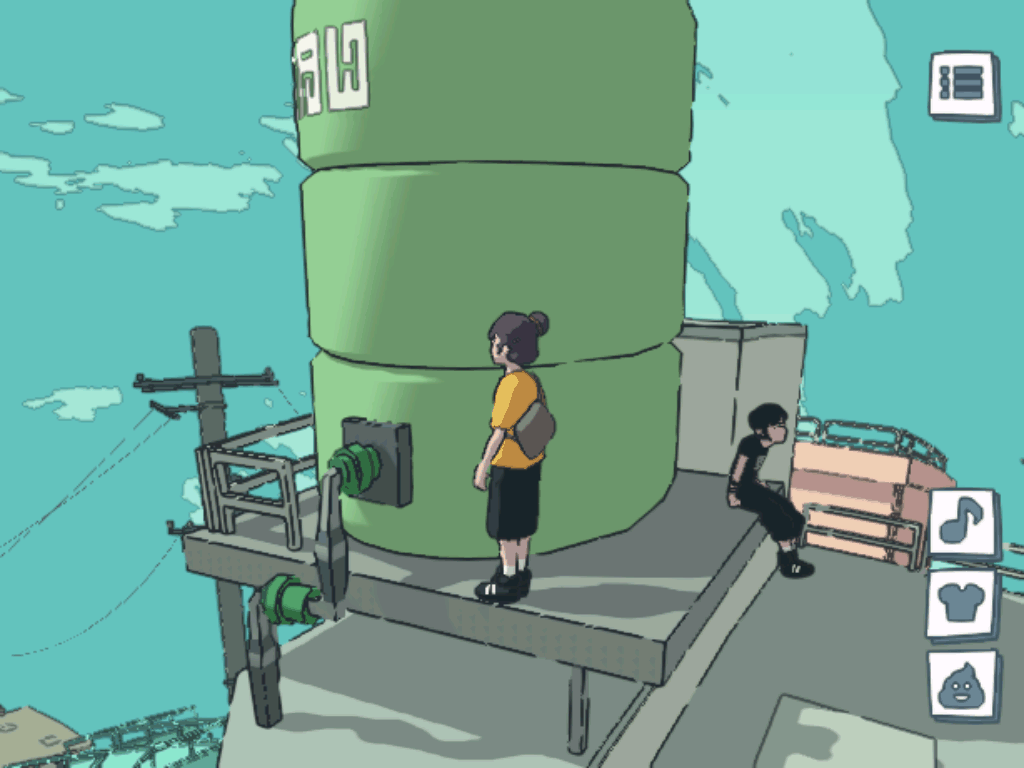
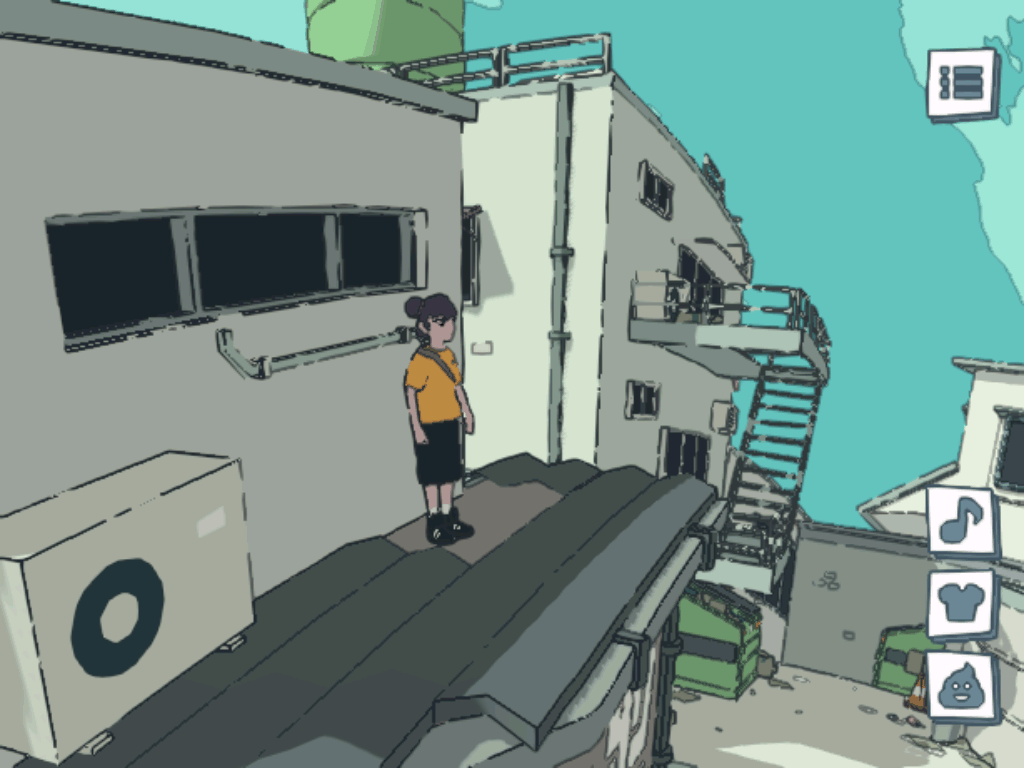
Go to the square (1). Walk between buildings to the backyard (2). Jump to the boxes at right,
then to the dumpster (3). Now jump to the fire-escape, climb it to the top and jump to the air-conditioner
block from the box below (4). Jump on the ledge, walk to the opposite side, jump to another air-conditioner
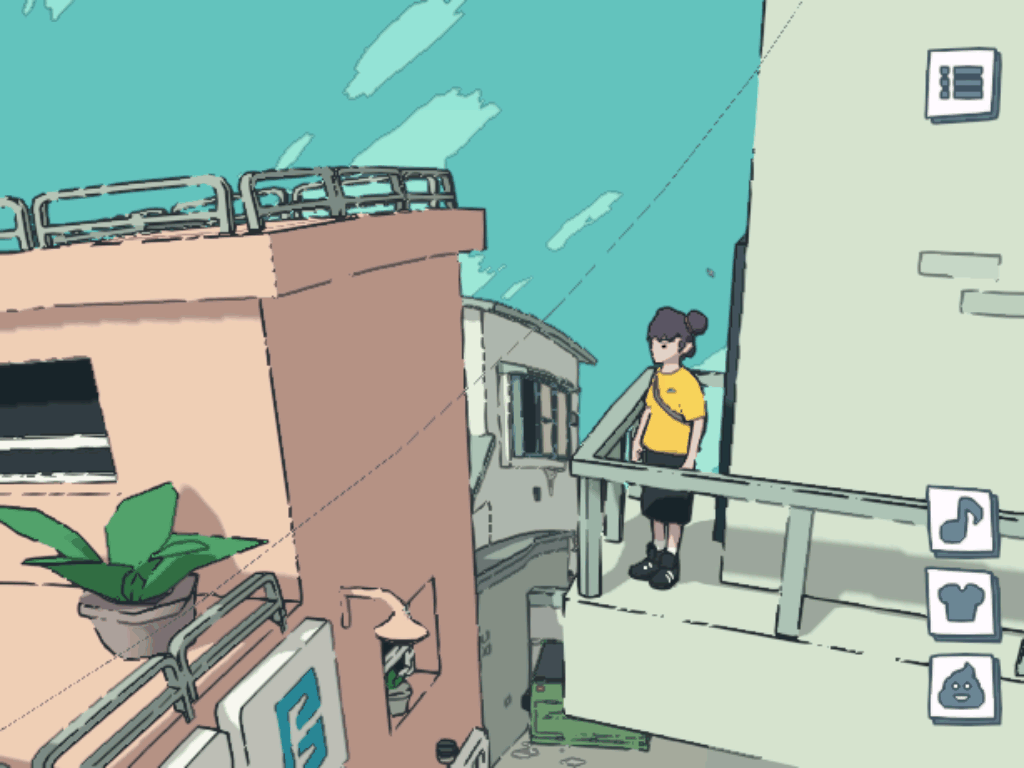
block and from there on the roof (5). You can listen to the [Hacker Girl] who's sitting there if you
wish (that's why I mark this location as "secret Easter egg").
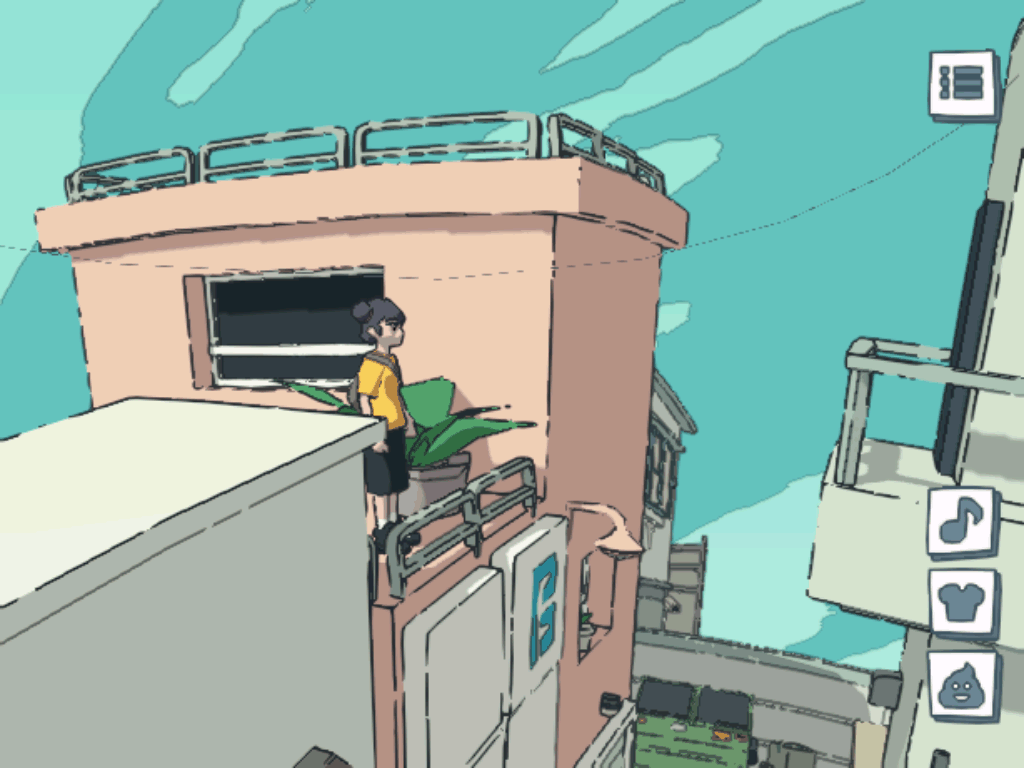
Now there is the two ways to climb higher - hard and easy one. Let's start with the hard one.
Walk to the floor platform at the left side from the [Hacker Girl] (otherwise it's too high for jump
from the ground) and jump to the parapet where she sitting (6). Now keep moving forward and jump over
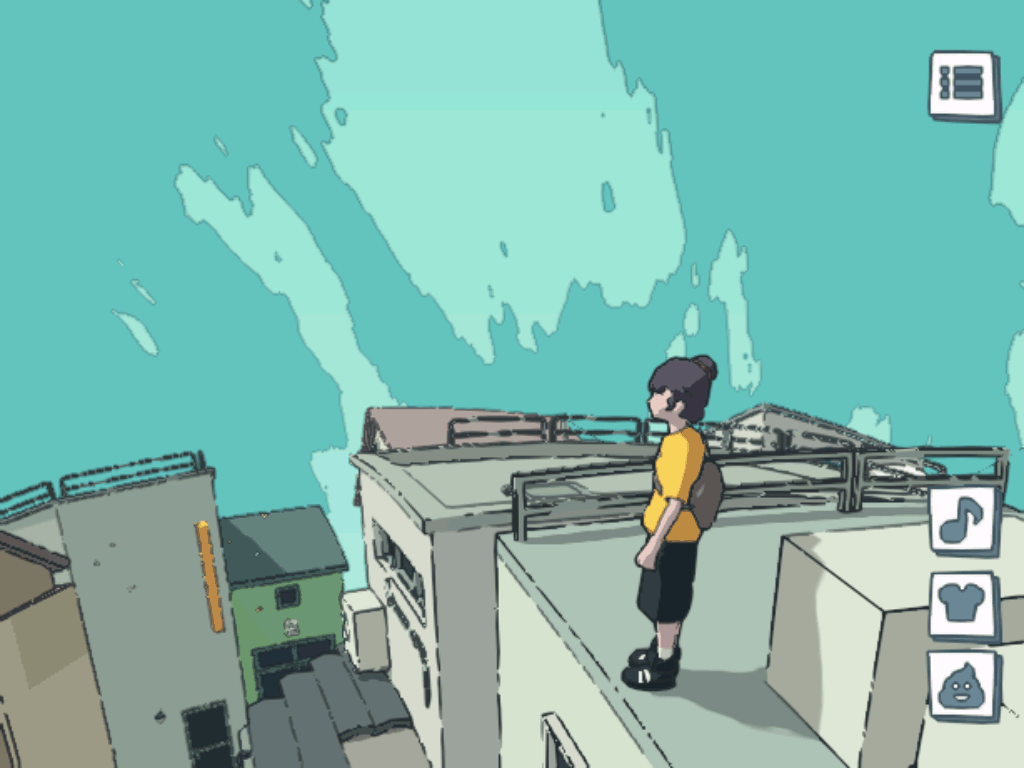
the pipes, it's hard but doable (7). Keep moving and jumping until the vertical pipe where you need
to walk around it at left (be extra careful there since you may easily fall) and jump on the roof
above (8). It's currently unknown if it's possible to jump to the highest part of the pink building
or it's unreachable (9). If you wish you can also descend to the balcony below (10).
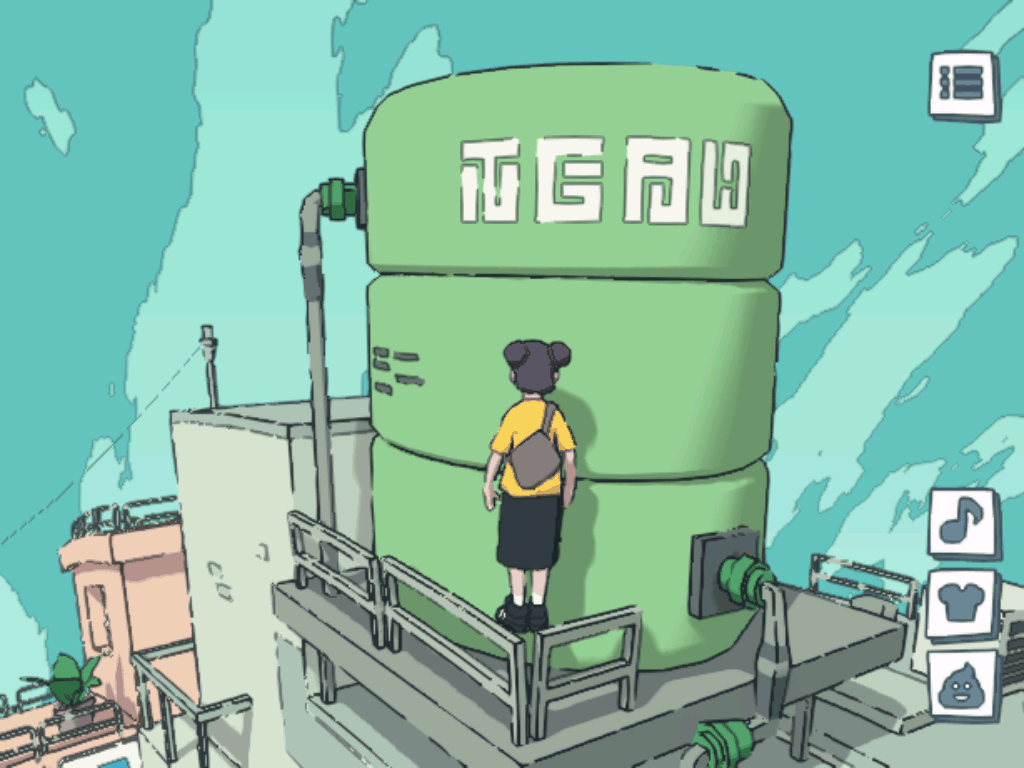
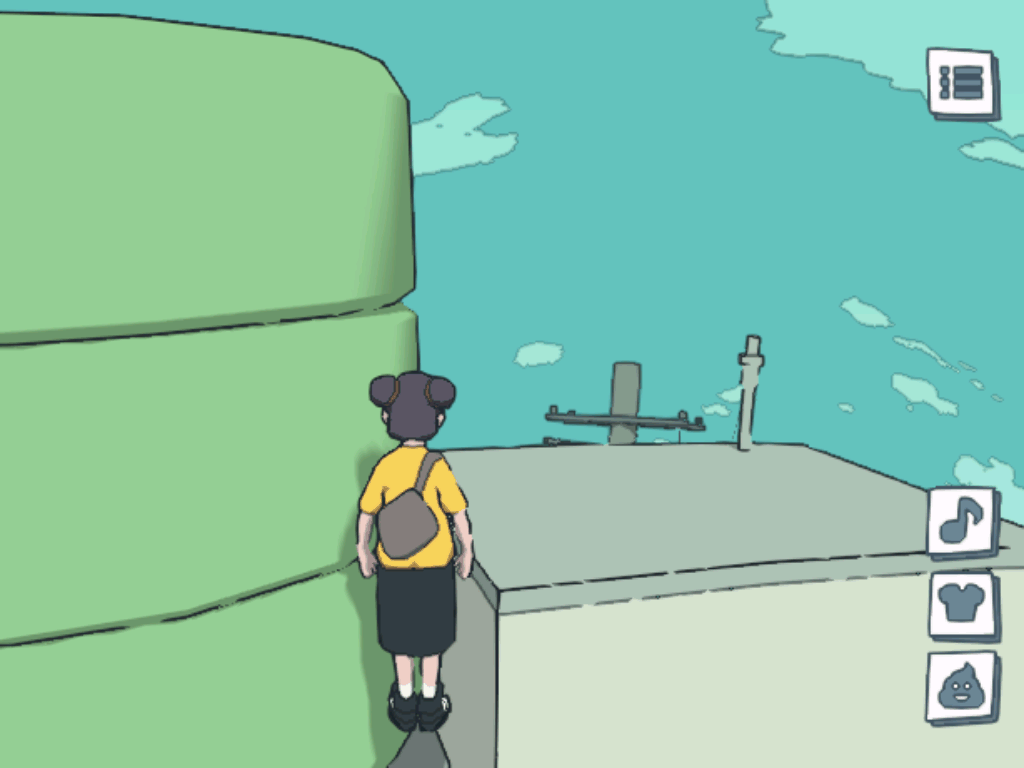
Let's get back to the easier way to get up there with using [C3]. Just jump to the parapet with
the [Hacker Girl], put yourself into the corner between green tank and the wall and move forward
(11). Do not jump - just move. You can jump only if you're already pushed yourself waist-high above
the ground to save some time. If you fall down at some point before reaching the top then make sure
the tank edge matches the character model vertical center - that should be the right angle.
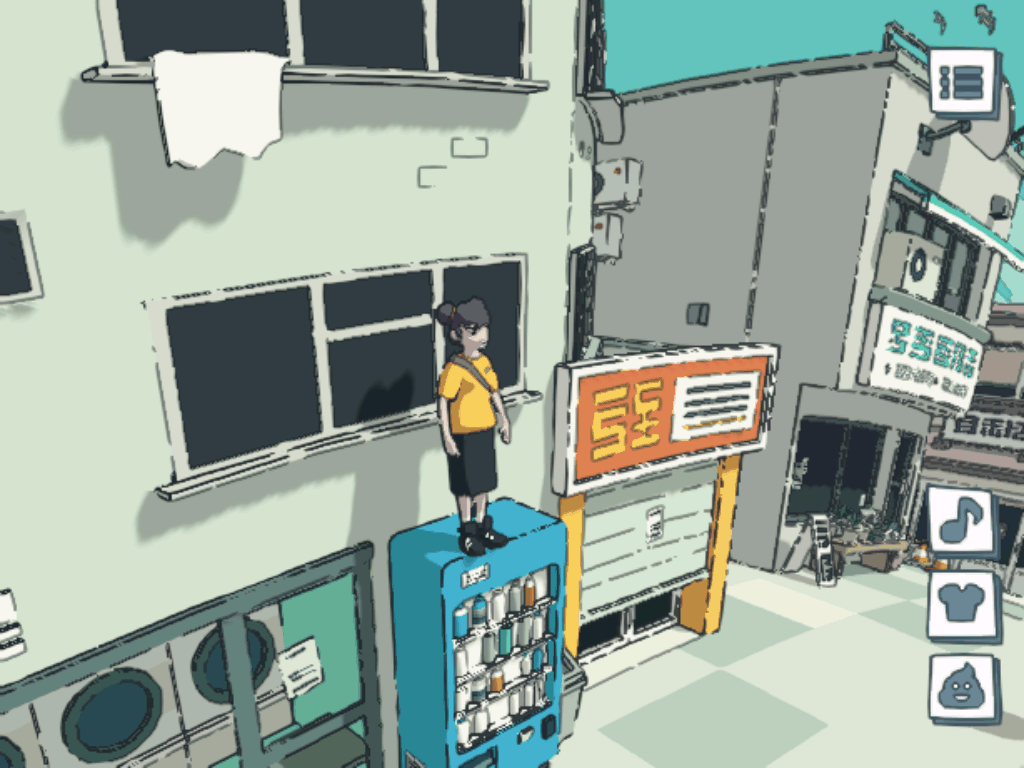
[P] Roof-4-1
Difficult: medium.
Same as Roof-4 but different path this time.
Go to the left side of the roof (1). Jump to the roof below with missing tiles (2).
You can also go past the air-conditioner block and descend on the vending machine if you wish (3).
[P] Roof-4-2
Difficult: hard.
Discovered by Pseu.
Same as Roof-4-1 but different path.
Position your character at the right side of the air-conditioner block and perform [JM] here (1).
If done properly this will throw you to the roof (2). It's hard but doable. You'll need 4 or 5 fast
pressing on the jump button. Or you can just press the jump button as fast as you can. Unfortunately
I can't figure out the exact conditions to perform this climb on a first try, but if you know please
contact me.
[P] Roof-4-3
Difficult: easy.
Same as Roof-4 but different descend.
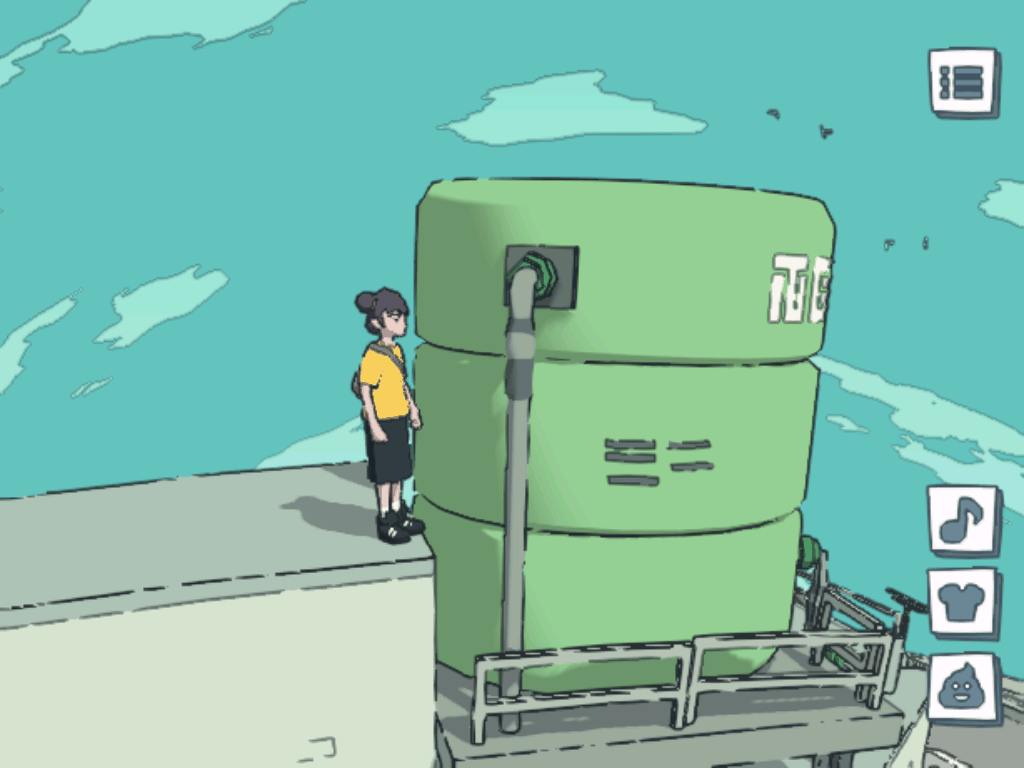
Go to the tank pipe (1). Now walk from the roof and instantly turn around and move forward or
you will miss the ledge (2). You can't stay there - you'll be slowly slipping. After you slip
keep moving forward (towards the building) and you find yourself on the roof of the store (3).
You can also descend on the vending machine at the left if you wish (4).
[P] Roof-5
Difficult: medium.
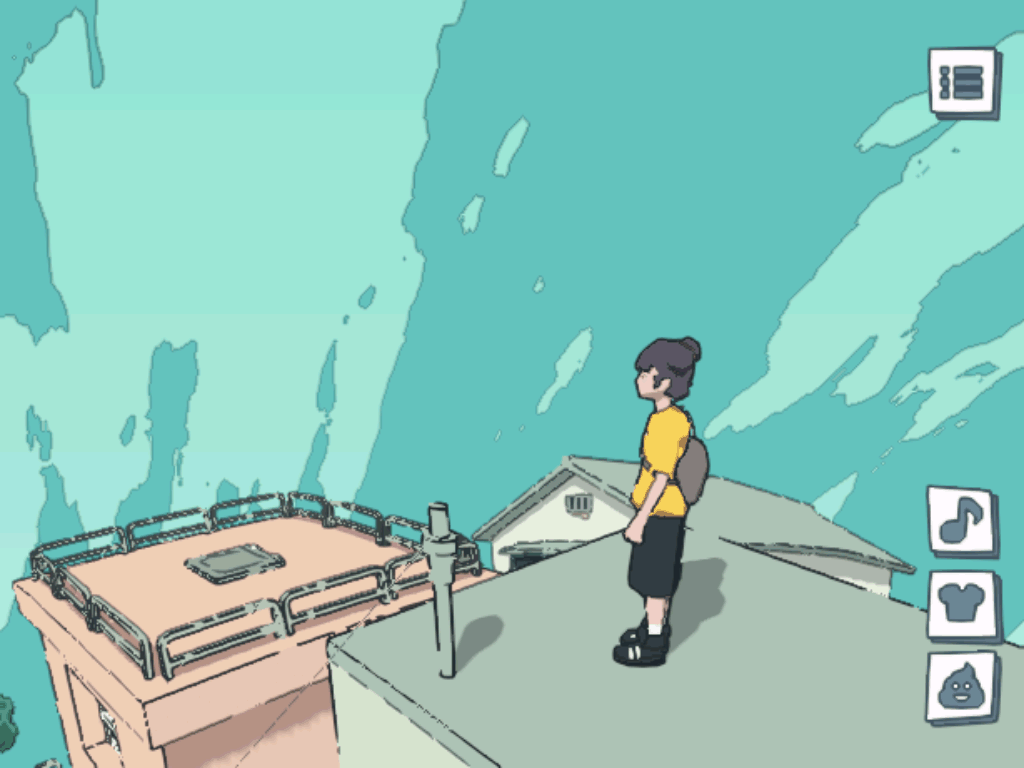
Start from the highest ground of Roof-4 then perform a diagonal jump from the corner at right of
the pole and you should land to the lower part of the roof of the pink building below (1). You can
also jump there from the handrails of the balcony at right if you descend there earlier. Now you can
jump on the handrails here and on the white building (2). Also you can go on the back and check air-conditioner
block - it has missing polygons which clearly indicates that developers not intended for players to
reach this place (3). Use [C3] on that air-conditioner and you can climb higher (4).
[P] Roof-6
Difficult: impossible.
Discovered by Pseu.
Same story as with Roof-4-2 but much harder. I was able to pull it off only once and I don't want
to do it again since this will probably break my jump key. I hope someone finds an easier way to
climb there.
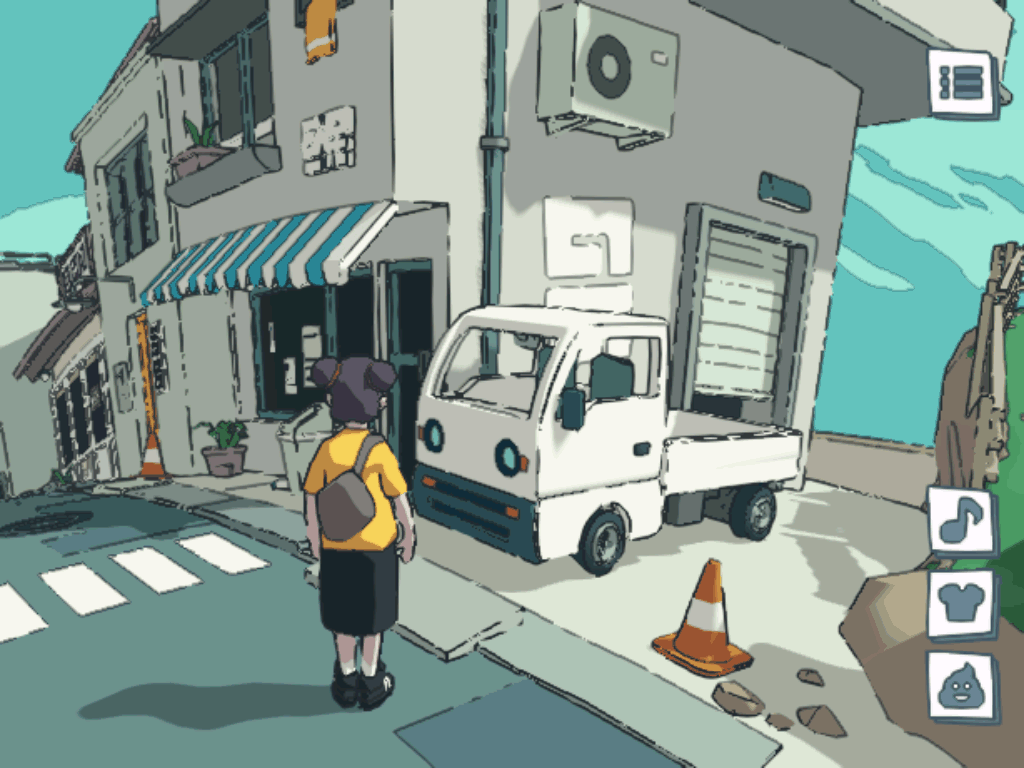
Find the truck near the square (1). Jump on it's roof and then to the parapet (2). Always keep
moving forward (towards the building) or your character will slip down. Now go under the left window
and perform [JM]. If you're lucky enough the game will throw you up to the second window (3). Repeat
[JM] again to climb the second window (4). And one last time to get to the roof (5). From there you
can drop down to the balcony at right or jump on the roofs at left till the end of the street (do not
forget that you need to perform a running jump to the next to last green building since there is a
gap there).
[P] Roof-7
Difficult: hard.
You need to do four difficult jumps to get to the highest roof. And all of the jumps except the
first one require [JM] to perform. Also proper camera control is highly recommended there.
First of all find the temple location and jump over the fence to the cliff edge here (1).
Now first jump consists of the two parts: one to the fence below and another to the wall. When you
reach the wall top then position yourself near the house window ledge (2). You need to carefully stand
as far from edge of the wall as possible so you have space to perform a running jump. If there is not
enough space you just fall down before you even have a chance to jump. Now run forward and immediately
start jumping. When you reach the window ledge start doing [JM] since otherwise you'll slip down.
If you've done everything correctly, you should reach the roof of the house - this is the second of
four jumps (3). Now go to the right side of the roof and position yourself looking to the next house
corner (4). Perform a running jump - you don't get to the fence top instantly, just stuck on it,
so keep doing [JM] or you'll slip down. If you're succeed the third of four jumps - the game will
push you up to the next house lower roof (5). Go to the left side of the windows (6). You can go down
to the lower roof on the left if you want, but then you won't be able to go back without starting the
climb all over again. For the last fourth jump start [JM] to climb the windows ledge (7). Keep it up
until you're reach the top (8). If you're lucky enough the game may push you from the roof to the top
instantly. Also you can jump down to the first house roof from there if you want.
[P] Plant-1
Difficult: medium.
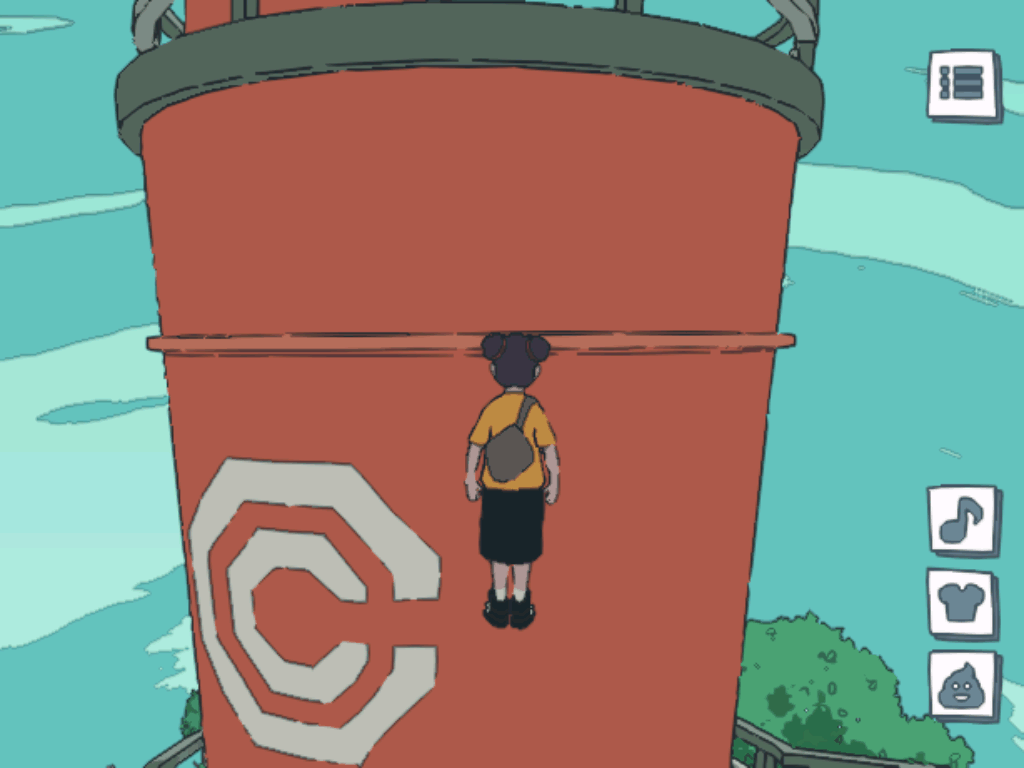
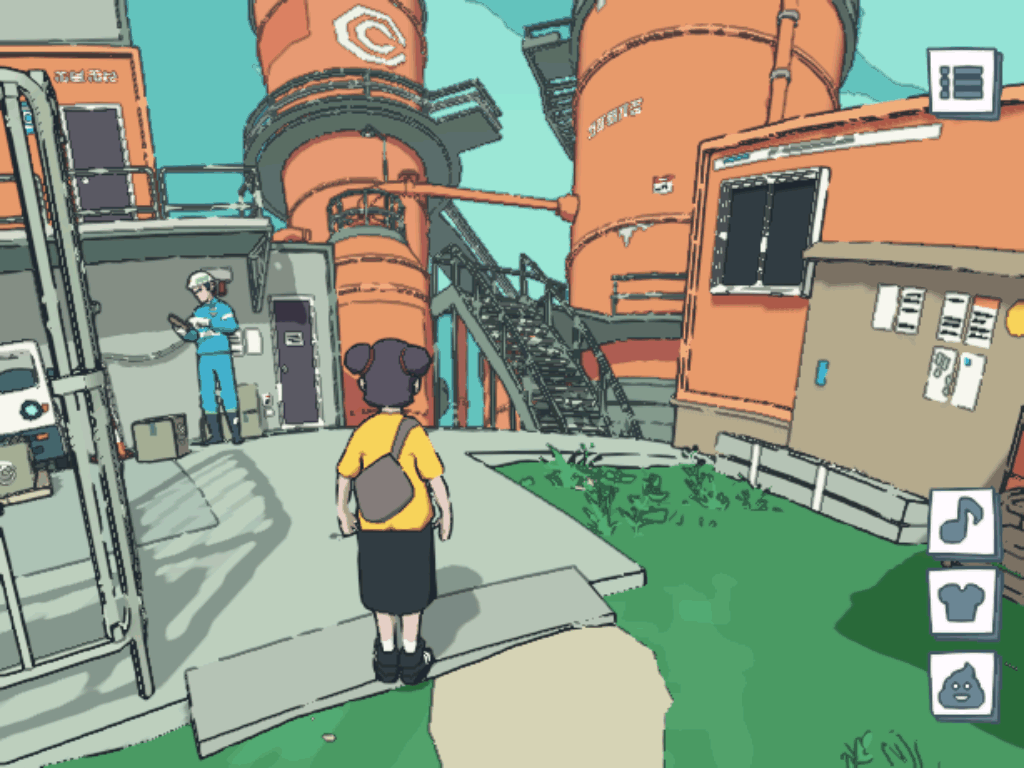
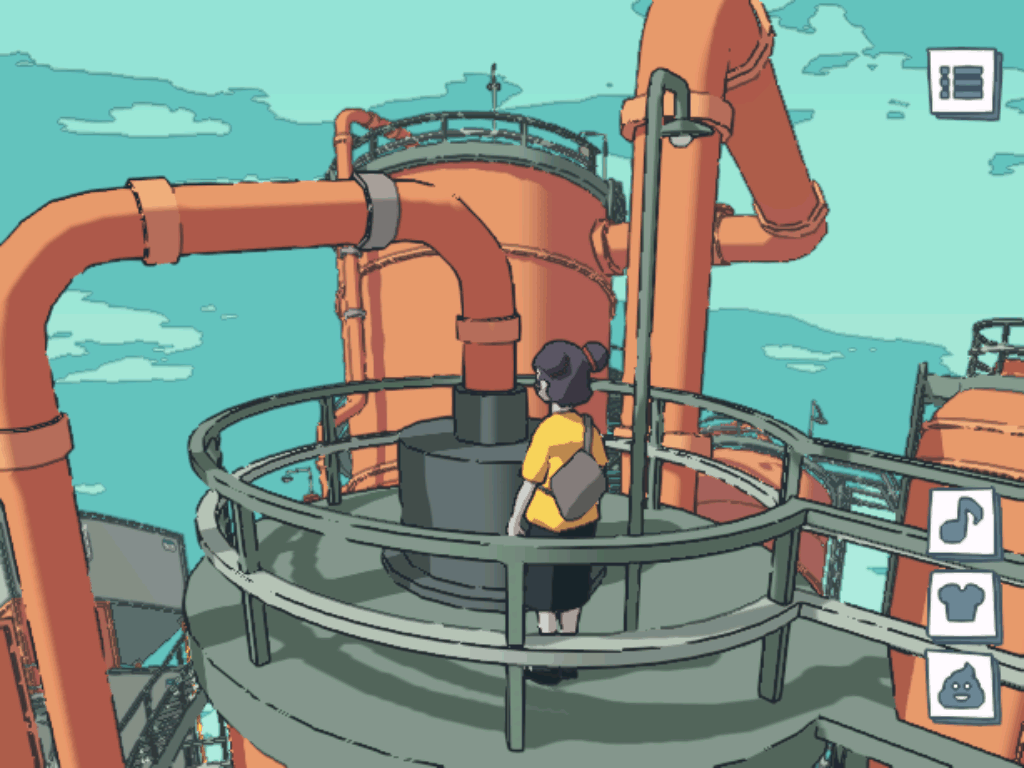
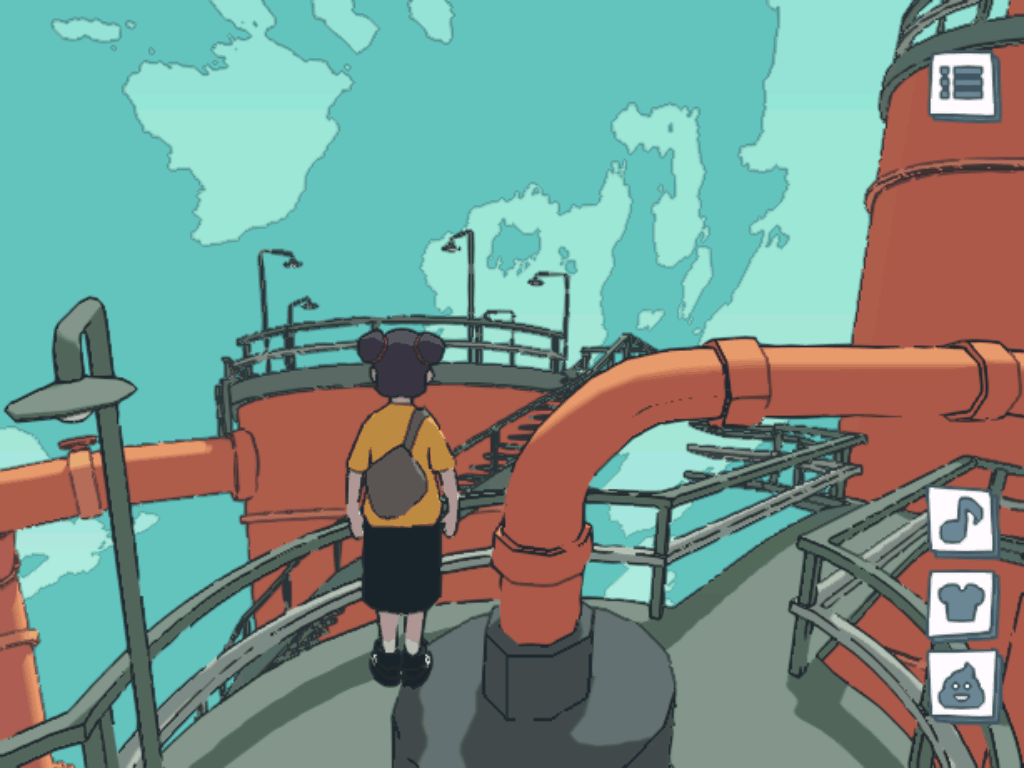
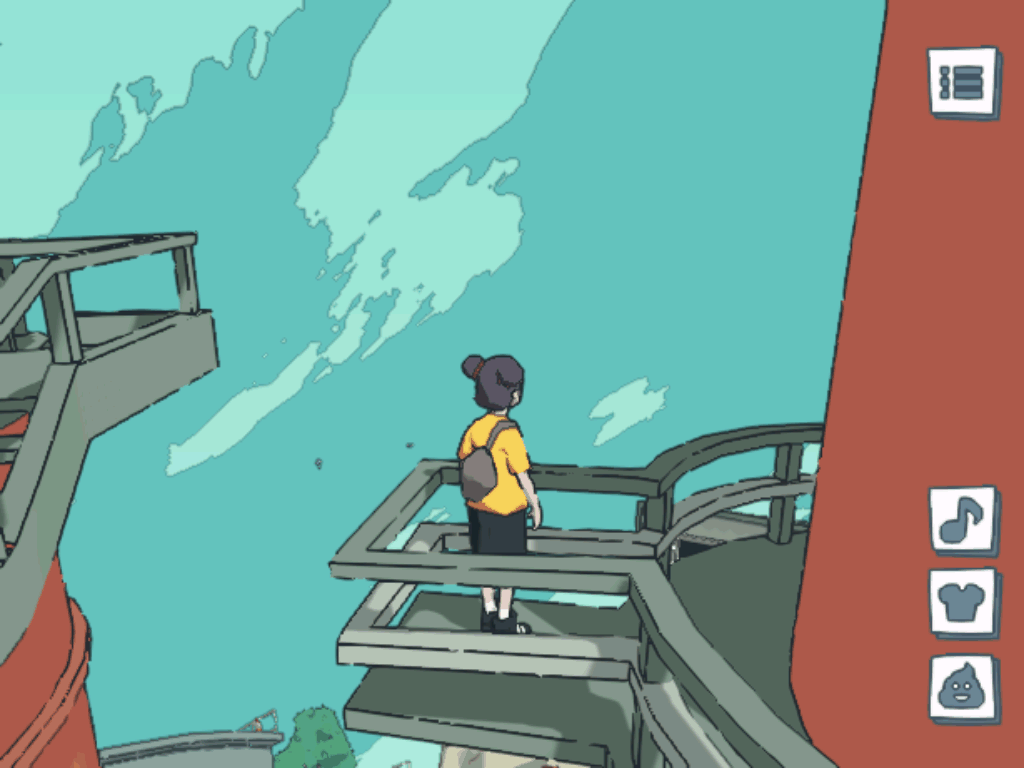
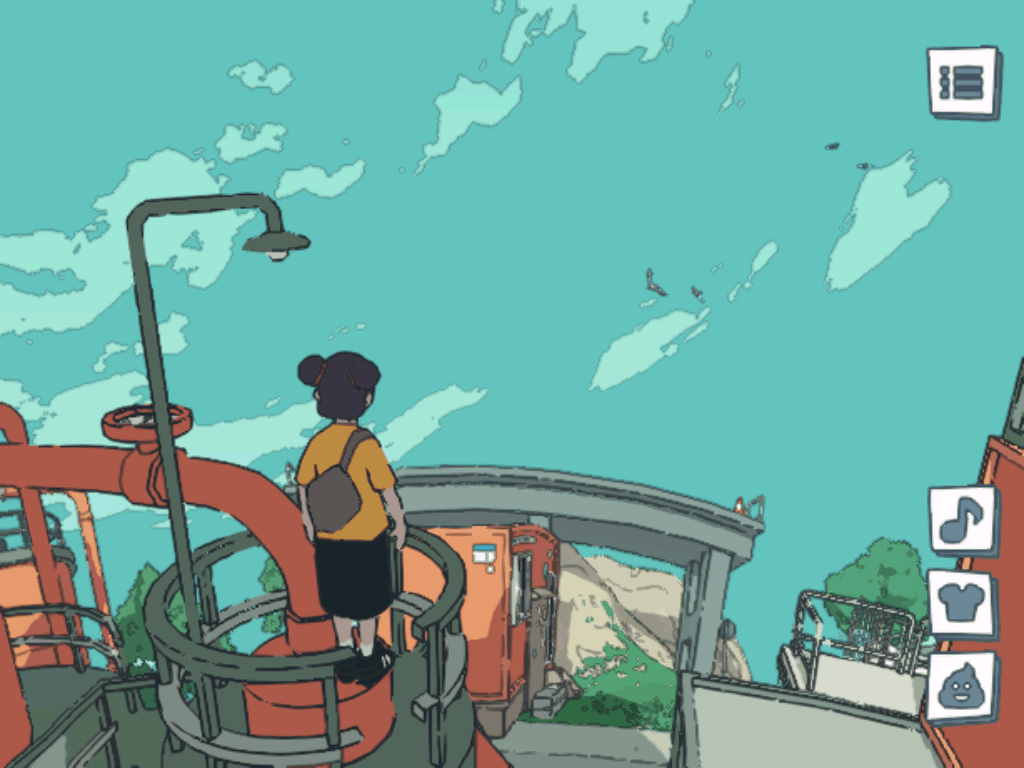
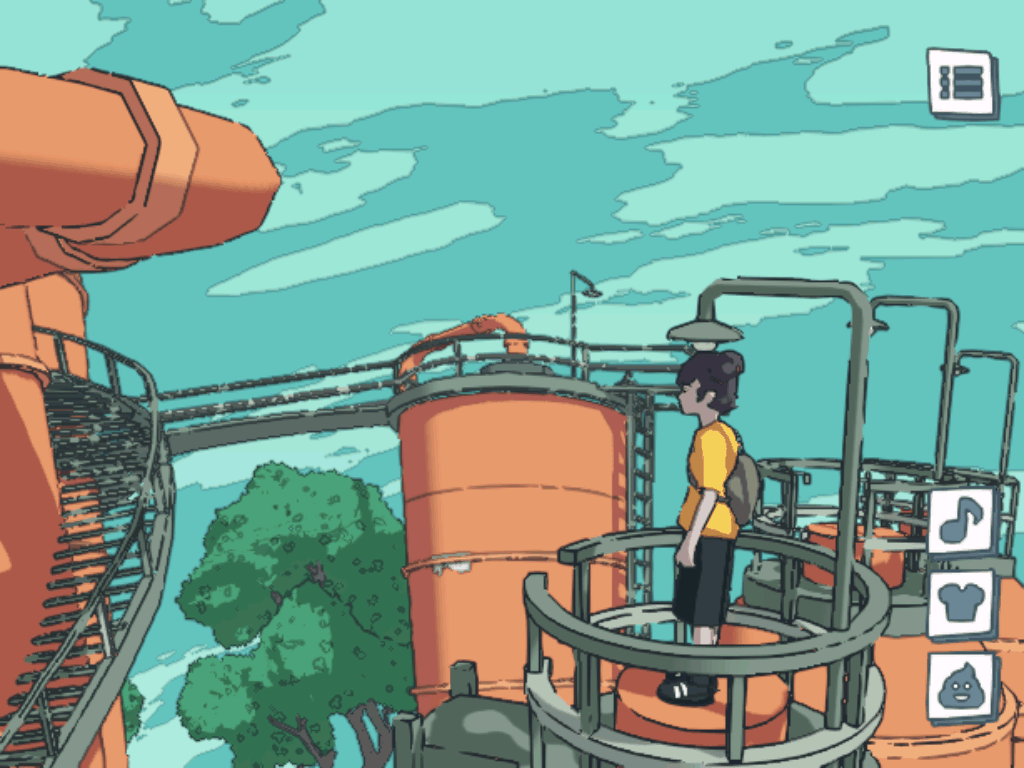
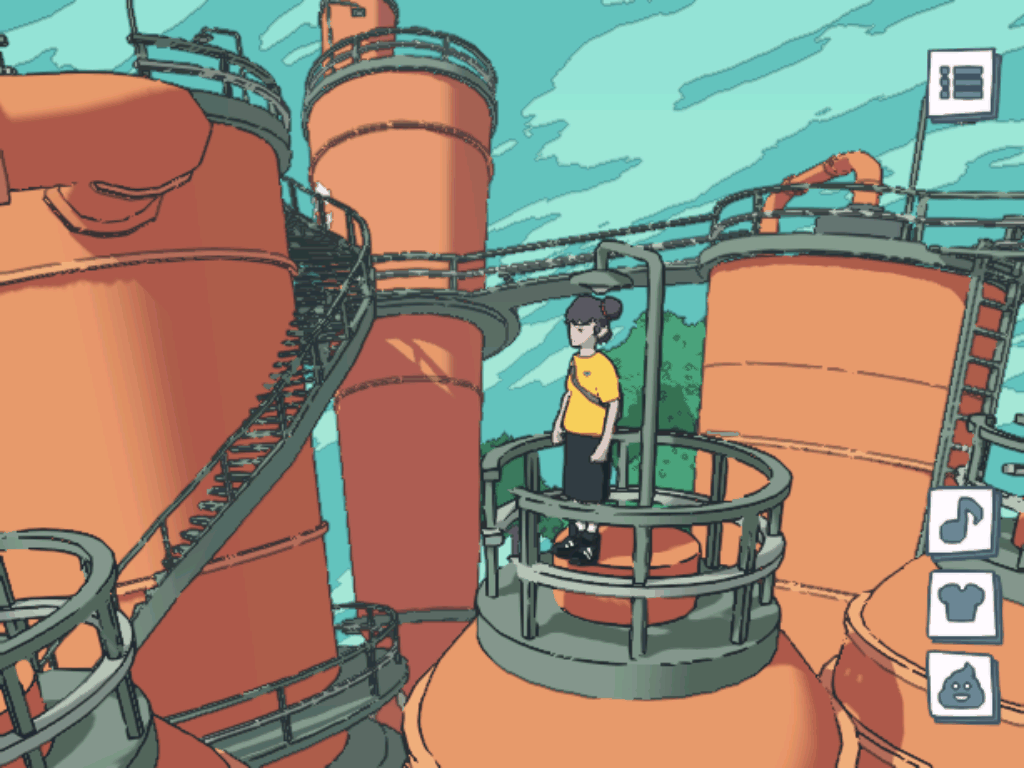
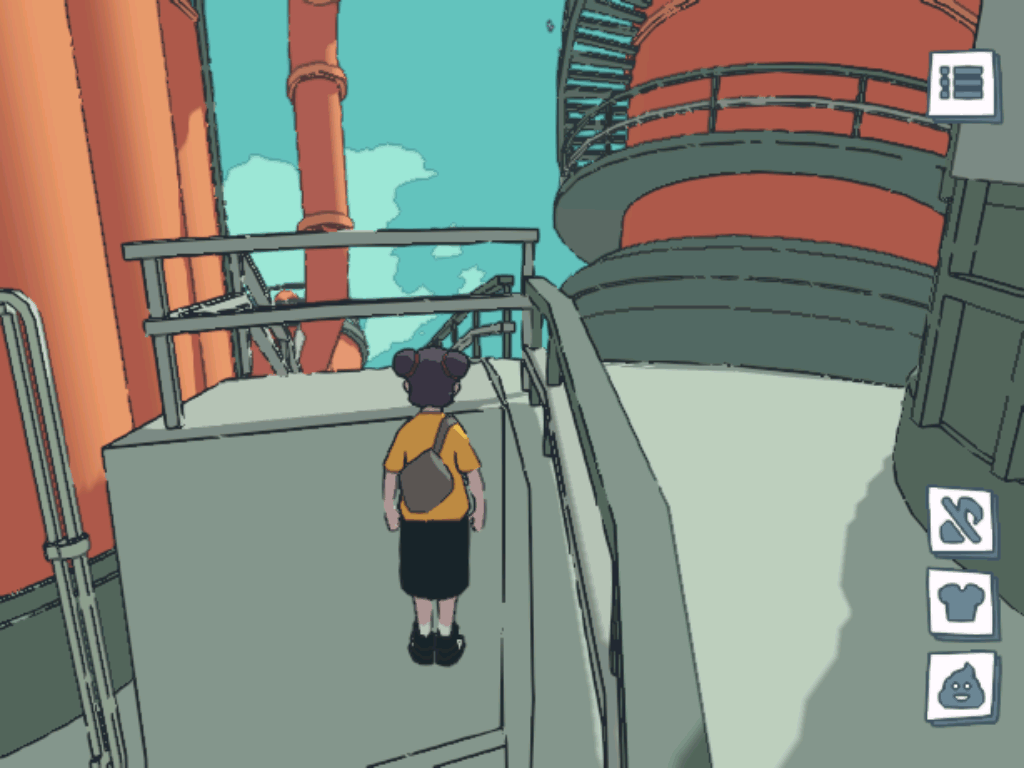
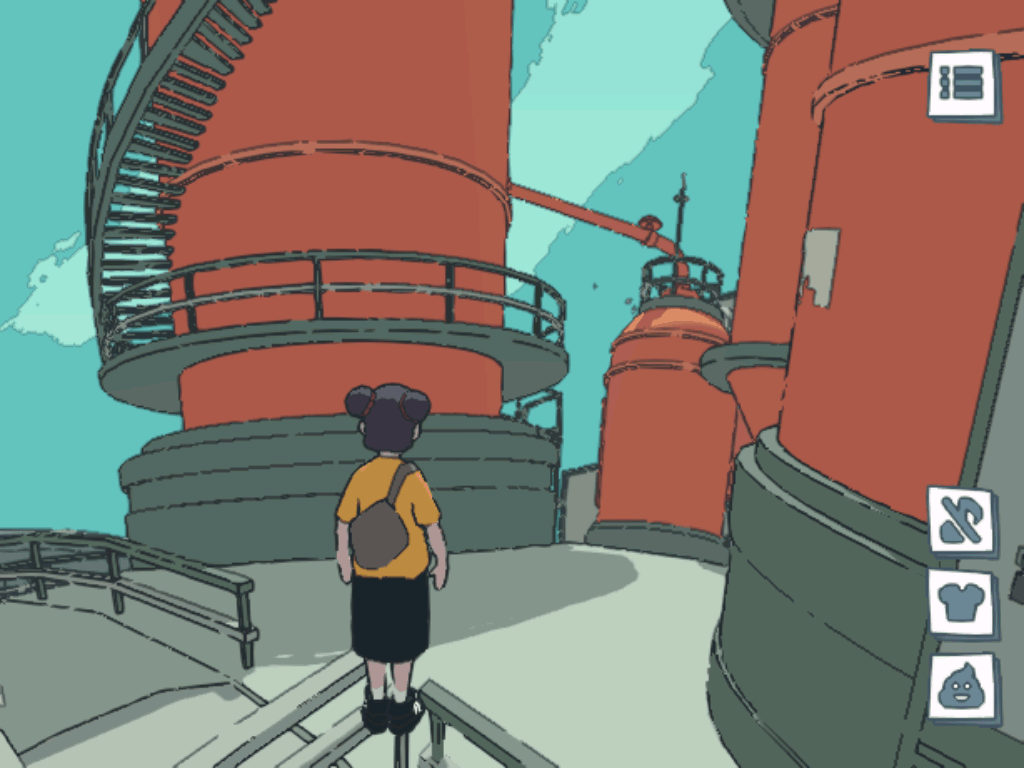
Locate factory plant - you will need the staircase at the right (1).
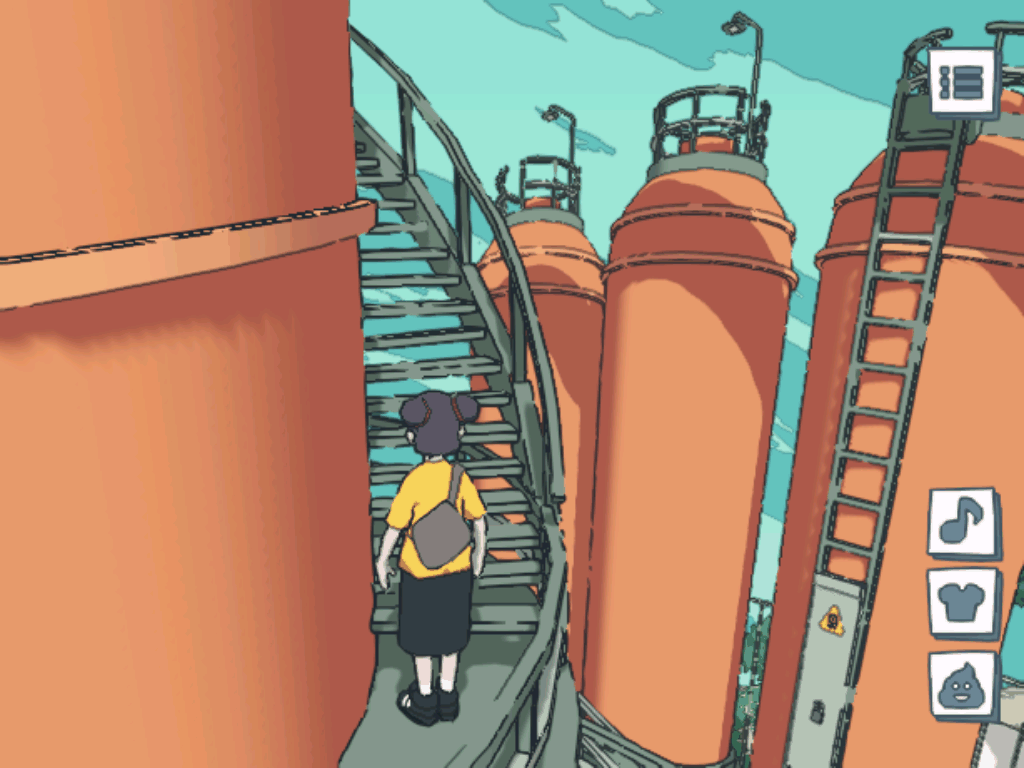
Climb it and go around the barrel to the right where you should find the spiral staircase around it
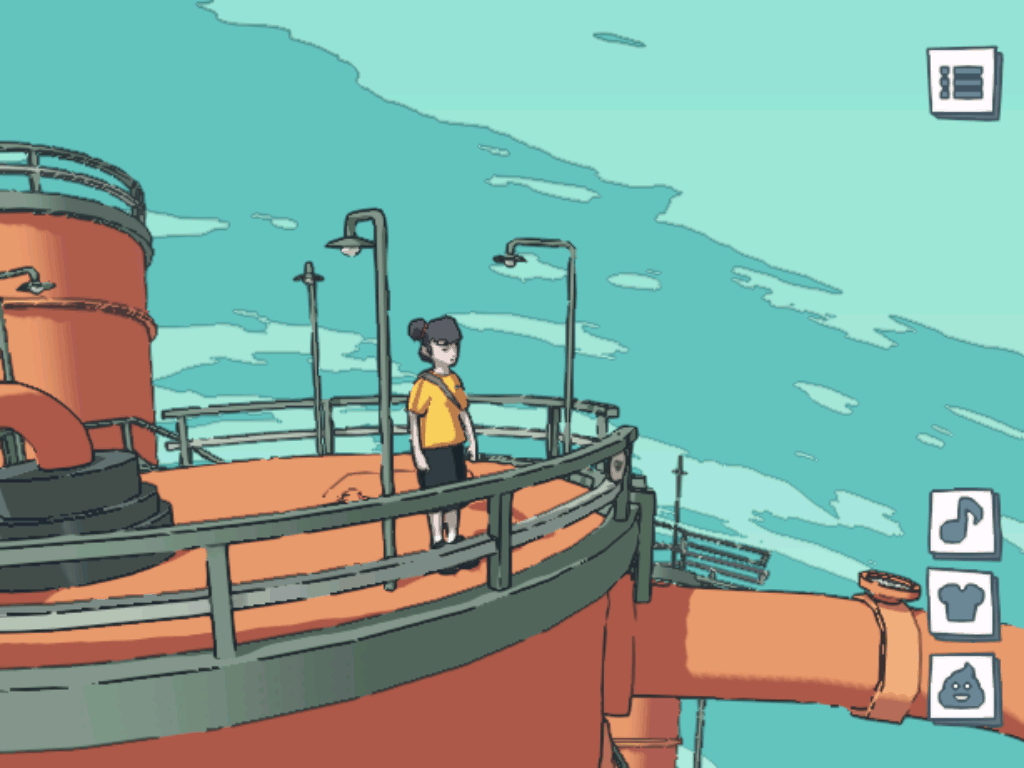
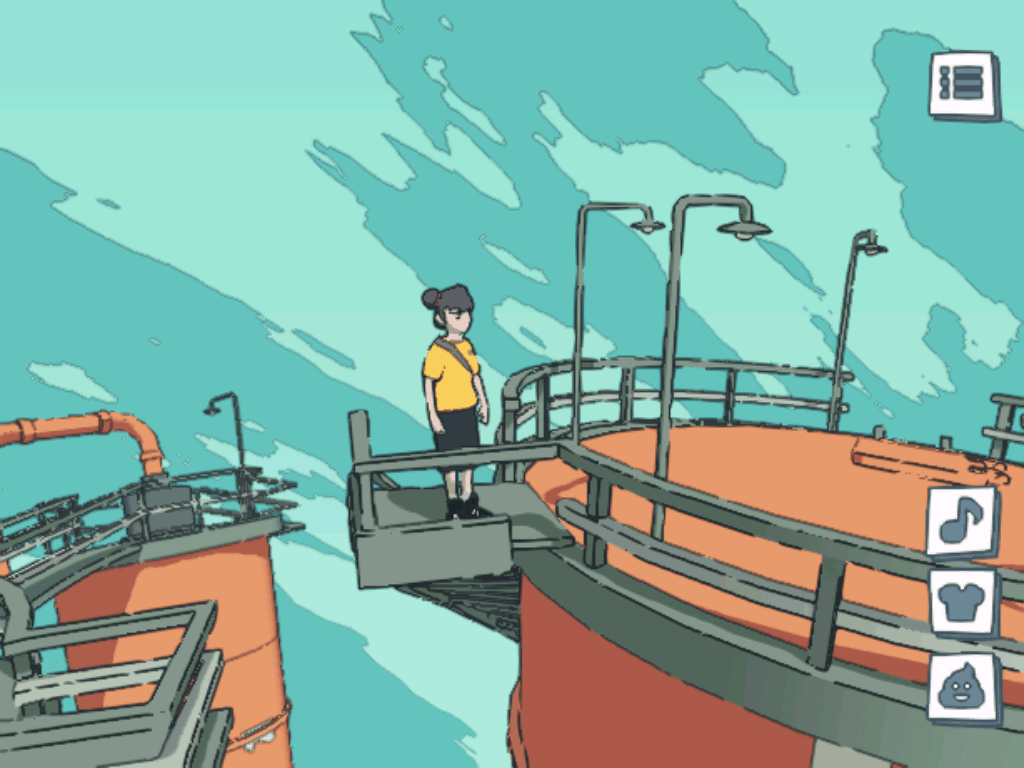
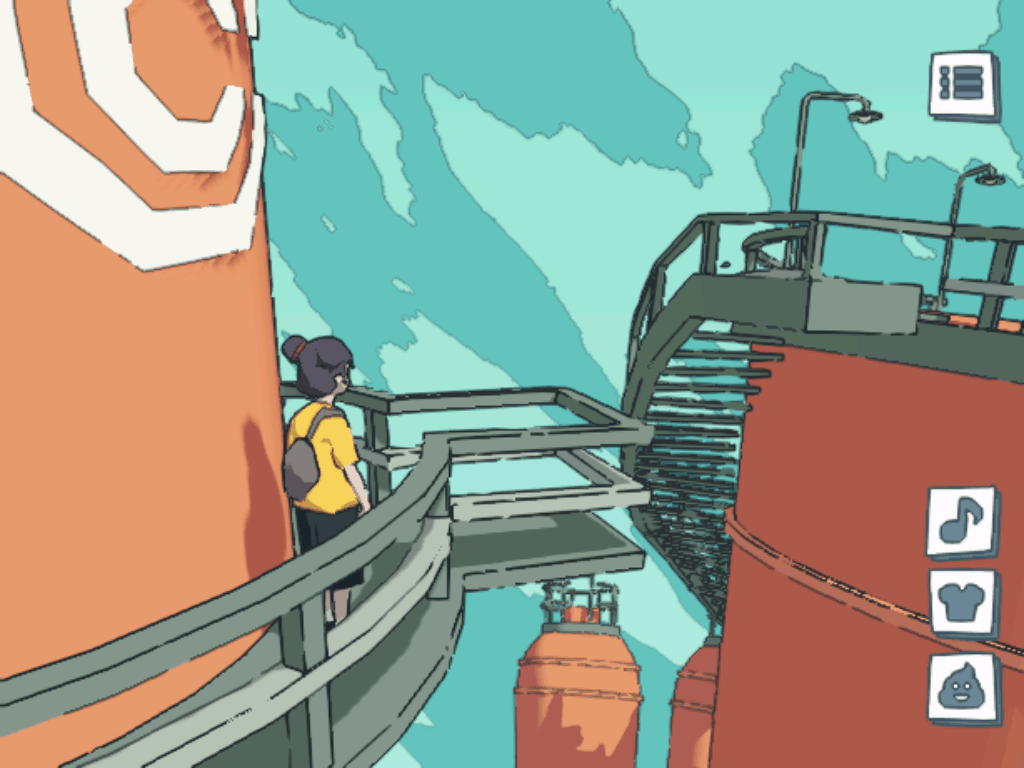
(2). Climb to the top and go to the part where railing is missing (3). Now you need to walk to the
pipe below and be extra careful there since you may easily slip from the pipe (4). Follow the pipe
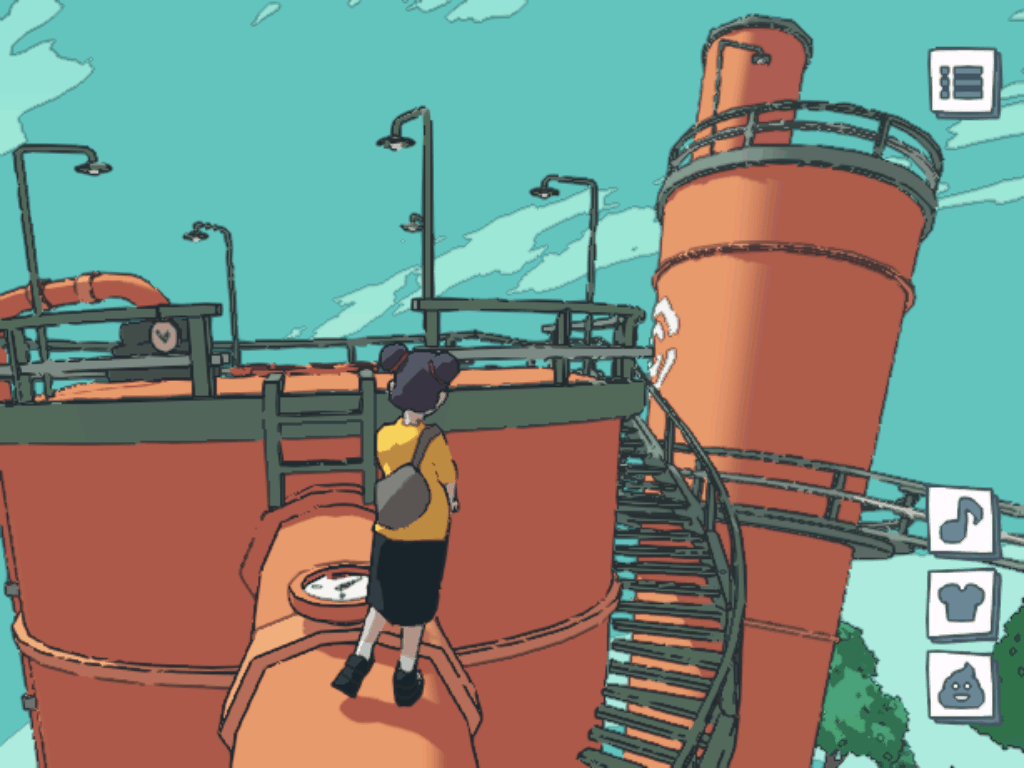
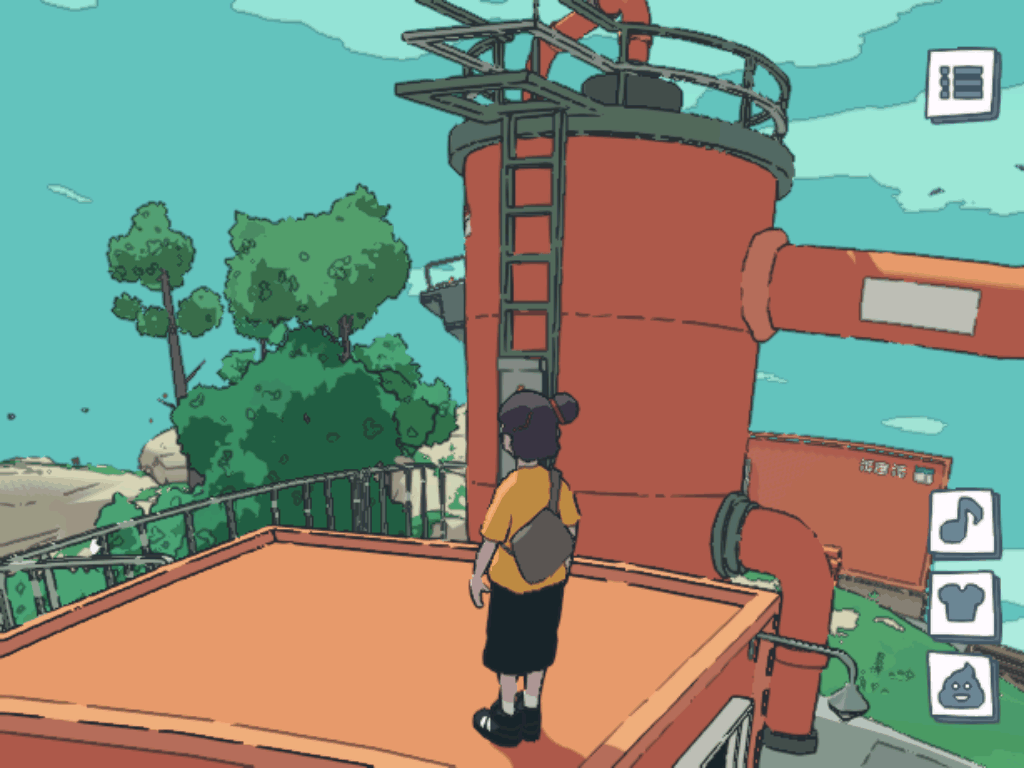
to the place where it goes down (5). Now you need to perform a running jump to descend to the barrel
below (6). If you jump on the handrails of the ladder leading down and jump forward from there you
can get to the roof of the container below (7).
[P] Plant-2
Difficult: easy.
Same as Plant-1 but different path.
When you reach the barrel top jump from the staircase handrails to the handrails below (1). Place
below after jump (2). You can also go around the barrel to the right to another connected barrel (3).
[P] Plant-3
Difficult: medium.
Same as Plant-2 but different path.
After the first jump down to the handrails turn to the left (1). Now just jump to the handrails
and jump forward - if you do it correctly you should land to the top of the small barrel below (2).
[P] Plant-4
Difficult: hard.
Same as Plant-1 but different path.
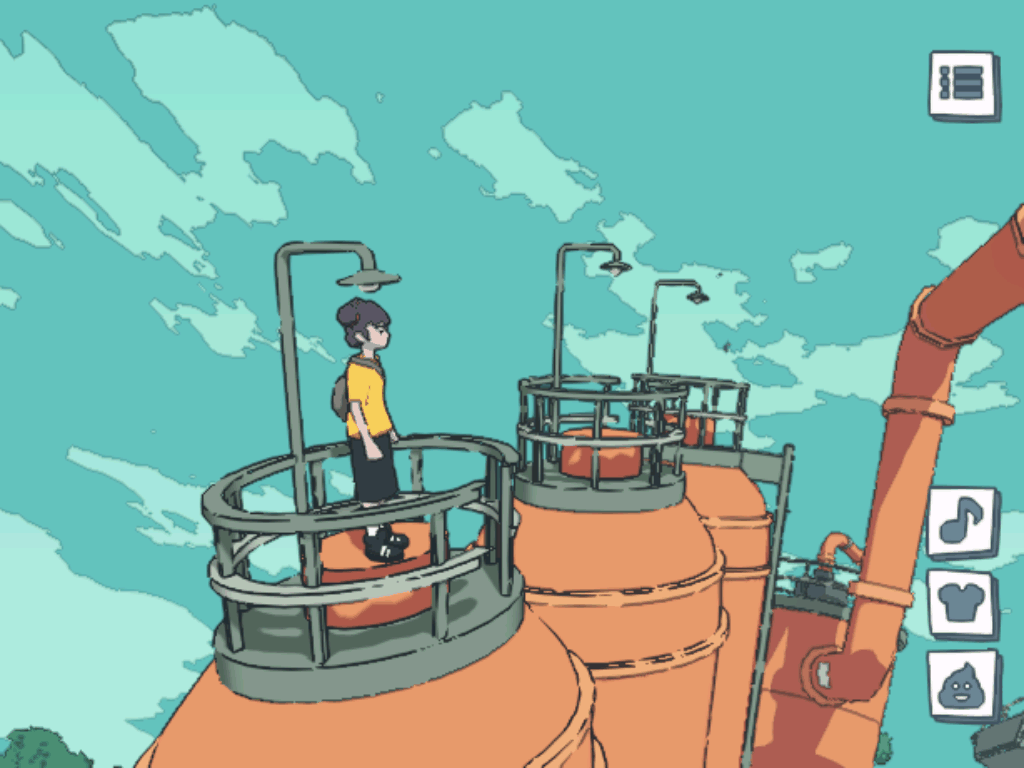
You need to perform a running jump to the direction of the second coupling ring after the right
turn (1). This will get you to the right of the three narrow barrels (2). From there you can jump to
the second narrow barrel (3). And to the last narrow barrel but be careful because this jump is extra
hard since missing part of the handrails which helps to get in located on the side (4). You get more
chances by pushing forward and keep jumping.
[P] Temple
Difficult: medium.
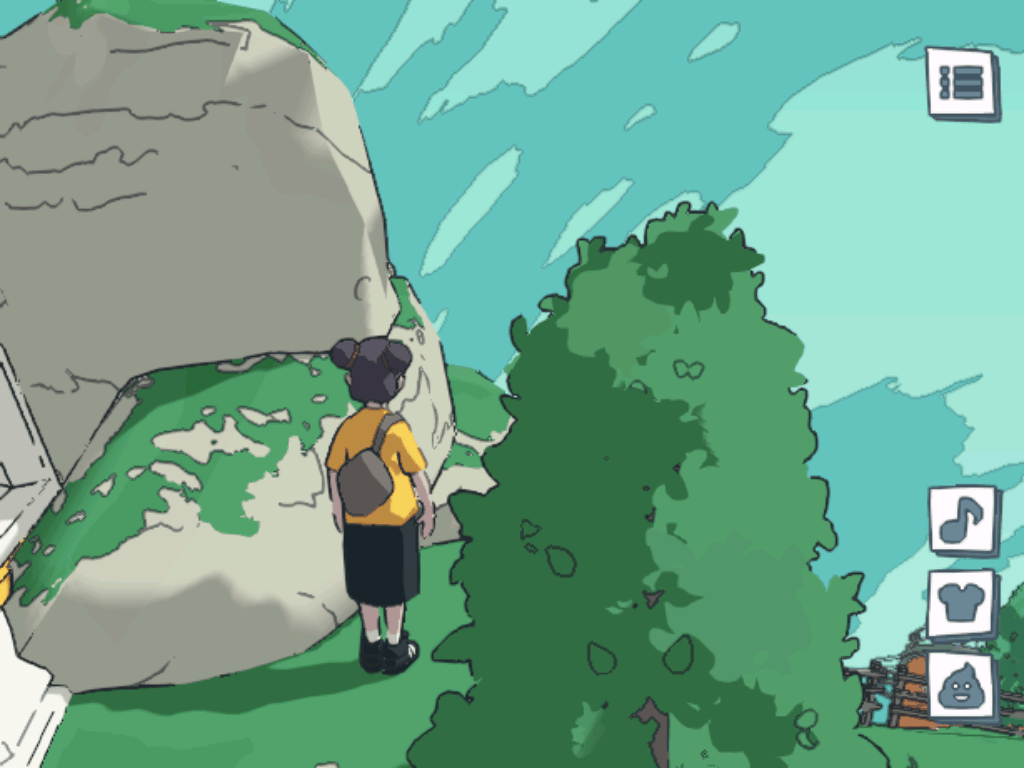
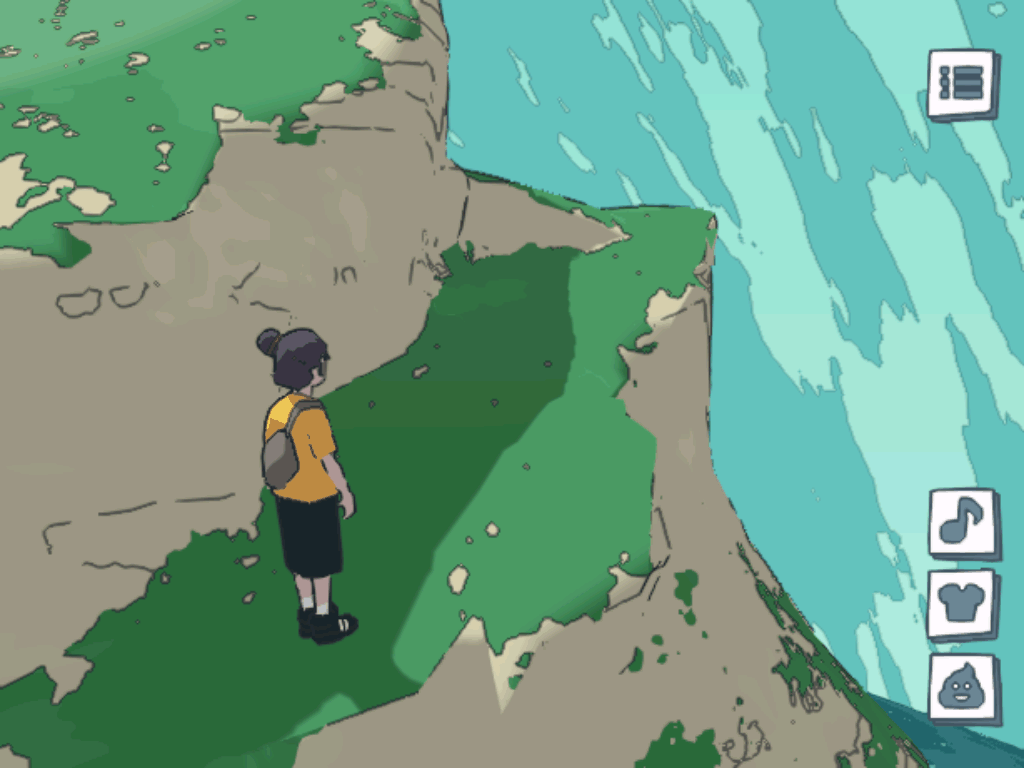
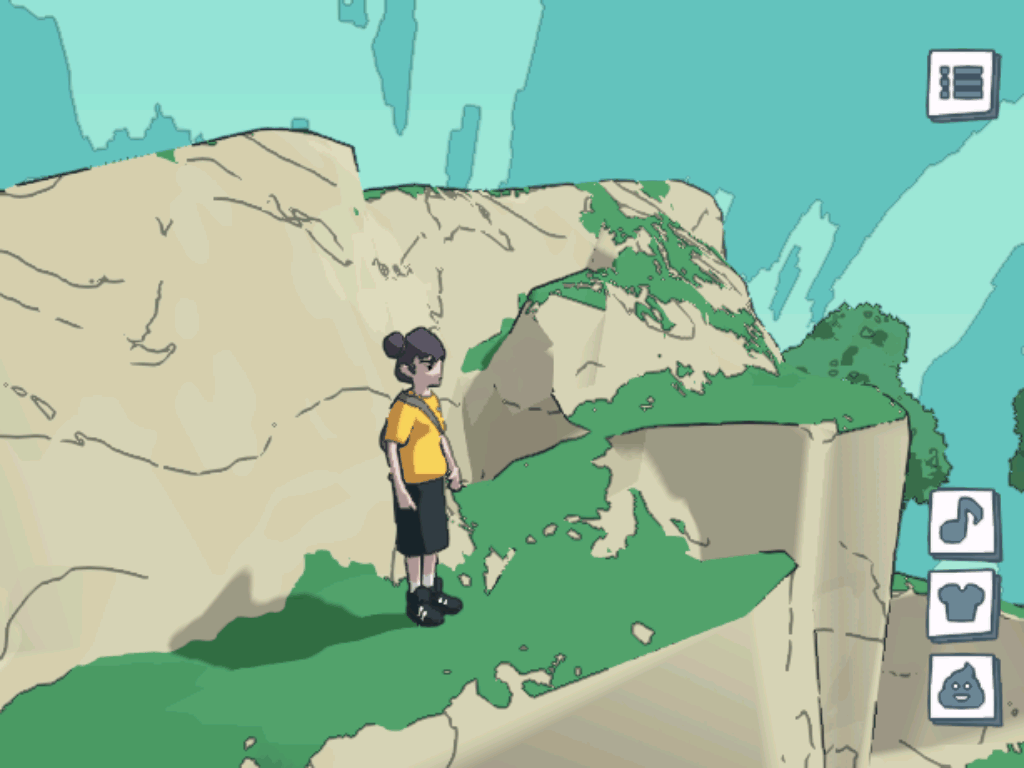
Find temple location (1). Now go to the right side where stones behind the trees (2). Carefully
climb them to the bigger one (3). From there you can jump on the roof (4). From the roof you can also
jump down to the altar (5). Be extra careful when climbing stones because if you fall down from the
cliff you will find yourself at the beach below and it will take some time to return here again.
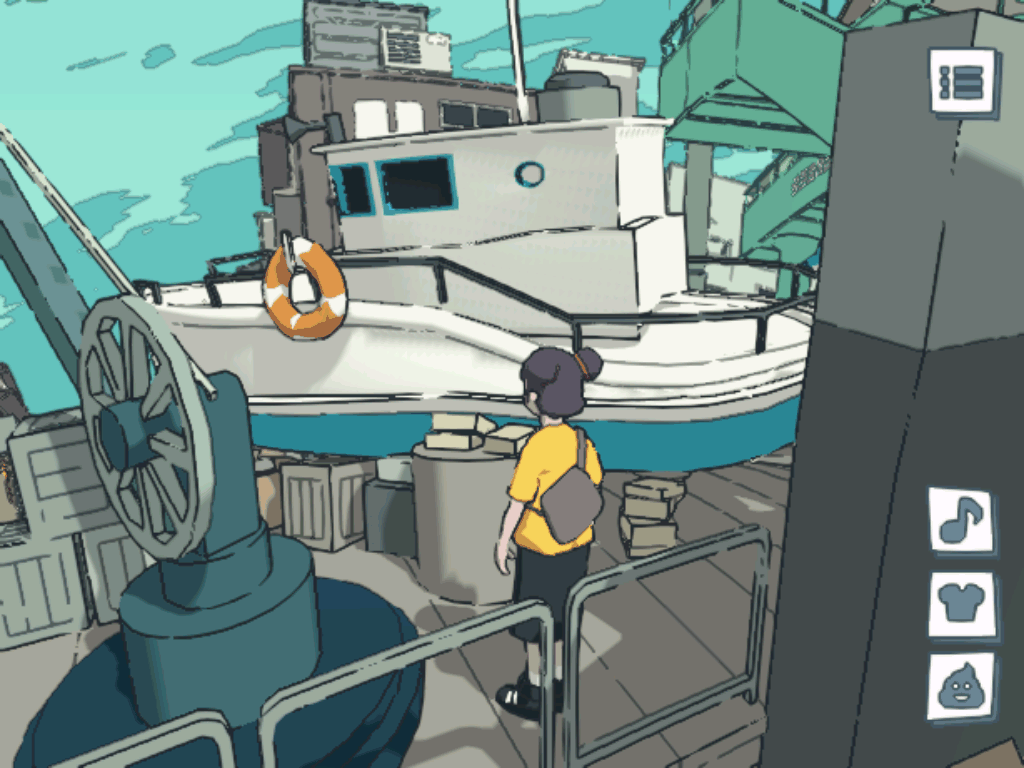
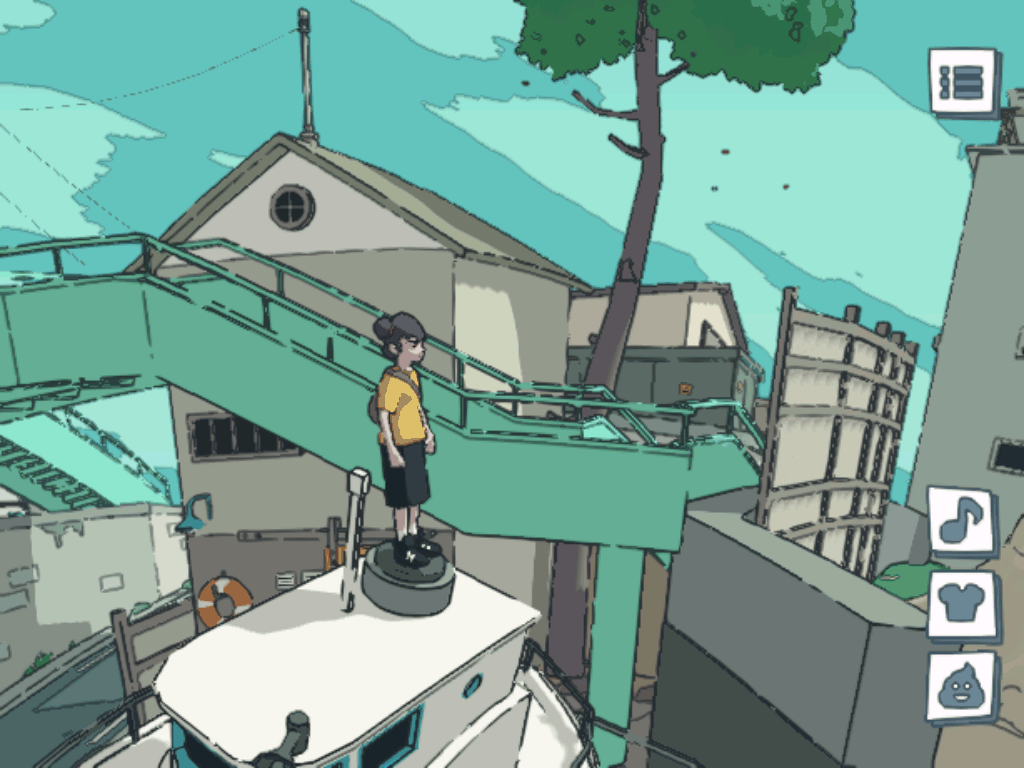
[P] Ship
Difficult: easy.
Relatively easy jumps. From square go down the road under the overpass (1). Now go past the diver
and jump between the fence and the ship until you reach the other side (2). Jump to the round pillar
(or just walk from the left side), then jump to the ship handrails and to the ship roof (3).
[P] UFO (secret Easter egg)
Difficult: easy.
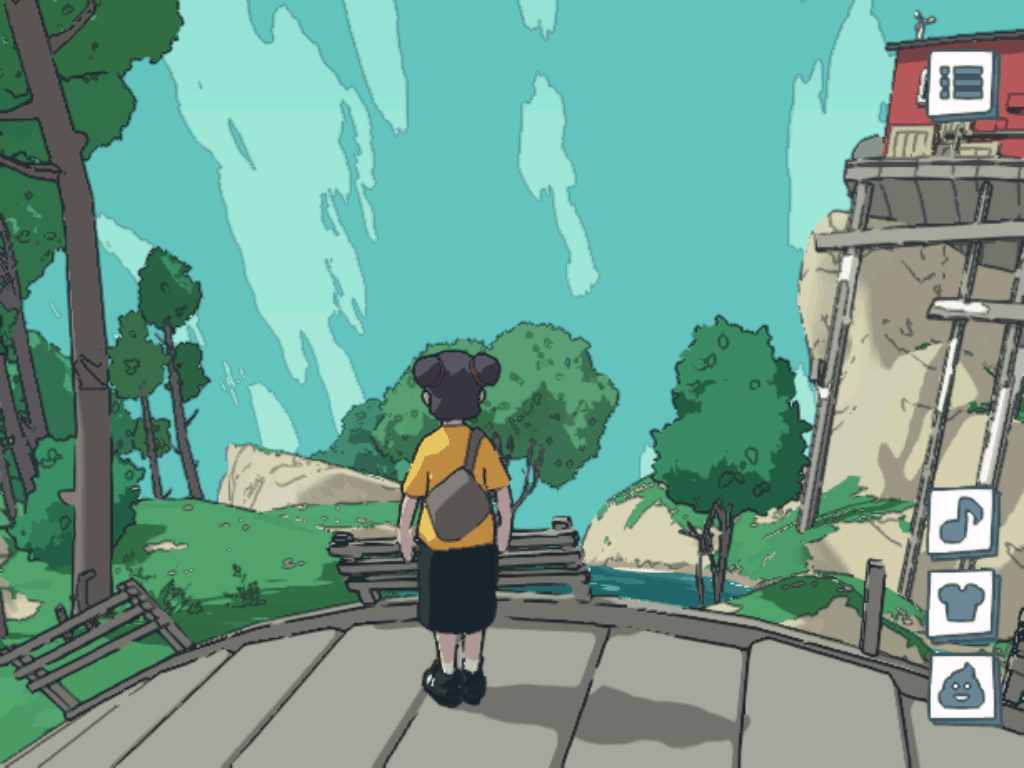
Go to the bridge to the forest (1). Now turn right after the bridge and go to the shore (2).
Jump on the walkway (3). Climb up, there is nothing extra hard there (4). Carefully walk on the last
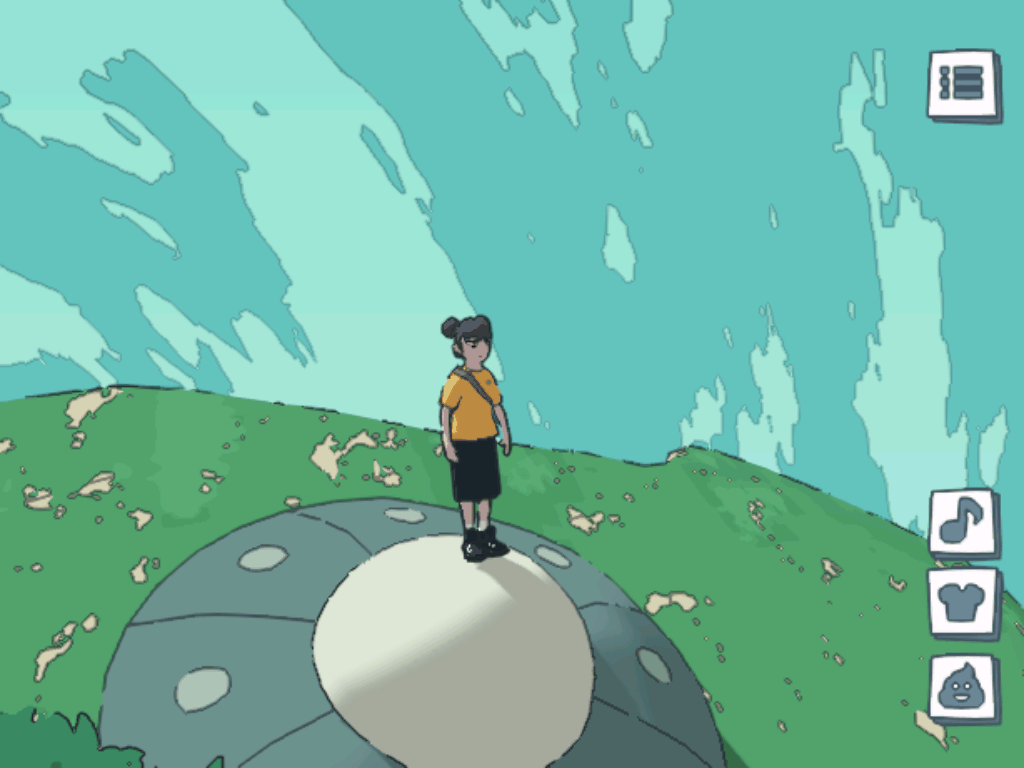
slope and jump to reach the top with the UFO that you can also climb (5).
By the way you can find alien resting on the dead end at the beach (go further down the road near
the ship and diver).
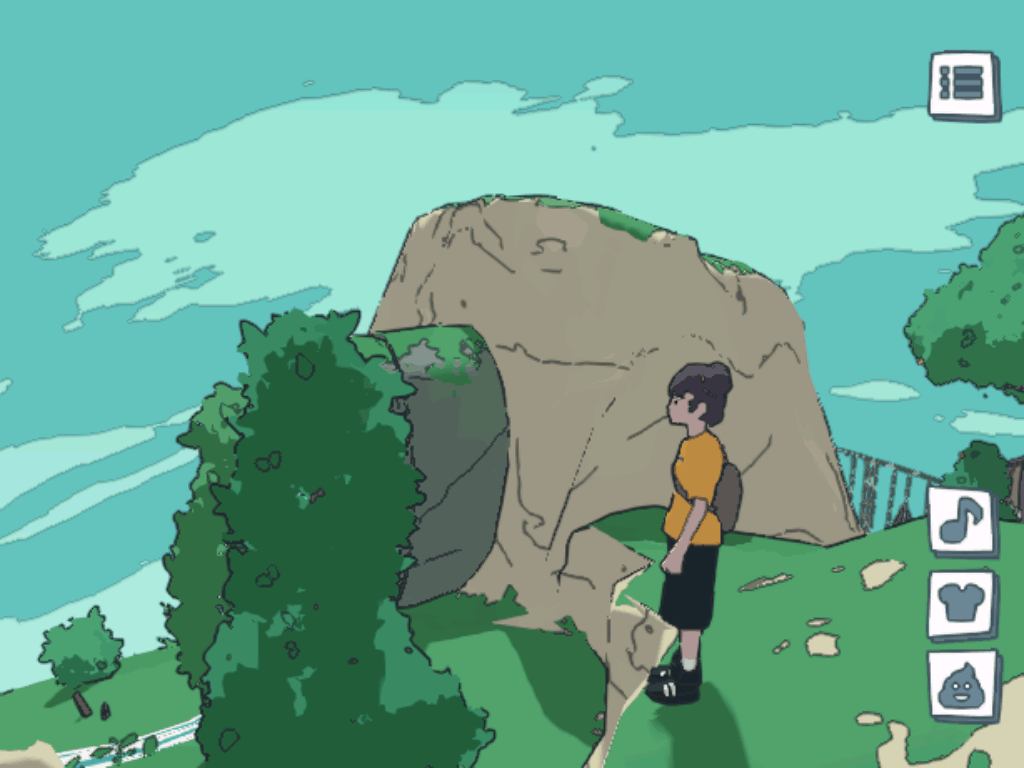
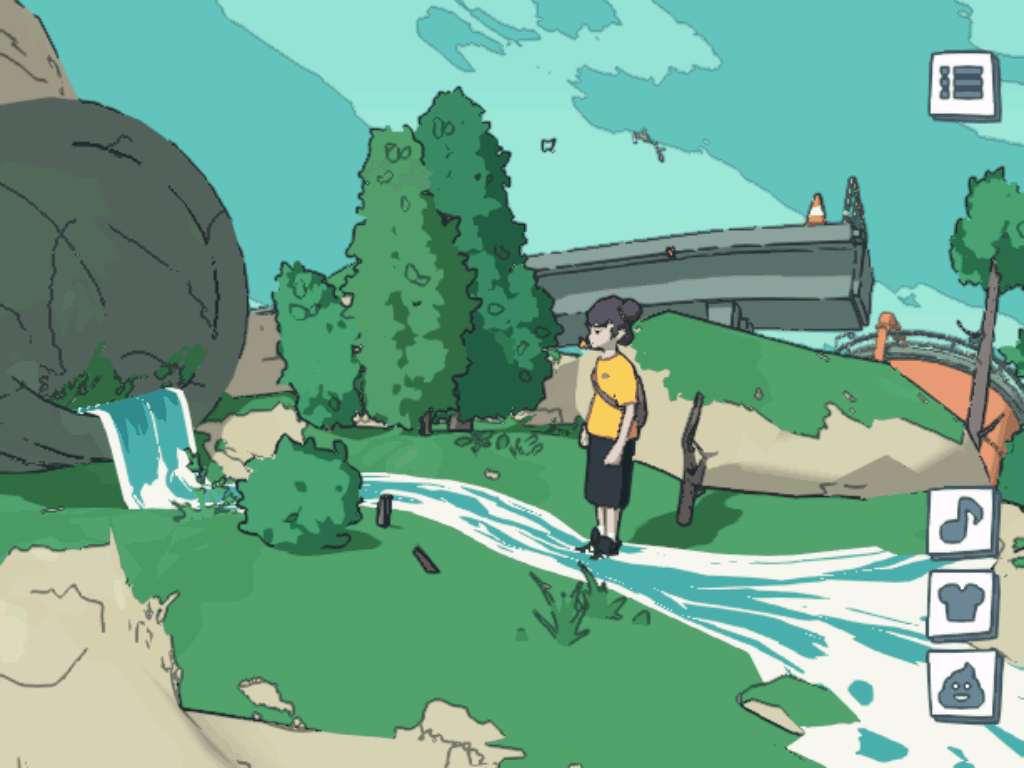
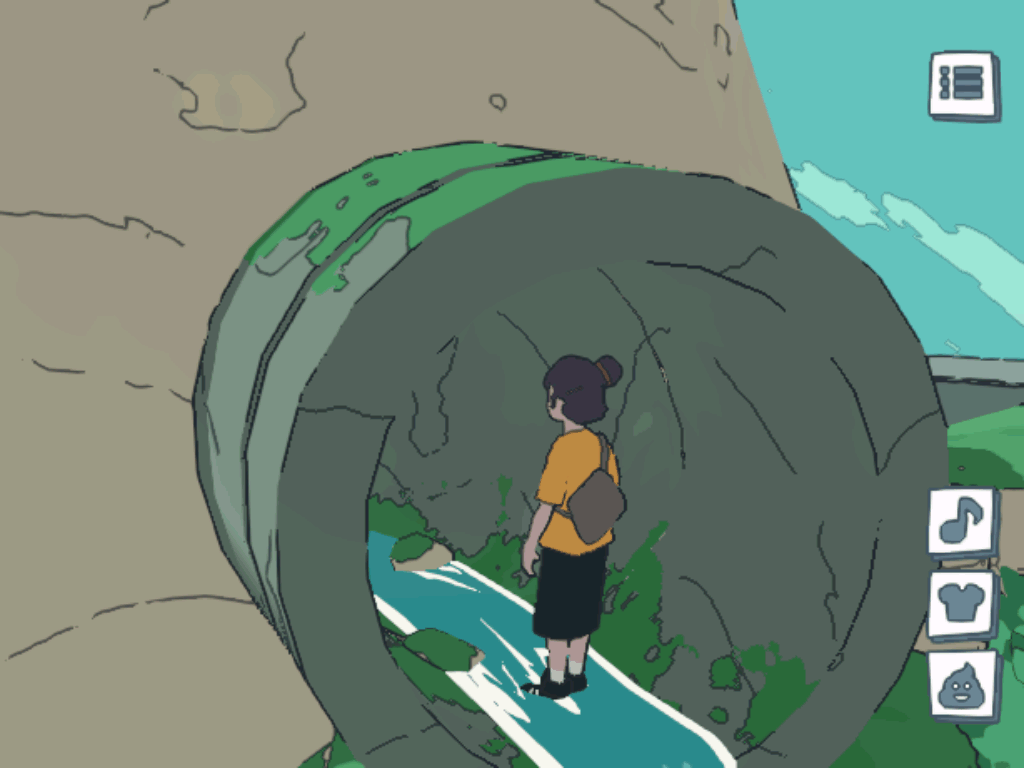
[P] Pipe (secret Easter egg)
Difficult: easy.
Go to the bridge near the factory (1). Now go to the right part of the bridge and turn right (2).
Go forward and turn right after last bridge footing (3). Go forward and climb the rock (4).
Now you can go to the right to visit second bridge part or to the left to visit pipe (5).
Jump inside the pipe and go forward (6).
[P] Misc
Difficult: medium.
Miscellaneous places, not that hard to reach.
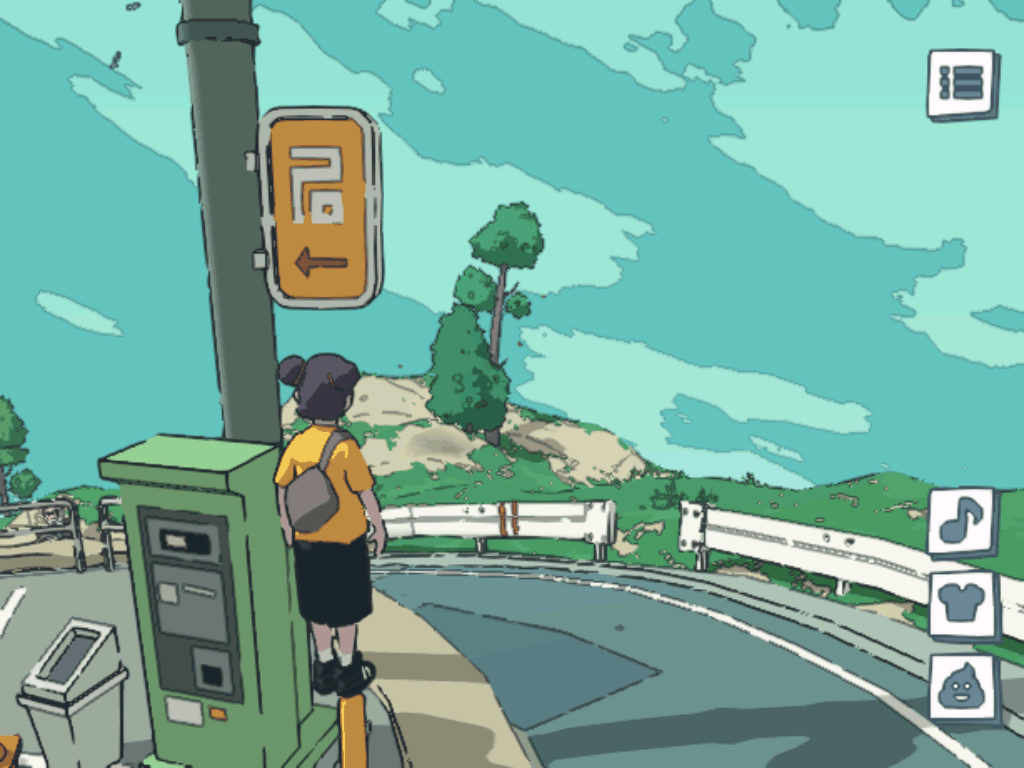
Vending machine near hut (1).
Small pole at the same place (2). Note that it's hard to find the right spot where character can
standing still without slipping.
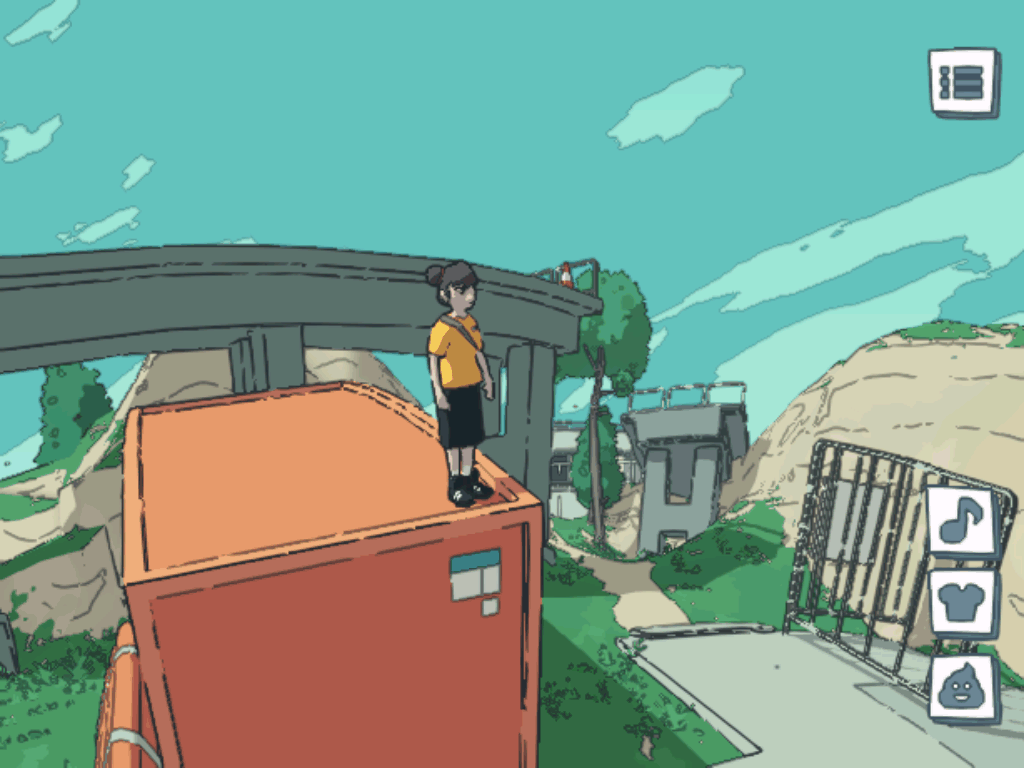
On the roof of the container at the factory (3). You can jump down here from the second bridge part
(see Pipe above).
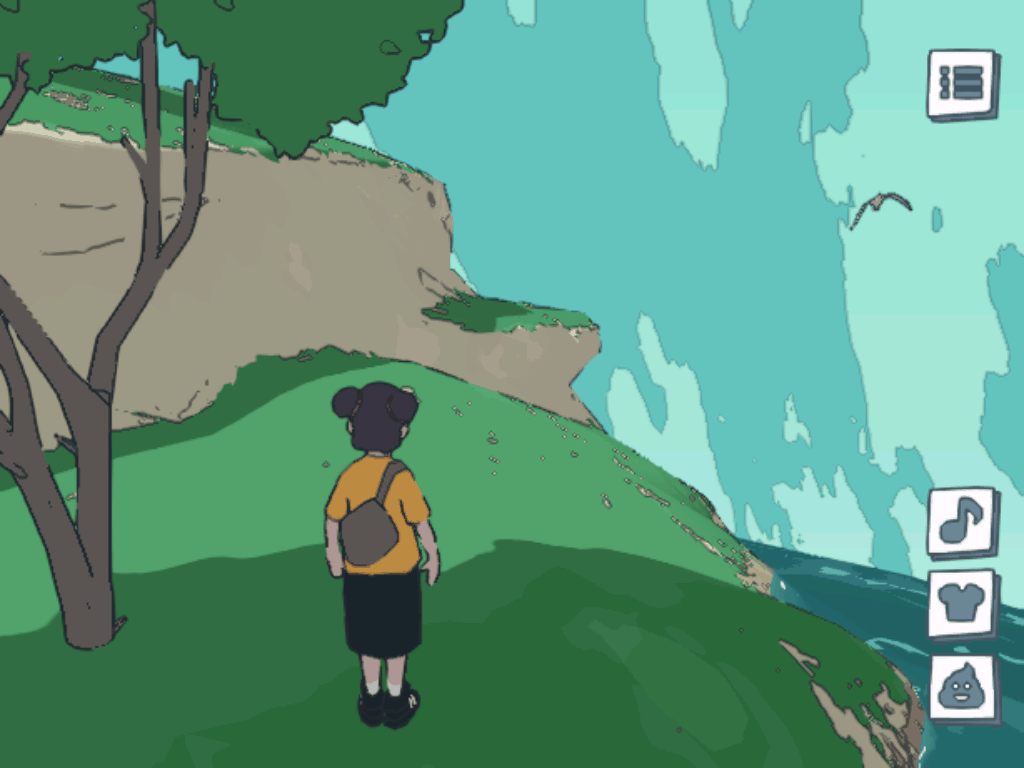
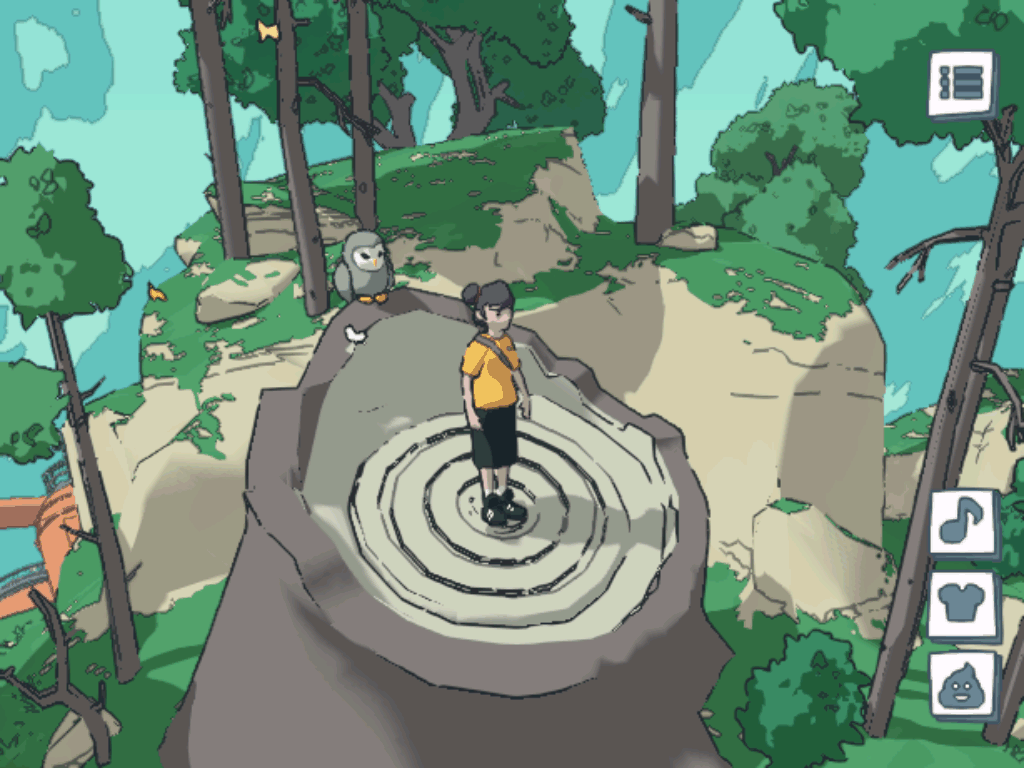
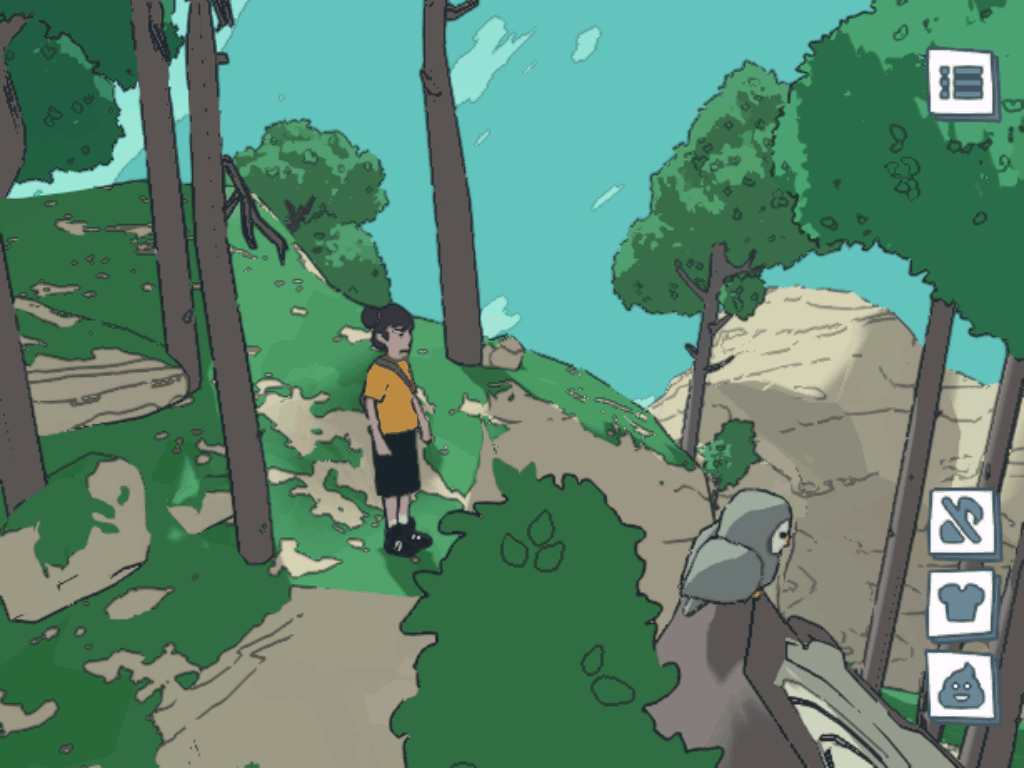
Stump in the forest (4). It's actually a bit hard to jump there. On the other note if you look
closely you may notice that even the owl animated in the game.
You can also climb the hill behind the owl but it's a bit tricky (5).
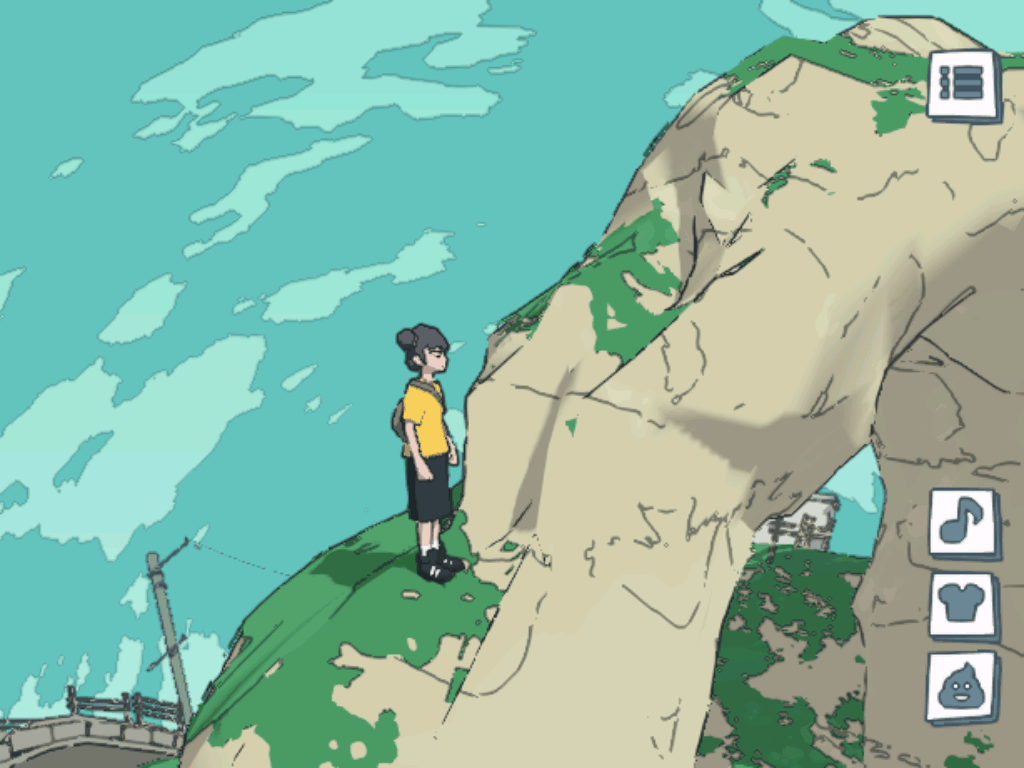
Stone arch over the river near the forest (6). You can't climb it from the ground - only carefully descend from
its top.
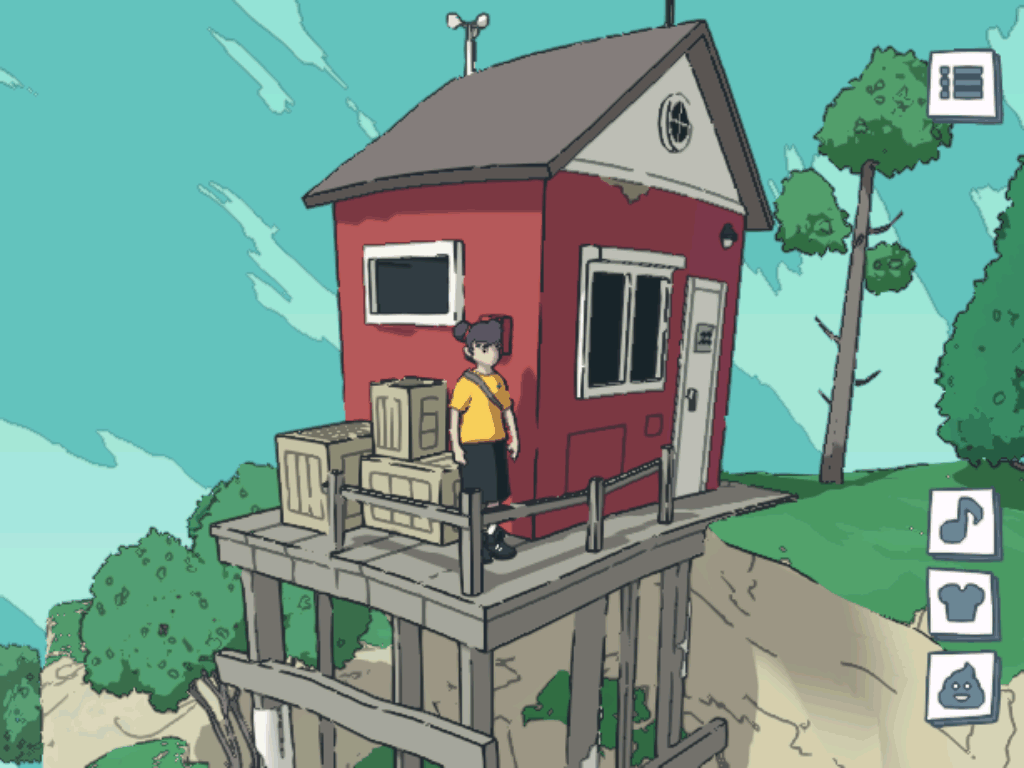
Red house (7). You can even climb the barrel on it's back (8).
This place is near the first wall and hut - climb up the staircase, jump on the handrails and
use [C3] on the air-conditioner block (9). It's unknown too if you can reach this house roof top (10).
You can limb the wall near graveyard from outside - position yourself near the right side of the
fence between two green moss spots (11). Now perform [JM] until you reach the other side (12).
[P] Sea (over invisible wall)
There is a huge, high, invisible wall encircling the sea on all sides. It's unclear why the
developers decided to add it. You can climb it using [C3], but it will be incredibly slow and takes
whooping 10 minutes (9min:46sec) from the sea level at the beach. There are two ways to reduce this
time to climb: start from higher ground (which shortens the distance) and use the part of the wall
that forms an acute angle (which increases your speed). After trying out various combinations and
locations, the time required for climbing the wall was reduced to 5 minutes (4min:50sec). If anyone
finds a faster and more convenient route, please let me know.
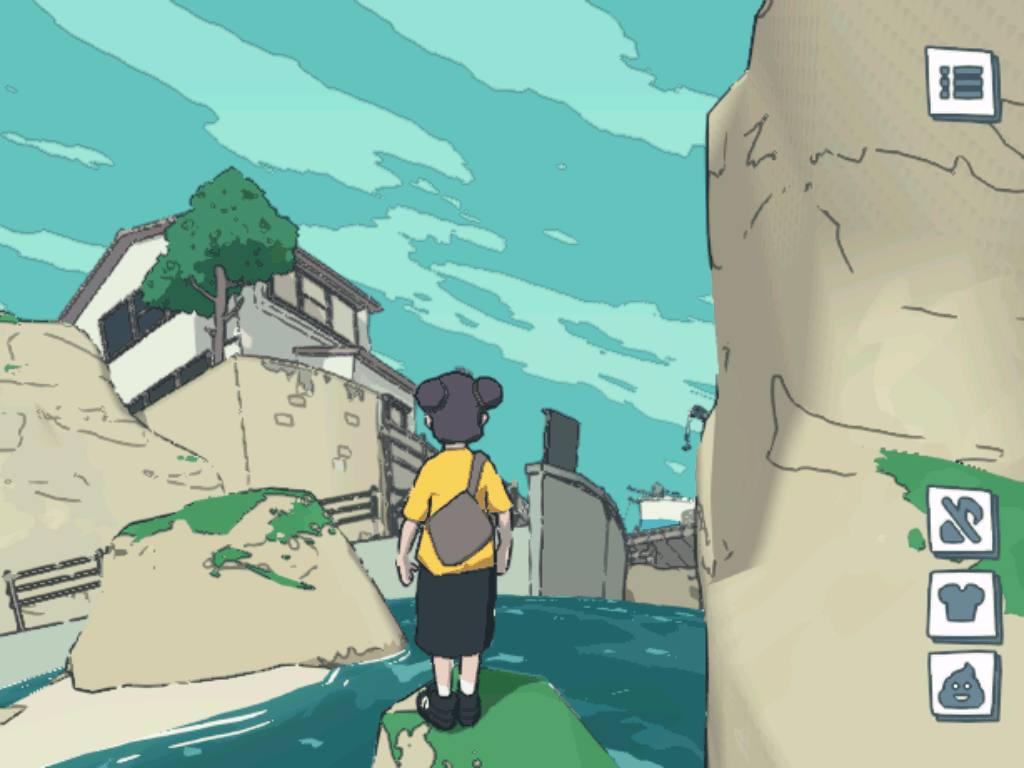
First of all, to get inside, find the entrance to the temple (1).
Then go through the small passage at the right and walk to the corner of the fence (2).
Now jump onto the fence, set yourself against the corner, and keep moving forward (3).
For the next 5 minutes, just keep pressing forward and wait until your character climbs over the wall.
When the camera comes closer or the character starts to move around, don't panic and just keep
holding down the forward key - you're almost there. After you climb over the wall, you'll fall
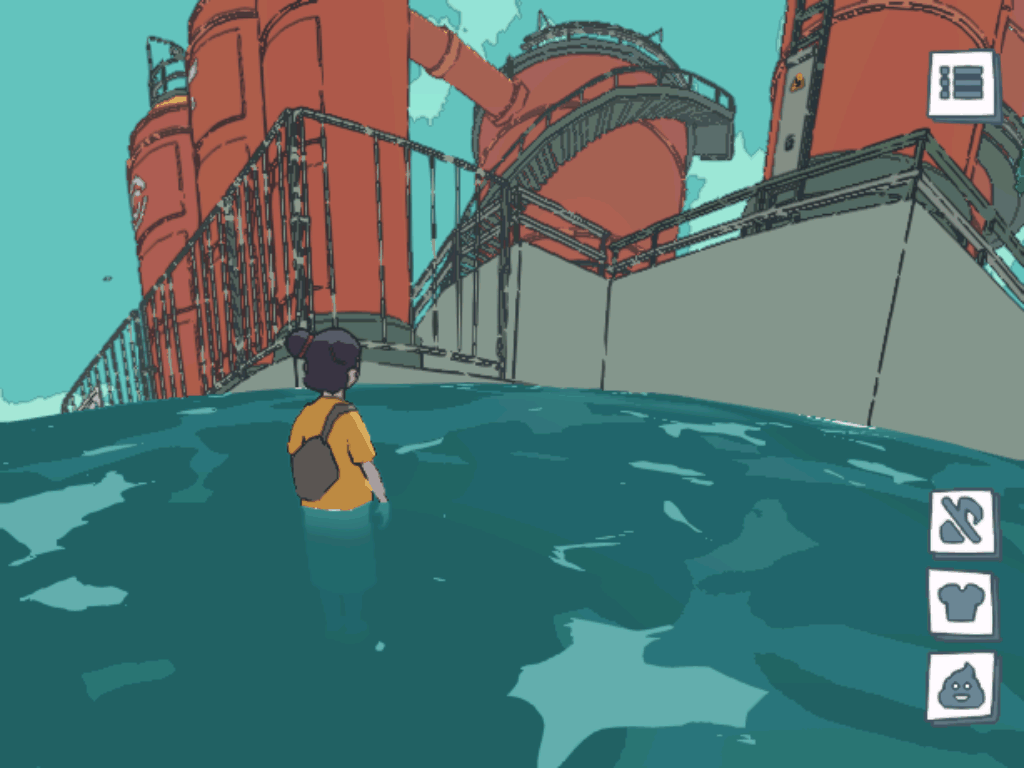
into a small cove below (4). Congratulations - the whole sea is now open for you to explore (5).
You can also climb some pillars with [C3] there (6). By the way, it wasn't until I dove completely
into the sea that I noticed the character's clothes get wet and gradually dry out when I get out of
the water.
It will take a little longer to get back without restarting the game because there are almost no
high spots along the wall that you can climb. Find the corner by the factory entrance (7). Lean
against the left wall of the corner and climb up to the level above the handrails (8). After that,
carefully - so you don't fall - turn right and keep going up until you reach the end (9).
It's a bit difficult to set up, but it's worth it since it's the fastest way to return back.